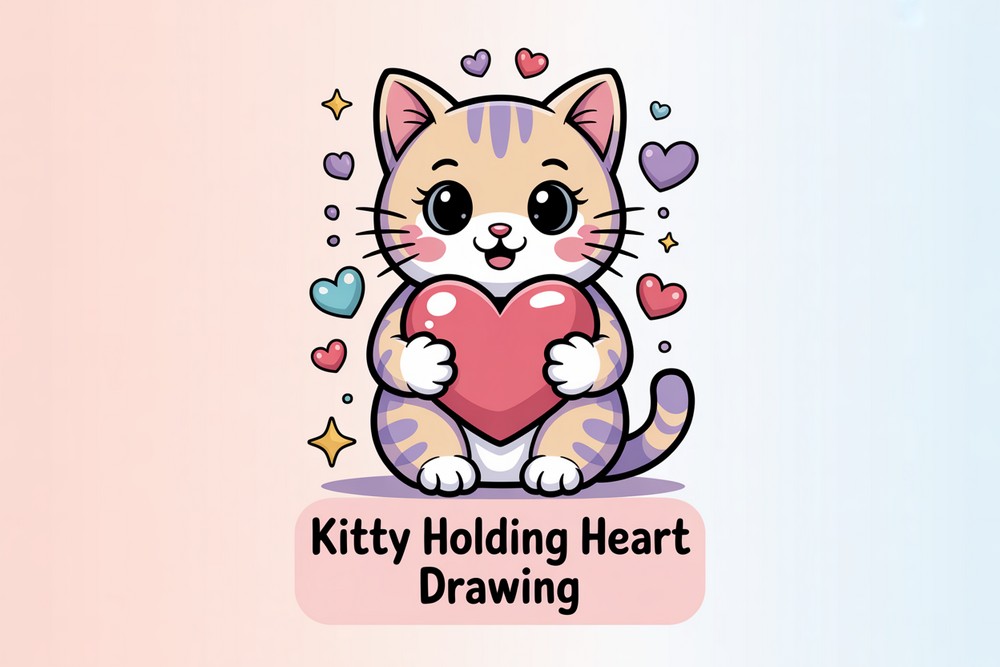
Kitty Holding Heart Drawing
Want a cute drawing you can finish in one sitting? This kitty holding a heart is perfect for all ages. It uses easy shapes, smooth outlines, and simple coloring, so beginners feel confident while experienced artists can add flair. We’ll start with a big heart, tuck in tiny paws, then build the head, bow, whiskers, and feet. You’ll practice symmetry, line control, and small decorative details. When the outline looks right, we’ll add friendly spots of color and leave bright stars as highlights. Work lightly with pencil first, trace with a fineliner, and color last for clean results. Grab your paper and follow each step. By the end, you’ll have a cheerful kitty and a neat heart design you can gift, post, or save in your sketchbook. Let’s start now.
Supplies for This Drawing
- HB and 2B pencils
- Fineliner/black marker (0.5–1.0 mm)
- White eraser and kneaded eraser
- A4 (8.3×11.7 in) smooth paper, ~160 gsm
- Ruler (for centering)
- Sharpener
- Alcohol markers or colored pencils: red/pink, yellow, gray
- Optional white gel pen
Prepare the Materials
- Clear your workspace and set good lighting.
- Tape paper edges if you like clean borders.
- Sharpen pencils; test the fineliner on scrap.
- Place this reference nearby.
- Warm up with a few curved lines.
- Lightly mark the page center.
Special Features of This Drawing
- Cute chibi proportions with a large head.
- Big heart doubles as body and focal shape.
- Simple bow adds personality and balance.
- Repeating stars create playful texture.
- Clean, bold outline for a sticker feel.
- Limited colors for quick, strong impact.
Tutor’s Suggestions
- Keep the first sketch barely visible to avoid dents.
- Mirror-check symmetry by briefly flipping the page against light.
- Ink slowly, lifting your hand to turn the paper through curves.
- Build color with overlapping passes rather than pressing hard.
- Leave stars white for contrast; resist over-coloring.
- Rest your hand to prevent smudges.
- Compare eye spacing with the nose as a landmark.
Uses
- Classroom practice or art club mini-project
- Greeting card for birthdays or Valentine’s Day
- Cute wall print for a kid’s room
- Social post or sticker design
- Gift tag or small postcard
- Portfolio warm-up page
Level of Difficulty
Beginner-friendly — simple shapes, forgiving curves, and minimal colors.
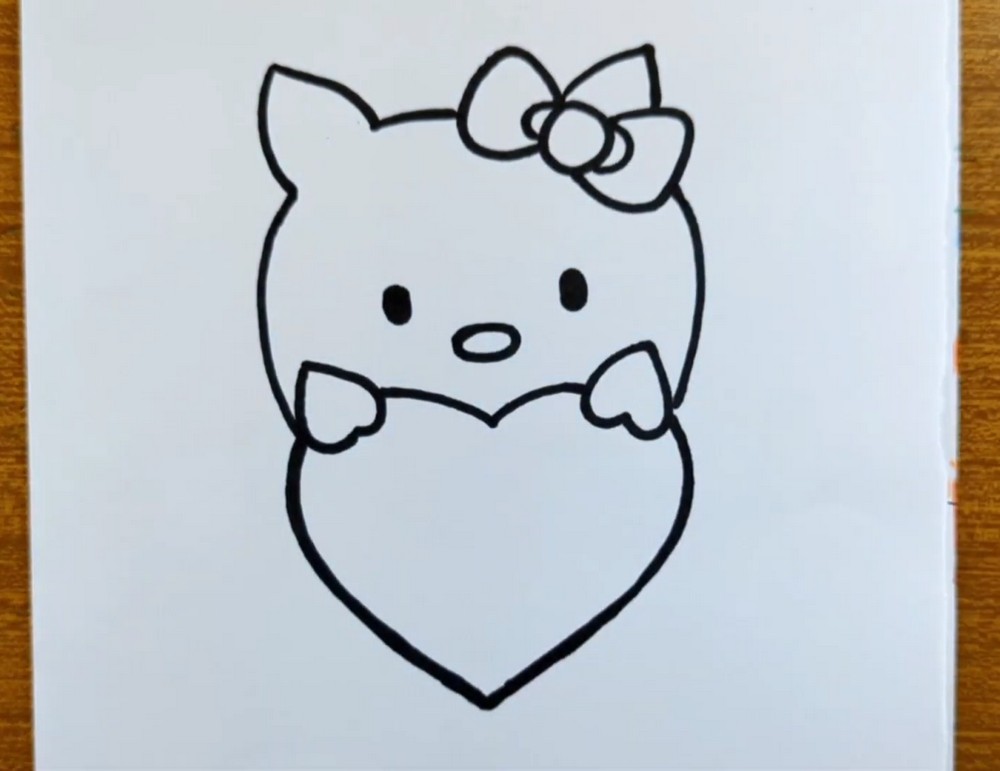
Heart and Paws Base
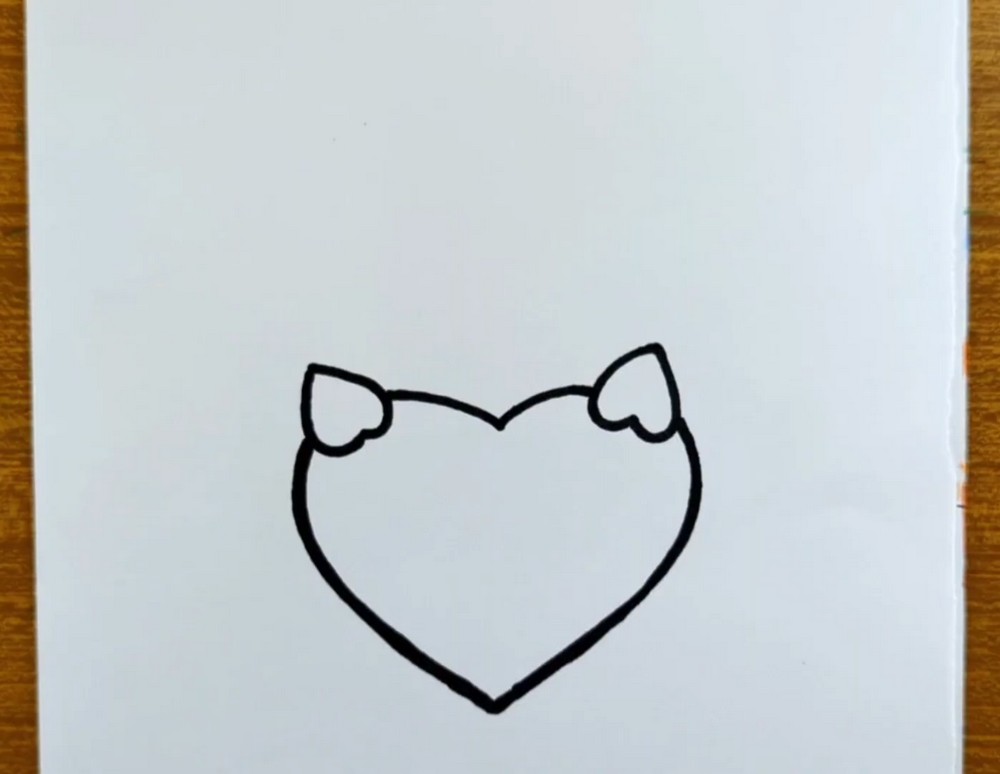
Sketch a large heart centered low on the page. Keep the bottom point a little rounded so it feels plush. At the top curve, draw two small paw shapes that rest over the heart’s edge—each looks like a rounded triangle with a tiny bump. Leave space above the heart for the kitty’s head and bow. Use light pencil lines first, staying relaxed.
Head, Ears, and Bow
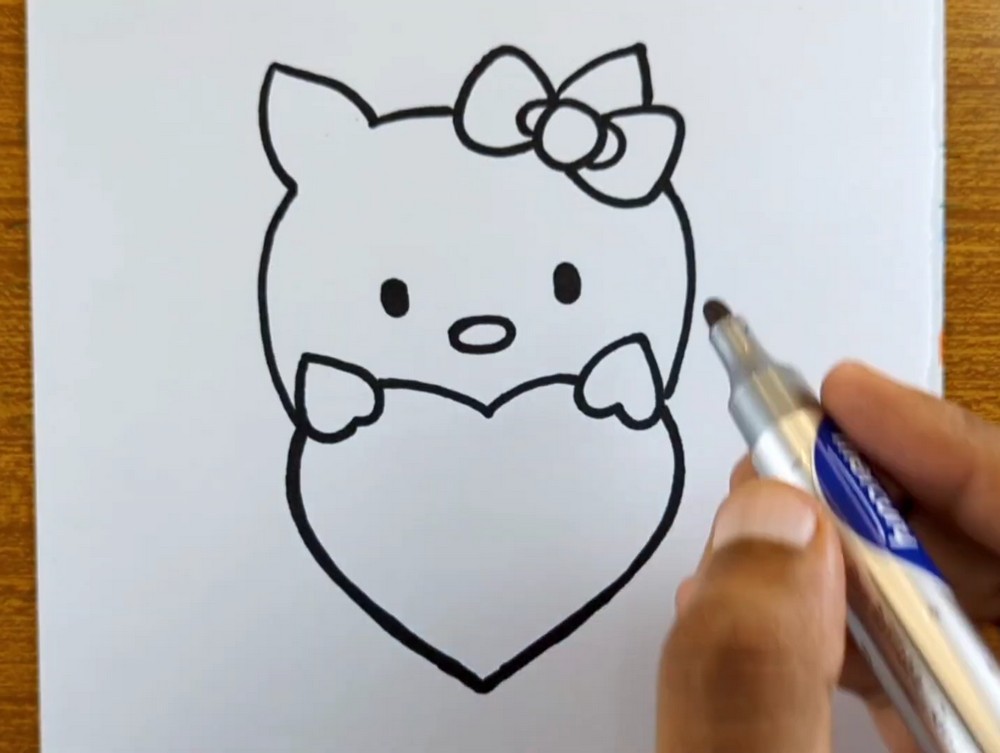
Build the head around the heart’s top by drawing a wide, rounded outline. Add two simple ears: soft triangles that curve slightly outward. Sketch a big bow on the upper right: three petals and a circular knot. Place two oval eyes and a small horizontal oval nose, spaced evenly. Keep everything symmetrical and slightly bigger than the heart so it feels cuddly.
Clean Outline and Features
Refine the outline so the head connects cleanly to the heart without overlaps. Define each paw more clearly by tracing the outer curve and adding a short inner crease. Adjust the bow’s loops until they look balanced and round. Darken the eyes and nose shapes slightly so placement feels right. Double-check proportions before inking; small tweaks here keep everything cute and even.
Whiskers, Feet, and Star Décor
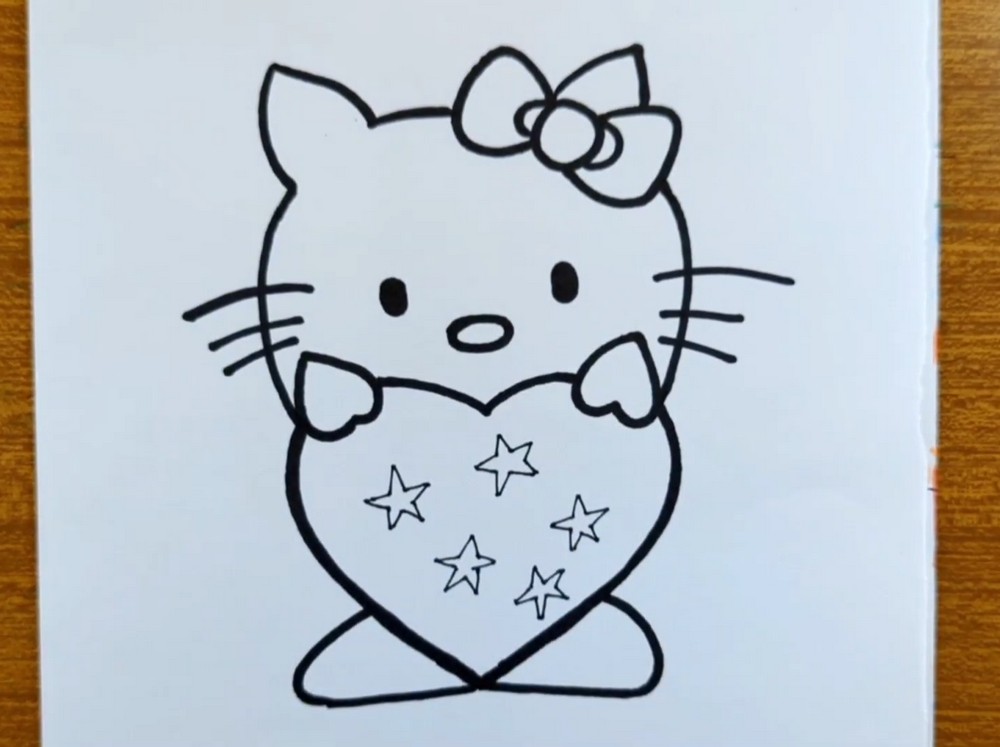
Add three whiskers on each cheek using smooth, slightly curved lines that angle outward. Sketch two rounded feet peeking beneath the heart, keeping their bottoms flat so the character “stands.” Inside the heart, draw scattered star shapes for decoration—vary sizes for interest. Clean any overlaps and smooth corners. You’re ready to ink the drawing with steady strokes along your best pencil lines.
Color the Bow, Nose, and Heart
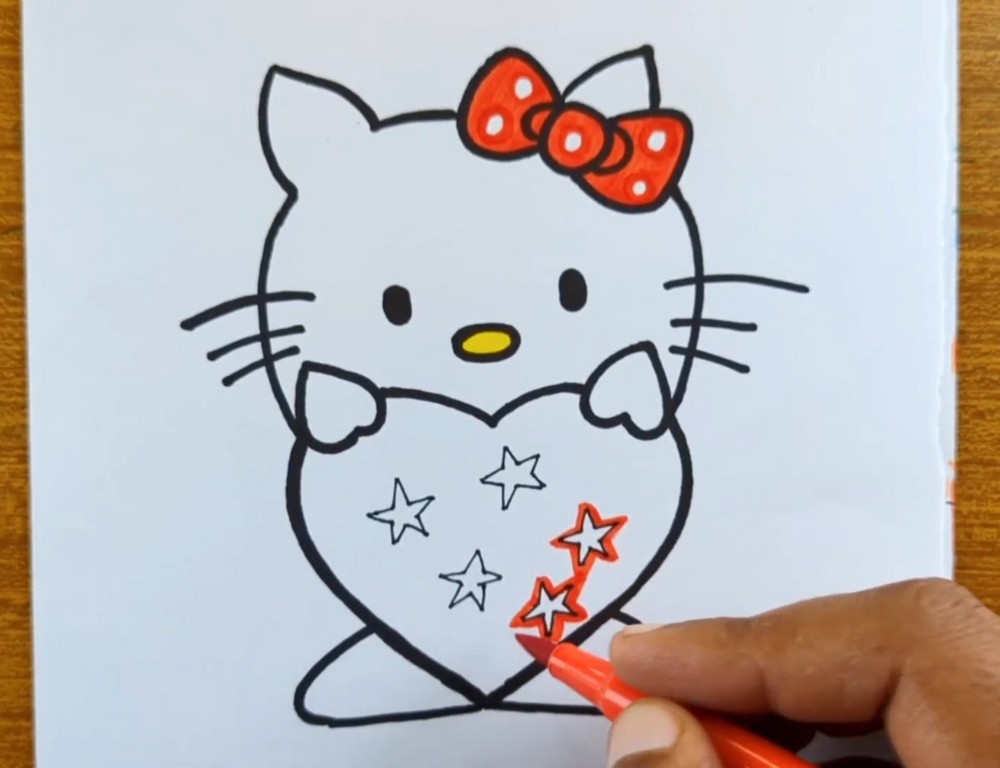
Once the ink is dry, erase all pencil. Color the bow a bright red or pink and add simple dots for shine. Fill the nose with warm yellow. Outline the stars on the heart with your color, then leave their centers white. Begin shading the heart evenly, using overlapping strokes so coverage looks smooth without streaks. Work from edges toward the center.
Final Touches and Finish
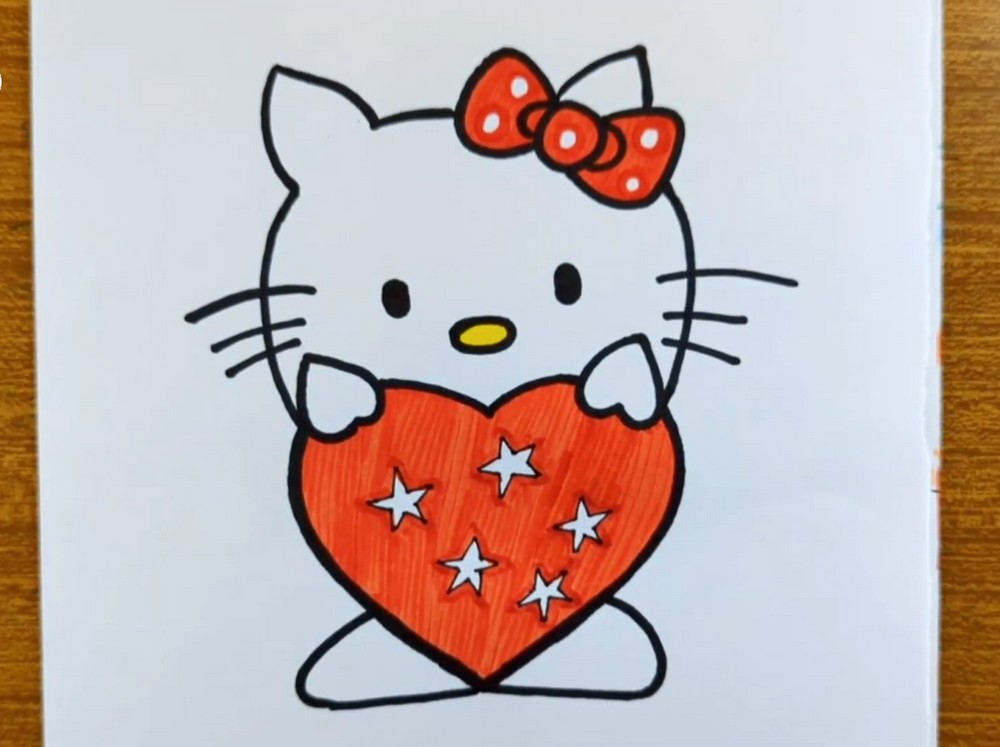
Finish by deepening the outer outline slightly for a sticker-like look. Add tiny white dots on the bow and heart for sparkle, or use a gel pen to brighten edges. Check whiskers for clean, consistent length. If you like, soften the feet with a light gray shadow. Your kitty holding a heart is complete and ready to gift! Sign your finished drawing.
Conclusion
This cute project is quick, tidy, and satisfying. It builds confidence with clean lines, matching shapes, and simple color choices. Once you’ve drawn one, try swapping bow positions, changing patterns inside the heart, or experimenting with pastel markers and colored pencils. Keep your strokes calm and your edges smooth. Share it with someone who needs a little extra brightness today.
A Bonus Tip
Thicken only the outside contour (not interior lines) to instantly make the kitty pop.
FAQs
Q: How long will this take?
A: Most people finish in 25–45 minutes, including inking and color.
Q: What paper size works best?
A: A4 or Letter is ideal; the heart fits comfortably with space for the head and bow.
Q: My heart looks uneven. Help?
A: Lightly fold the paper to mark the center, then mirror each side from that point.
Q: Should I shade before or after inking?
A: Ink first, let it dry, erase pencil, then color. This keeps edges crisp.
Q: Can I use markers and pencils together?
A: Yes. Lay marker color first, let it dry, then add gentle colored-pencil shading on top.