Circle Scenery Drawing – Gift Piece
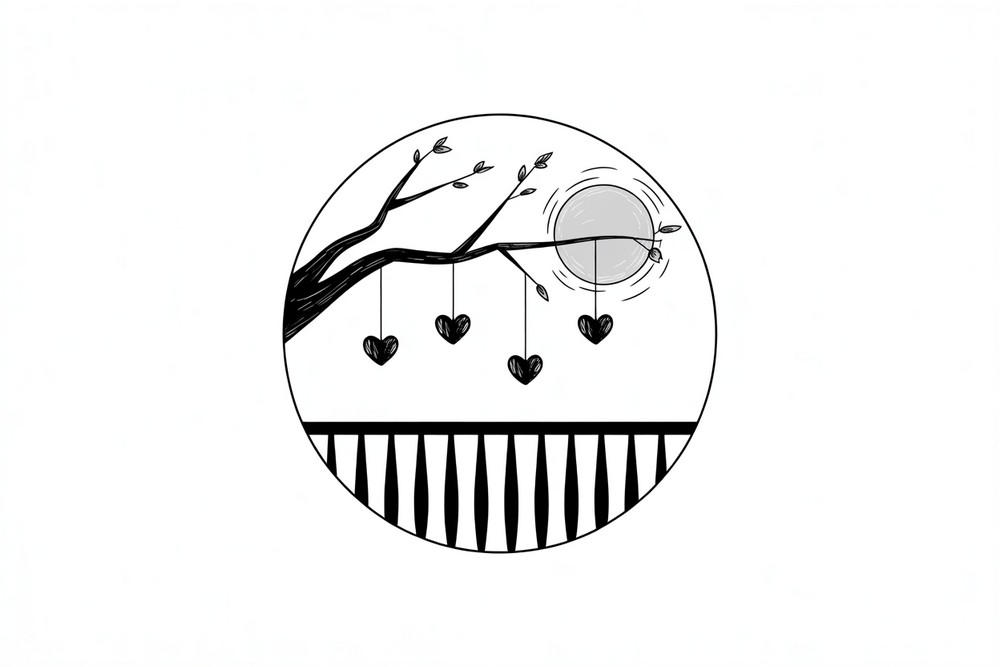
In this project you’ll draw a peaceful, round composition that fits neatly inside a circle. We’ll build a balcony railing along the lower half, then grow a sweeping tree branch across the sky. Dangling hearts add charm, while a soft, shaded moon keeps everything calm. Most of the work is clean silhouettes and steady lines, so beginners feel at ease. You’ll sketch lightly, ink decisively, and blend graphite to create glow and depth. Grab your tools, clear your space, and enjoy the slow, simple rhythm of drawing. We’ll mark guides with a ruler, fill dark bars for contrast. No complex perspective is required—just patient strokes. Personalize the hanging hearts or add twigs. By the end you’ll have a crisp black-and-white scene that frames on a card or in a sketchbook.
Supplies for This Drawing
- A4 (8.3×11.7 in) smooth drawing paper, 160–200 gsm
- HB pencil for layout, 2B and 4B pencils for shading
- Black fineliner (0.5–0.8) or small brush pen
- Compass and 30 cm (12 in) ruler
- Kneaded eraser and vinyl eraser
- Blending stump or cotton swabs
- Sharpener and scrap paper for testing
Prepare the Materials
- Clear your desk and set good lighting.
- Tape paper edges to a board for steadiness.
- Sharpen pencils and test pressure on scrap.
- Set compass width; check circle placement.
- Keep tissues nearby to protect from smudges.
- Place reference images within easy view.
Special Features of This Drawing
- Strong circular frame focuses the composition.
- Bold balcony silhouettes give instant contrast.
- Expressive branching with tapered, organic lines.
- Hanging hearts add narrative and rhythm.
- Soft graphite halo sets a gentle mood.
- Minimal shapes read well at small sizes.
Tutor’s Suggestions
- Start ultra-light; save darks for the end.
- Pull marker strokes along a ruler for crisp bars.
- Taper twigs by lifting pressure as you exit.
- Vary heart sizes slightly for charm.
- Blend in small circles, not long wipes.
- Keep fingerprints off shaded areas using scrap.
- Step back often to judge balance.
- Erase in dabs, not scrubs.
Uses
- Classroom warm-up on value and shape.
- Sketchbook vignette or greeting card cover.
- Minimalist wall print in a round frame.
- Practice for inking control and clean edges.
- Social post celebrating calm, romantic vibes.
- Quick gift artwork made in one sitting.
Level of Difficulty
Beginner-friendly — simple shapes, clear silhouettes, and forgiving graphite blends.
Circle and Guides
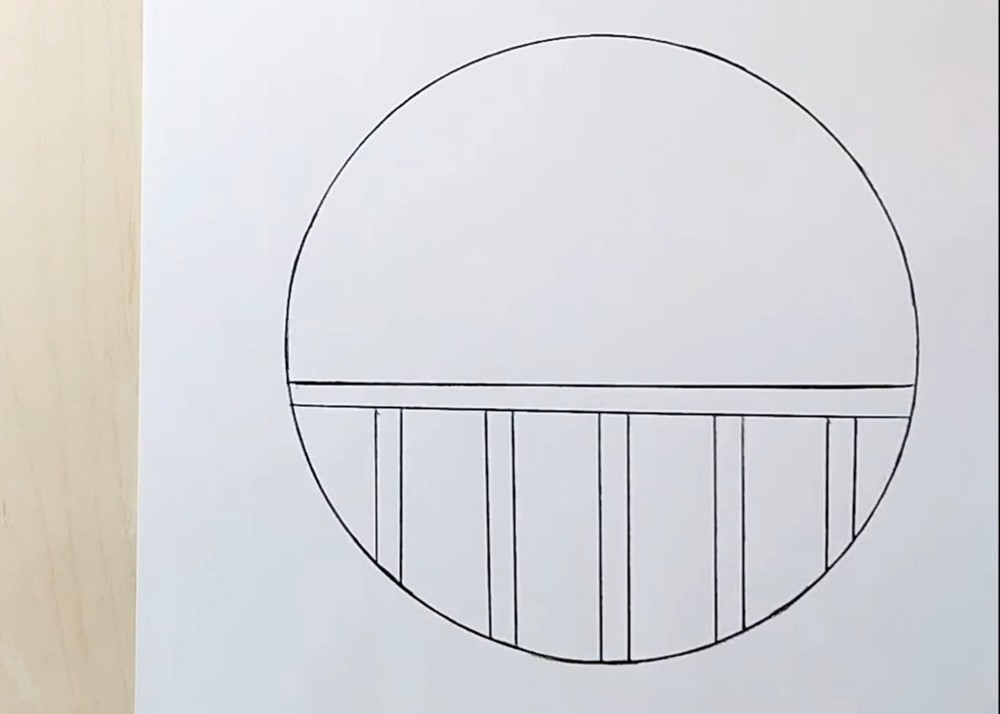
Use a compass to draw a clean circle. Lightly place a horizontal guide a little below the midpoint for the balcony rail. Add a narrow band under it for the trim. Drop several vertical guide lines from that band to the bottom curve for posts. Keep everything inside the circle, letting lines meet the border cleanly. Erase marks and keep strokes light.
Ink the Balcony
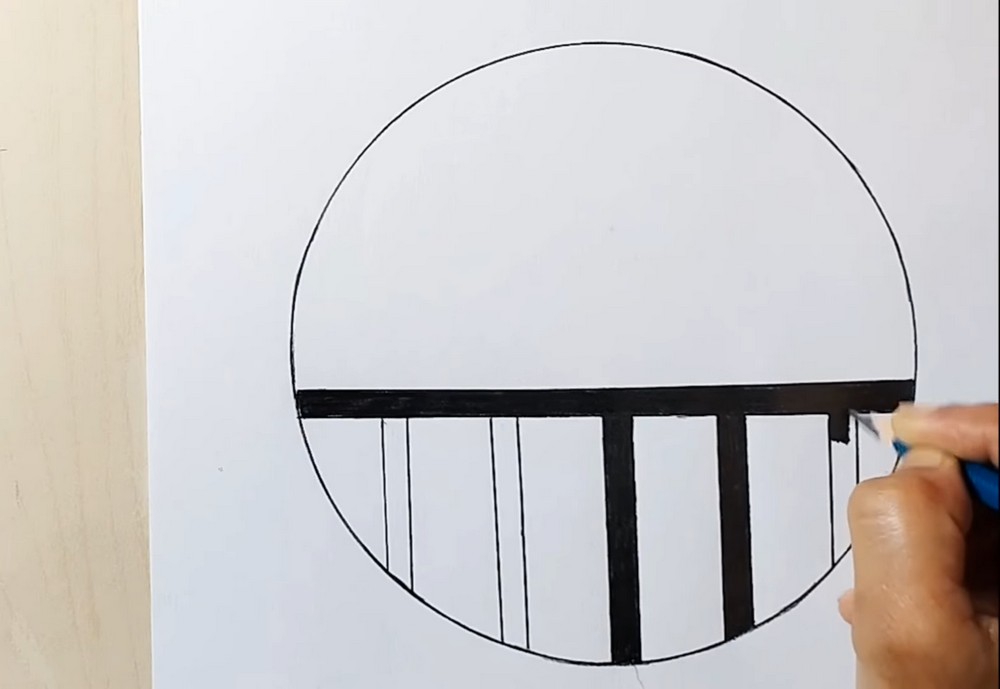
Ink the circle outline. With a fineliner or marker, fill the horizontal rail between the borders so it becomes a dark, solid bar. Thicken every other vertical post and color them in, leaving slim gaps to suggest spacing. Keep edges crisp by dragging the ruler as a straightedge. Let the contrast establish the balcony structure before adding any tree shapes. Avoid smudging.
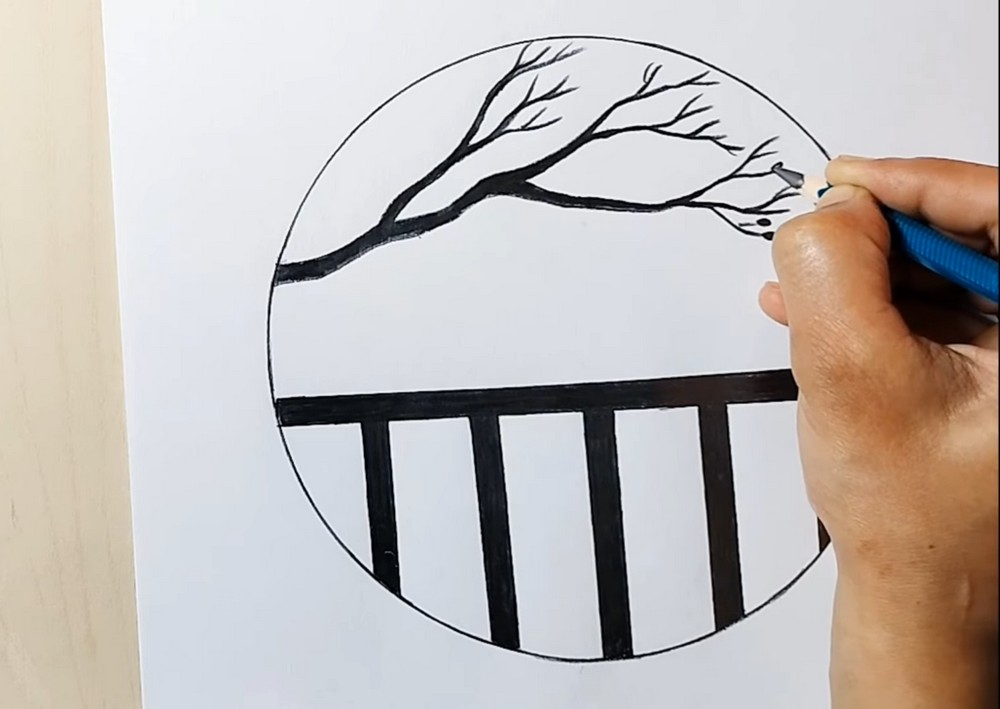
Sketch the Branch Flow
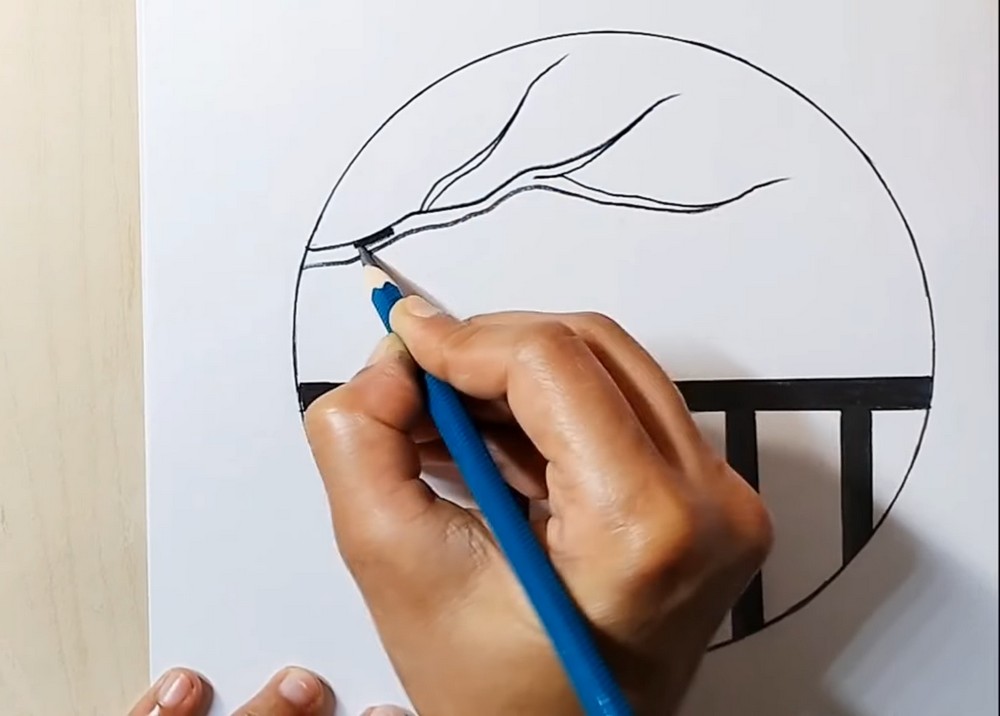
Lightly sketch the main tree branch beginning at the left border, arcing across the upper half. Draw two or three flowing limbs that split as they travel right. Keep lines thin and alive, tapering slightly toward their tips. Let one limb pass above the balcony rail. Check the overall curve so the composition feels balanced within the circle’s open sky. Adjust spacing.
Thicken and Shade Branch
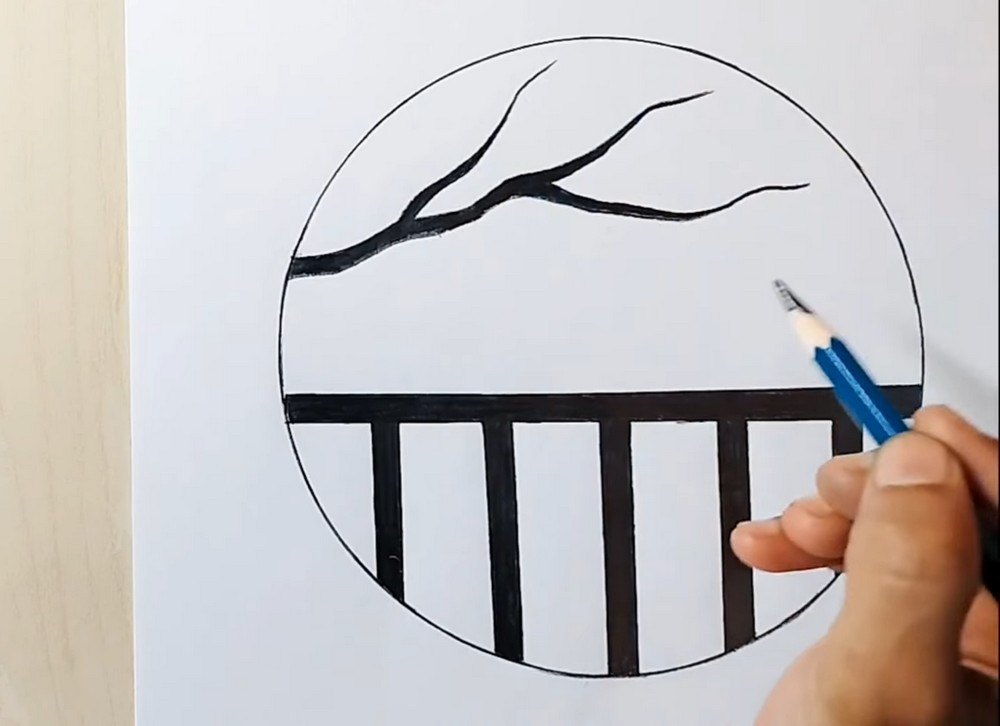
Ink the trunk portion of the branch, making its base thicker where it enters the circle and gradually slimmer across. Fill the underside slightly darker to suggest weight. Keep the top edge cleaner and a touch thinner for a lit rim. Erase any remaining pencil that crosses the rail. The bold branch should read clearly against the empty background. Keep strokes deliberate.
Add Twigs and Buds
From the main limbs, add smaller twigs that fork outward. Use quick, tapered lines, growing shorter as they near the right side. Place simple teardrop buds at tips to echo spring growth. Vary lengths and angles so everything feels natural, not mechanical. Step back and check rhythm across the arc; you want lively movement without cluttering the open sky. Keep it airy.
Hang the Hearts
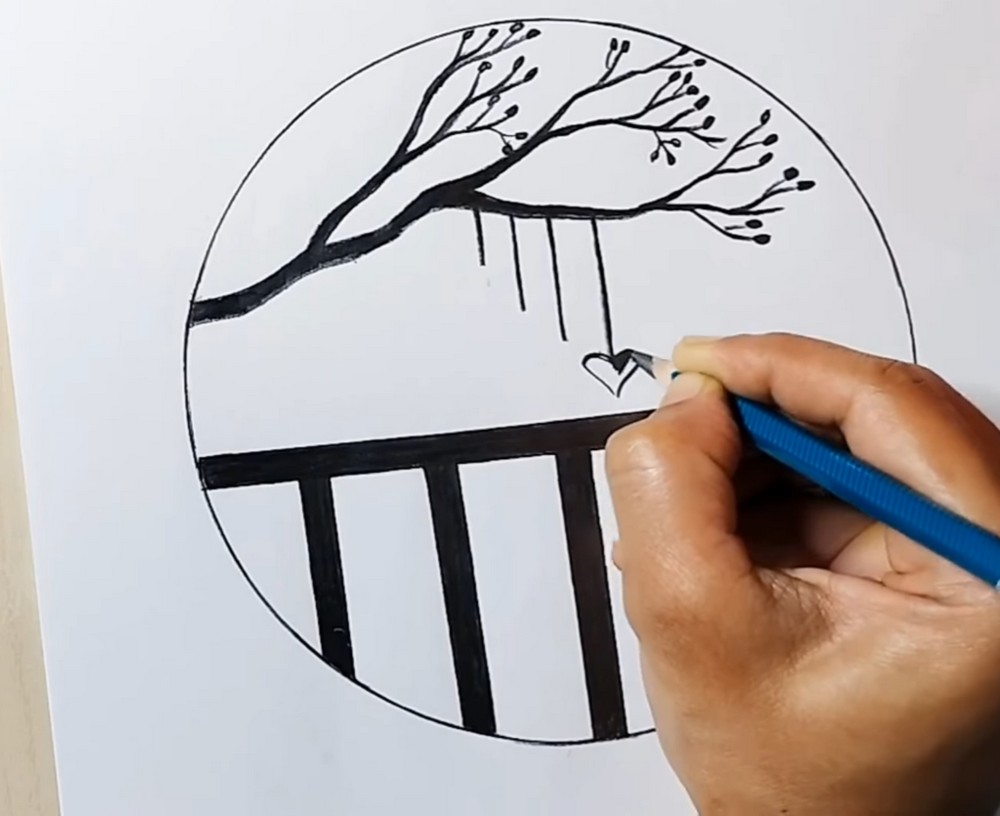
Under the branch, draw three or four thin hanging strings, spaced unevenly. At each end, sketch a small heart shape, slightly tilted for charm. Ink the strings and fill the hearts dark, leaving tiny white notches for highlights. Vary lengths so they step downward across the scene. Ensure the lowest heart floats above the rail, keeping the design readable. Avoid tangles carefully.
Place Moon and Halo
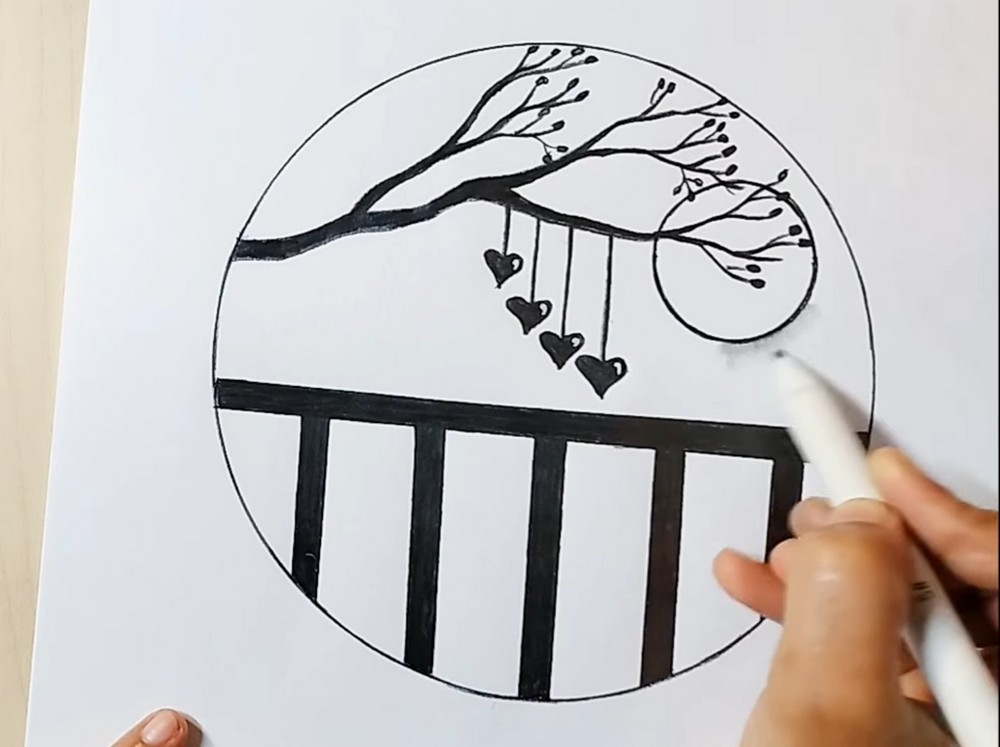
On the right side, place a small moon by tracing a light circle behind the branch tips. Let a twig overlap its edge for depth. With a blending stump, soften graphite around the moon to create a halo. Gently shade under the branch where it meets the sky, keeping gradients smooth. Re-ink any lost edges so silhouettes stay crisp against the glow.
Shade, Clean, Finish
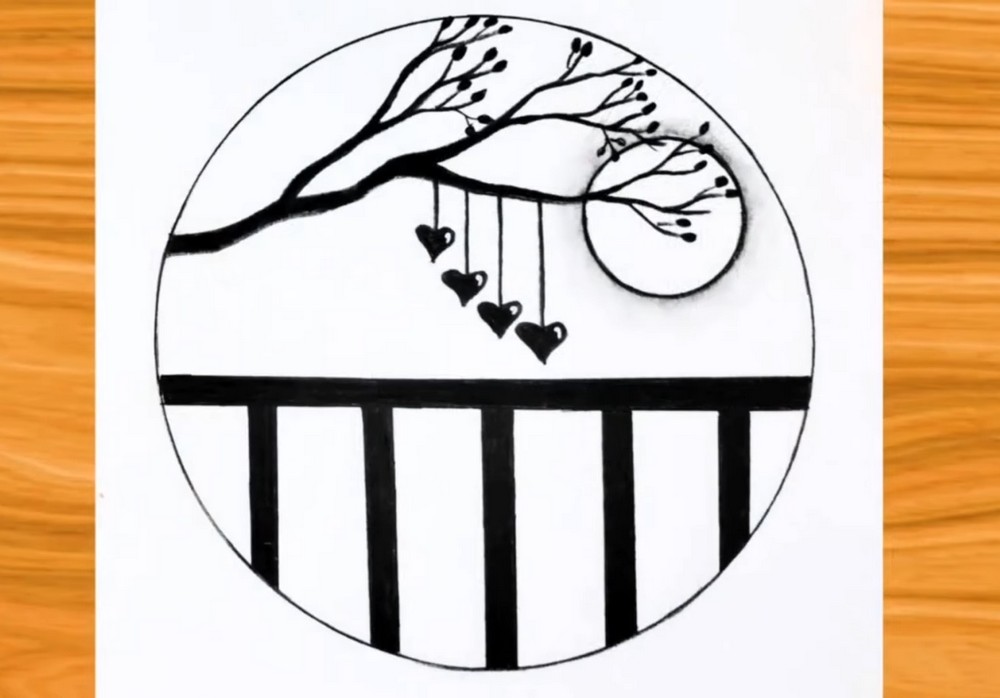
Deepen the rail’s shadow edge with a soft pass of graphite, then smudge lightly below the bar and near the circle border. Soften just enough to suggest atmosphere, not grime. Clean smudges with a kneaded eraser, and tighten any wobbly lines. Sign discreetly inside the circle. Your minimalist balcony, branch, hearts, and moon now form a balanced, tranquil scene. Nicely done.
Conclusion
Small circular scenes are great confidence builders. They encourage strong shapes, tidy edges, and mindful shading without overwhelming detail. Keep experimenting with branch directions, the number of hearts, or the moon’s position to shift the mood. When the ink is bold and the smudges are soft, the composition sings. Mount it in a round mat and enjoy the calm. Always.
A Bonus Tip
Place a sheet of clean scrap under your drawing hand; it prevents smudges and keeps edges razor-sharp.
FAQs
Q: How long will this take?
A: Most beginners finish in 25–40 minutes, depending on inking speed and shading care.
Q: What paper size is best?
A: A4 or Letter works well. Heavier stock (160–200 gsm) blends cleaner and resists buckling.
Q: My posts look wobbly. How do I fix them?
A: Use a ruler as a fence and pull the pen toward you in one confident pass.
Q: Should I shade before or after inking?
A: Ink first so edges stay crisp, then shade lightly, re-inking any lost silhouettes.
Q: Can I use markers instead of pencils for shading?
A: Yes, use cool gray markers, but keep blends subtle and avoid touching the circle outline to prevent bleed.