
Painting a Beautiful Flower with a Cute Little Bird
Paint a dreamy hummingbird sipping from a hibiscus with soft bokeh behind. This acrylic project builds a diagonal teal-to-navy gradient, then glows with warm circles of light, a rosy flower, fresh leaves, and finally a jewel-bright bird. Each step matches your photos, so follow in order. We’ll layer thin glazes, feather edges, and add crisp highlights last. Simple brushes and a small palette keep mixing easy. Beginners can finish comfortably in one session; intermediates can add extra feather textures. Keep strokes light, rotate the canvas for smoother pulls, and pause between passes so colors stay clean. Ready? Tape your panel, mist paints, and let’s fly. Gather water, paper towels, a glazing medium, and reference images handy. Keep a white gel pen optional for sparkle, plus a hair dryer for drying.
Supplies for This Drawing
- A4 (8.3×11.7 in) or 9×12 in primed canvas/panel, 280–380 gsm
- Acrylics: titanium white, lemon yellow, yellow ochre, cadmium orange, quinacridone magenta, phthalo green/blue, ultramarine, burnt umber, Payne’s gray
- Brushes: 1″ flat, filbert, small round, liner, soft mop/bright for glazing
- Glazing medium, water bucket, paper towels, spray bottle
- Palette, palette knife, masking tape
- Optional: white gel pen for micro-sparkles
Prepare the Materials
- Tape canvas edges; set bright, even lighting.
- Arrange paints light-to-dark; premix gradient teal and magenta tints.
- Keep one clean damp brush dedicated to blending only.
- Place reference images within view; protect your table.
- Test bokeh circles and wing flicks on scrap.
- Mist paints occasionally so they don’t skin over.
Special Features of This Drawing
- Luminous diagonal gradient for instant depth.
- Creamy bokeh built with translucent circles.
- Velvety hibiscus edges against cool background.
- Jewel-tone hummingbird with selective rim-light.
- Foreground marigolds for scale and color echo.
- Gentle motion cues in wing feathers.
Tutor’s Suggestions
- Blend early, then stop—overworking dulls glow.
- Reserve pure white for final sparkles only.
- Vary petal edges: some crisp, others lost.
- Keep reflections of sky color on the bird’s back.
- Use glazing medium, not water, for smooth tints.
- Rotate the canvas to pull long, steady wing strokes.
- Step back often and squint to judge values.
Uses
- Giftable wall art for spring or summer.
- Card prints, notebooks, or phone wallpaper.
- Classroom color-mixing and glazing demo.
- Relaxing weekend paint-along project.
- Portfolio study of birds, petals, and bokeh.
Level of Difficulty
Intermediate — relies on glazing control, clean edges, and small highlight placement.
Diagonal Glow Base
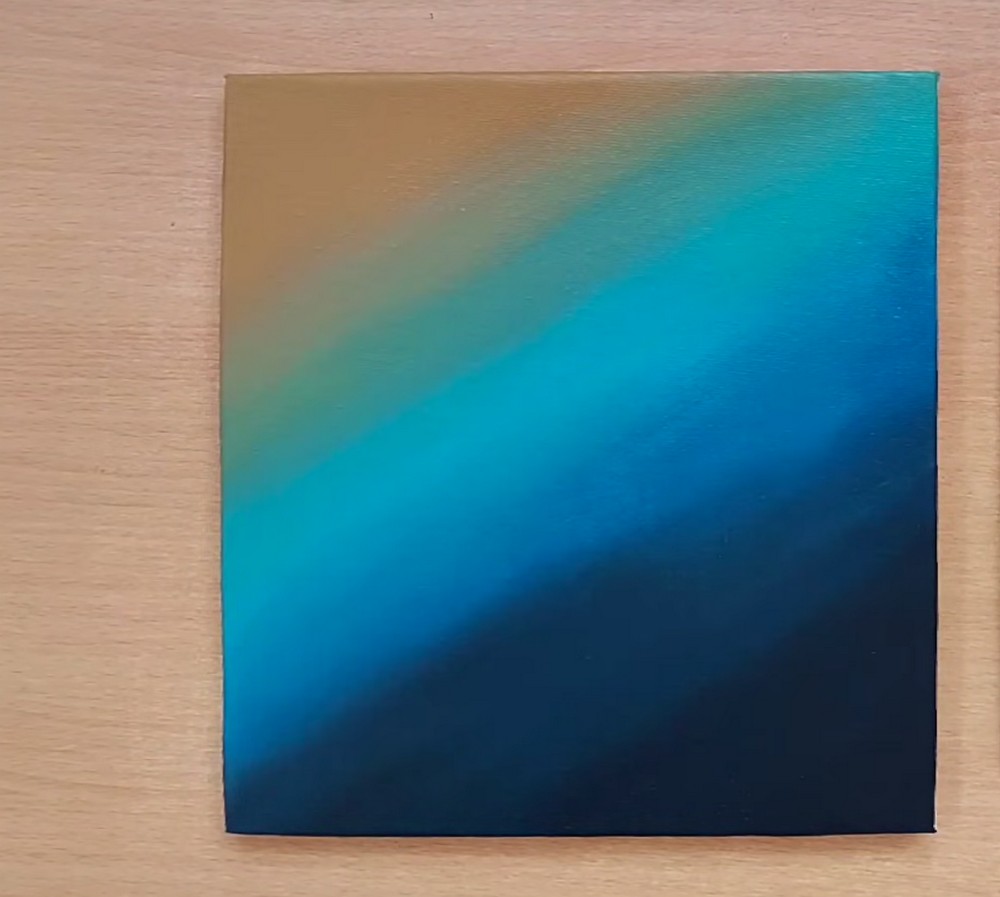
Paint a diagonal gradient across the panel: ochre in the upper left fading through minty teal, aqua, then deep navy at the lower right. Blend quickly with a large flat, wiping often to keep transitions silky. While slightly damp, soften the center band with a clean dry brush. Let this underlayer dry; it sets the underwater glow and dramatic direction for everything.
Soft Bokeh Field
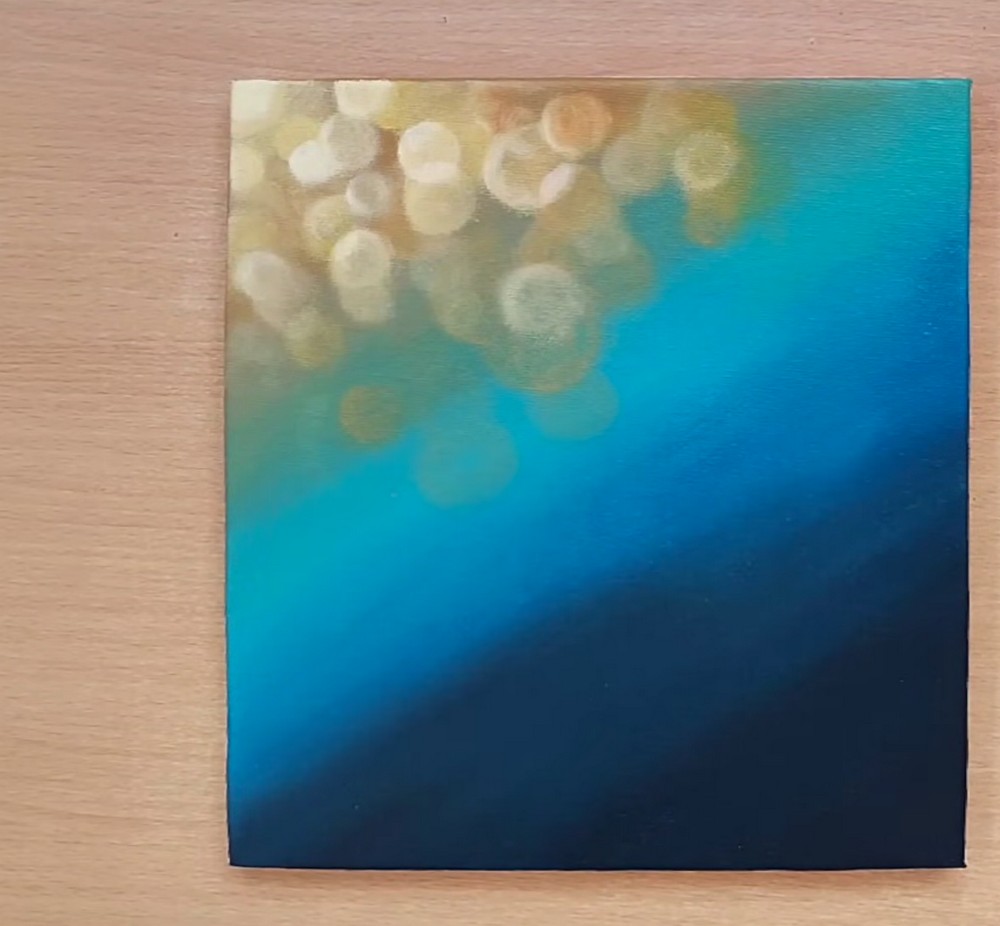
Scumble bokeh circles near the upper left using thin white with touches of ochre. Tap various sizes with a soft round, overlapping some and losing edges into the teal. Keep a few sharper near the corner. Glaze a warm haze beneath to suggest sunlight filtering through leaves. Leave the right untouched; we’ll reserve that darker space to frame the flower and bird.
Block the Hibiscus
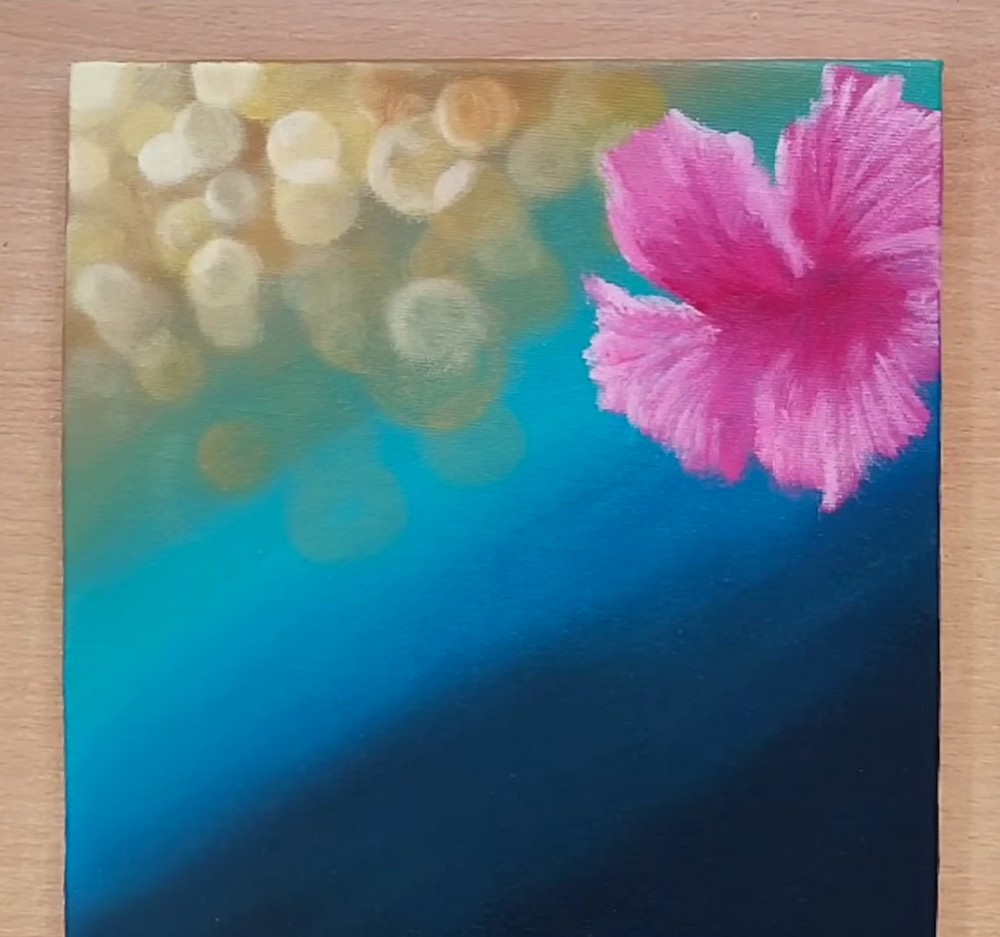
Sketch a large hibiscus on the upper right. Block petals with mixes of magenta and white, brushing from center outward to grow feathery streaks. Keep inner throat dark raspberry. Leave gaps of teal between petal edges and background to keep them crisp. Don’t chase detail; think five ruffles around a deep core. Let soft, uneven edges suggest motion and softness and sparkle.
Details, Stamen, Leaves
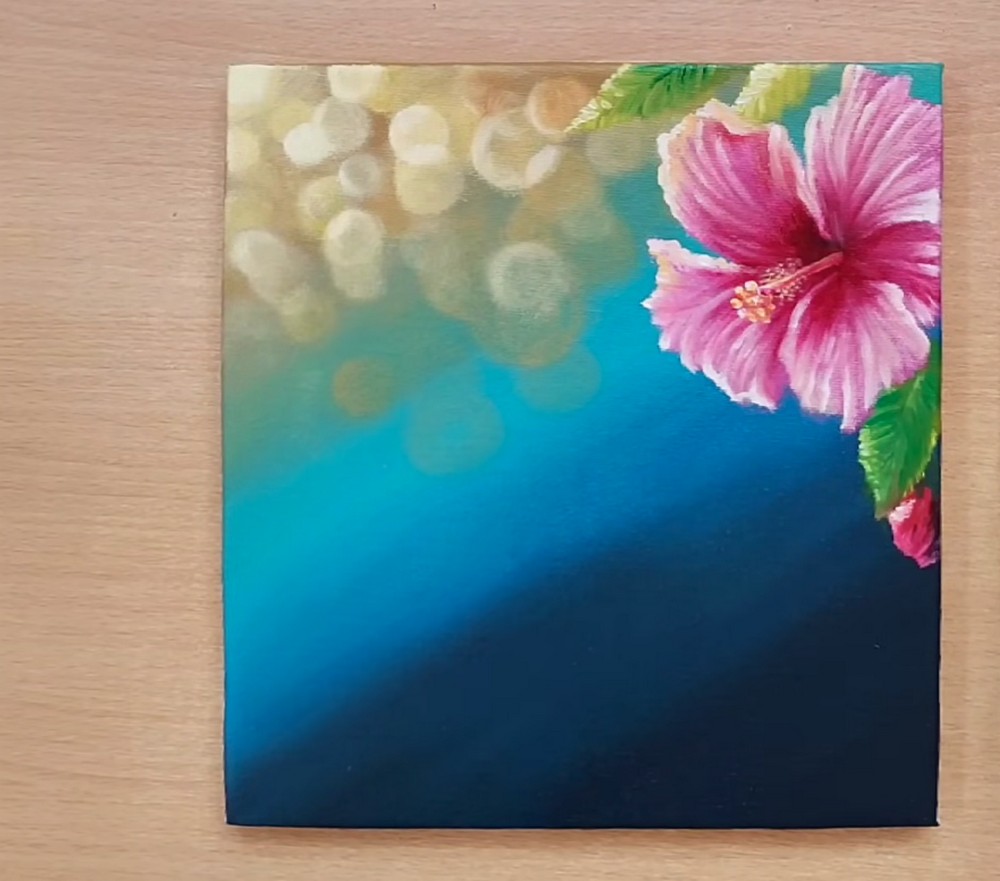
Refine the hibiscus. Add lighter pinks on ridges, cooler whites on tips, and a crimson center shadow. Paint the stamen: a pale pink tube with yellow-orange anthers. Tuck serrated leaves around the flower using yellow-green plus deep green shadows, keeping veins mostly implied. Aim for three leaf angles that frame the bloom and point toward the open space for the coming bird.
Hummingbird Underpaint
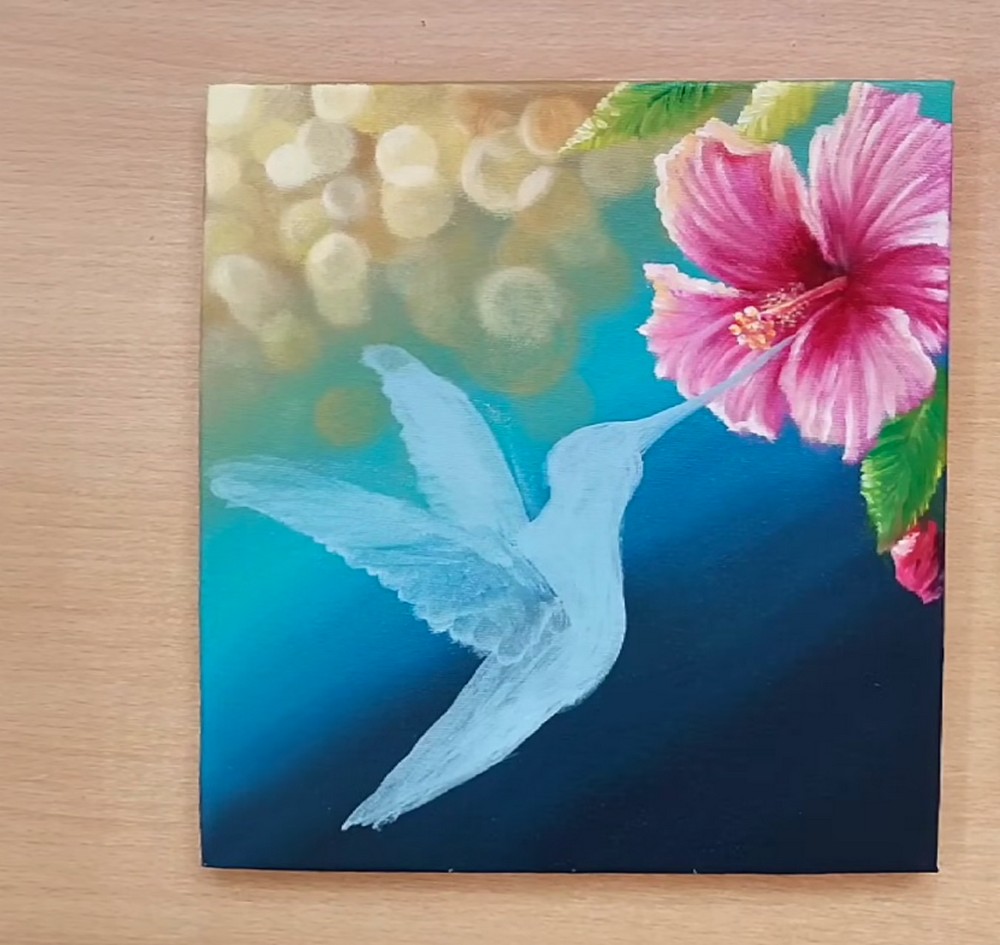
Block the hummingbird in pale blue-grey so future colors glow. Place the body at lower left, beak touching the hibiscus throat. Shape two wings—one raised, one back—using long, tapered strokes. Indicate feather groups with soft scallops, leaving airy translucency at tips. Keep belly rounded and tail split. This light silhouette lets adjustments happen without fighting dark paint edges later during detailing stages.
Foreground Pops & Depth
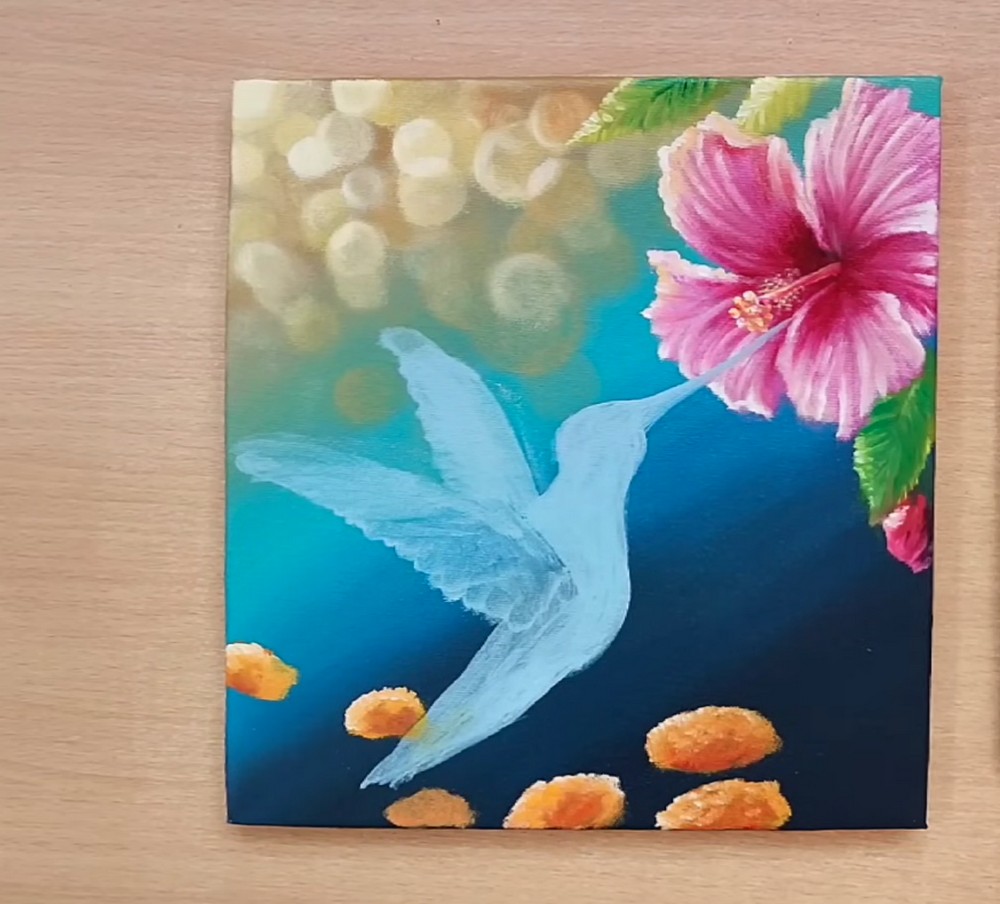
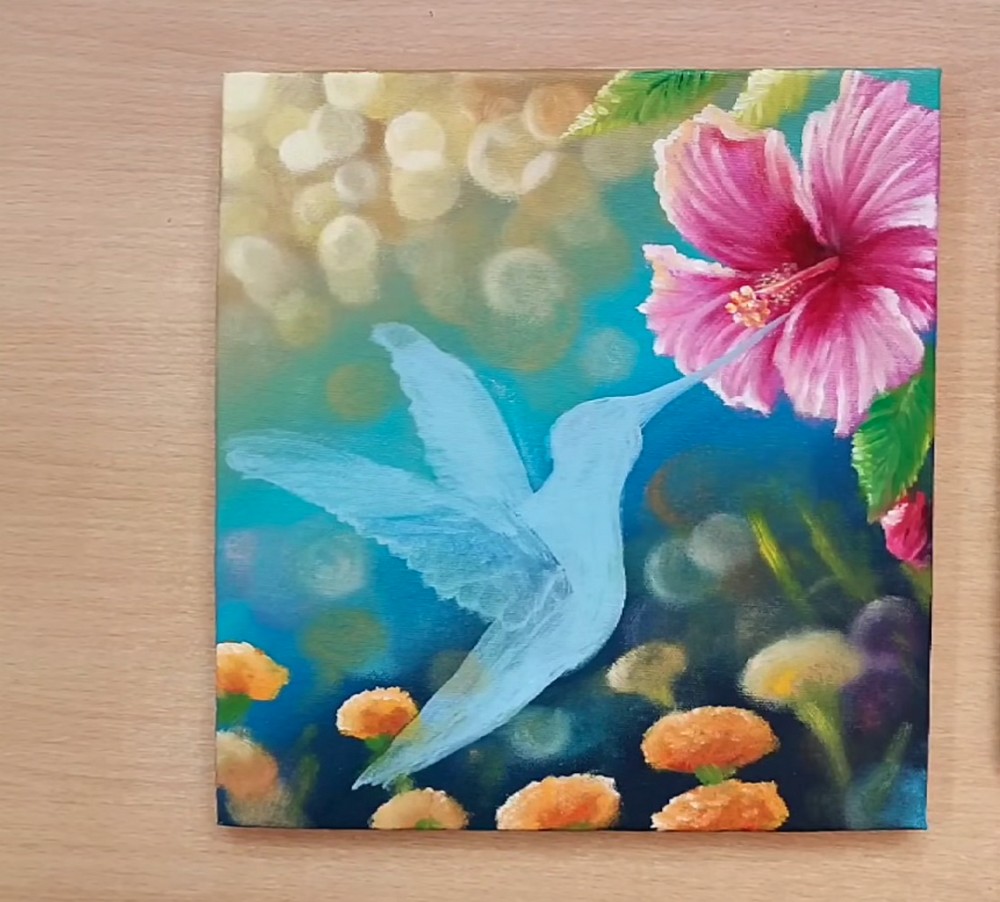
Introduce foreground pops. Dab small marigold blossoms along the bottom using orange, yellow, and a whisper of white; leave dark green dots for stems. Deepen background with turquoise glazes and a few muted circular bokeh echoes. Keep edges soft so the hummingbird remains the star. Strengthen contrast near the hibiscus, but fade shapes outward to create depth without cluttering the composition today.
Color the Hummingbird
Paint the bird’s colors. Glaze emerald and teal over back, turquoise on wings, and warm ruby at throat. Add creamy light on chest and wing membranes, keeping tips translucent. Drop a crisp black eye with a tiny white sparkle. Darken the beak and feet, and edge feathers with short flicks. Keep highlights concentrated on sunward planes for jewel-like brilliance and depth everywhere.
Final Sparkle & Balance
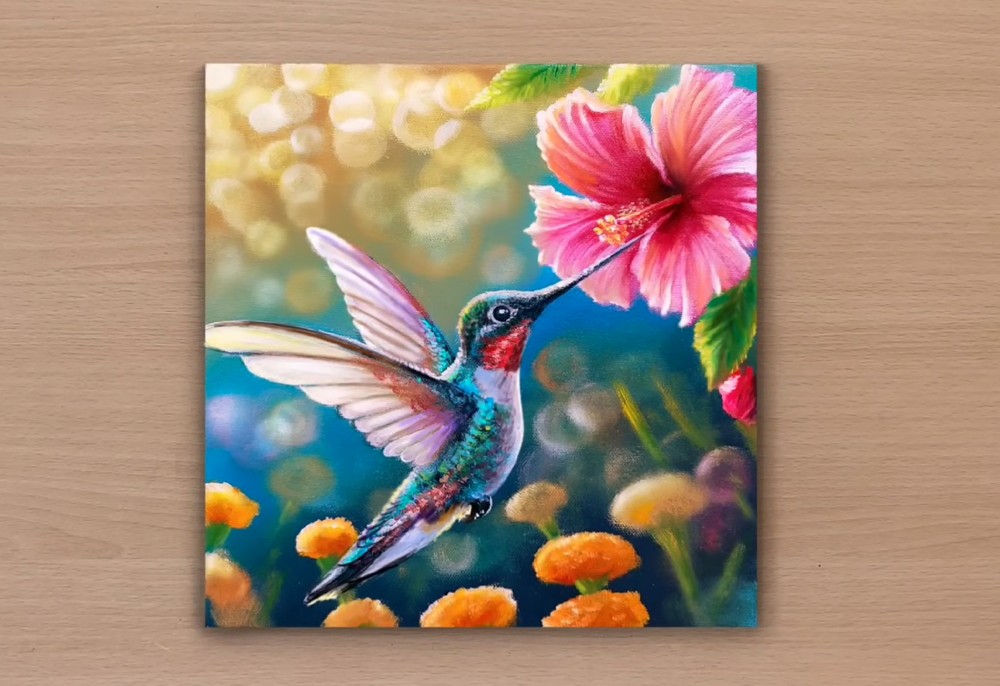
Finish the scene. Speckle tiny pollen dots on the stamens, add leaf veins, and brighten selected bokeh rings with translucent halos. Feather soft motion lines behind wings, then sharpen a few feather tips for contrast. Glaze turquoise into shadows under the bird. Add three crisp catchlights along the beak and rim-light on the back. Clean edges, balance contrasts, sign, and breathe proudly.
Conclusion
Lovely work. You layered a luminous backdrop, floated soft bokeh, and grew a lively hibiscus before bringing a sparkling hummingbird to life. Keep the contrast strongest around the beak, eye, and flower center so the focal moment sings. Try new colorways—orange hibiscus, sapphire bird, or deeper teal background. Repeat the process and your brush confidence will bloom with every painting.
A Bonus Tip
Edge the bird’s rim-light with a thin warm glaze before white—color under highlights makes the sparkle convincingly sunlit.
FAQs
Q: How long will this take?
A: About 90–150 minutes, including drying and glazing pauses.
Q: What canvas size works best?
A: A4 (8.3×11.7 in) or 9×12 in gives room for bokeh, flower, and wings.
Q: My bokeh looks chalky—help?
A: Use thin, translucent layers; blur edges with a clean, barely damp brush.
Q: How do I keep wings airy?
A: Leave transparent tips and use short, directional flicks, not heavy filling.
Q: Can I change the flower?
A: Yes—swap to plumeria or trumpet vine; keep warm lights and crisp edges.
Q: Should I varnish?
A: After curing 24–72 hours, apply a thin satin or gloss coat to deepen color and protect.


