How to Draw SpongeBob | Easy Drawing For Kids
Ready to draw SpongeBob SquarePants? This friendly tutorial turns him into easy shapes so anyone can follow. Start with a wavy rectangle for the body, add shorts, tie, and shoes, then build arms, legs, and facial features. We’ll keep proportions simple, focus on smooth curves, and finish with bold cartoon colors. Use light pencil marks first, then outline with a fineliner when you’re happy. Take your time, compare both sides often, and erase gently. Whether you’re practicing basics, making fan art, or drawing with kids, this guide stays fun and clear. We’ll note helpful landmarks—belt line, eye placement, and nose length—so he stays on model. Grab paper, an HB pencil, eraser, and markers or colored pencils. Set up good lighting and let SpongeBob’s goofy energy guide your lines. Have fun.
Supplies for This Drawing
- Pencils: HB for layout, 2B for darker sketching
- Fineliners: 0.3 mm and 0.5 mm for inking
- Erasers: kneaded eraser and vinyl block eraser
- Paper: A4 (8.3×11.7 in) or 9×12 in, 160–200 gsm
- Sharpener (precision or handheld)
- Ruler (for belt line)
- Color: alcohol markers or colored pencils (yellow, red, blue, brown, gray, black, beige)
Prepare the Materials
- Clear your workspace and set good, even lighting.
- Tape paper edges for a clean border.
- Sharpen pencils; test pressure on scrap.
- Place your reference where you can glance easily.
- Keep erasers within reach.
- Uncap fineliners only when ready to ink.
Special Features of This Drawing
- Wavy sponge silhouette with rounded corners
- Iconic shirt, tie, shorts, and bold shoes
- Oversized eyes and teeth for instant appeal
- Playful sponge holes that vary in size and spacing
- Simple limbs that keep the pose readable
- Clean ink lines and flat cartoon colors
Tutor’s Suggestions
- Start ultra-light; build shapes before details.
- Ghost the stroke in the air, then draw.
- Mirror-check symmetry around the tie and eyes.
- Erase in stages to avoid paper damage.
- Ink slow curves with steady breathing.
- Keep holes away from key features to avoid clutter.
- Layer color lightly to prevent streaking.
Uses
- Classroom or club drawing practice
- Fan art for sketchbooks and portfolios
- Greeting cards or mini posters
- Kids’ room wall prints
- Coloring page you can duplicate
- Quick warm-up before bigger projects
Level of Difficulty
Beginner-friendly — simple shapes, clean lines, and forgiving proportions.
Wavy Body Outline
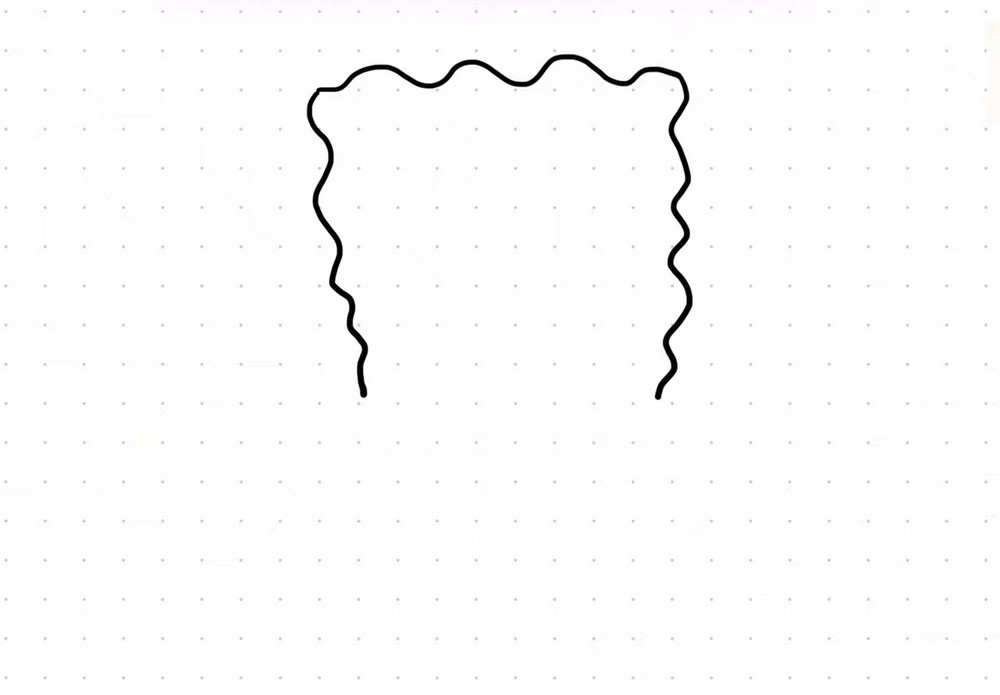
Using a pencil, draw a tall wavy rectangle. Make the top edge a soft ripple and let the sides gently wiggle downward. Keep the corners rounded, not sharp. Leave open space below for shorts and legs. Use smooth, confident strokes rather than tiny scratches. Lightly check that both sides feel balanced before moving on. This is SpongeBob’s spongey body outline for scale.
Block In Shorts
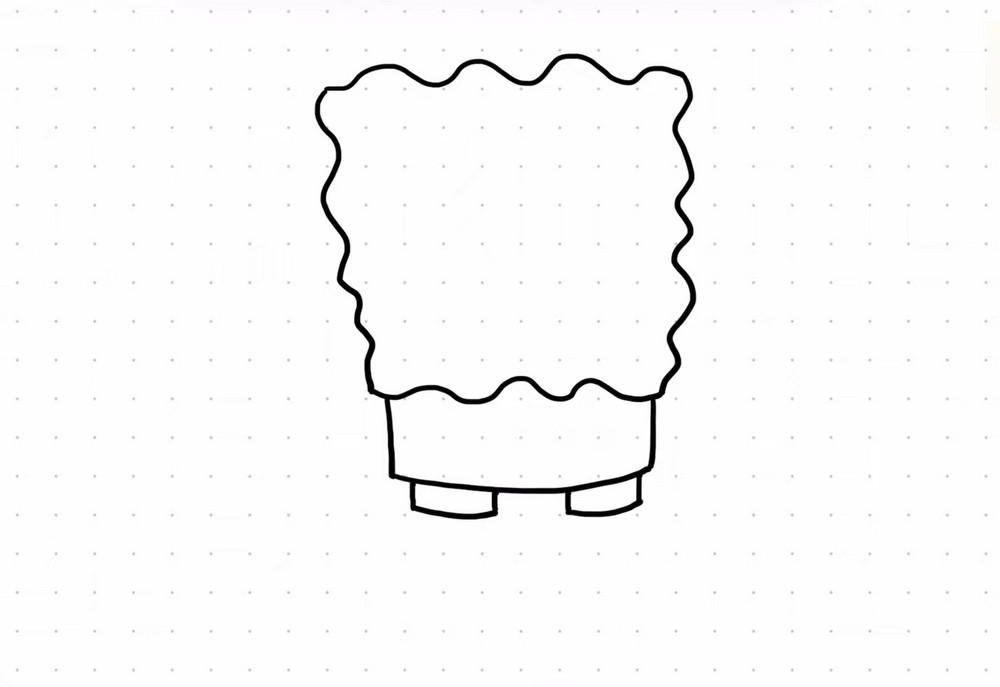
Add the shorts: draw a curved waistband across the lower body, following the wavy edge. Drop two straight sides down and connect with a shallow curve. Sketch two small tabs beneath for pant legs. Everything should feel centered under the body. Keep lines light so you can adjust. These simple shapes will anchor SpongeBob’s outfit and later details. Leave foot room below.
Tie, Shirt, and Belt
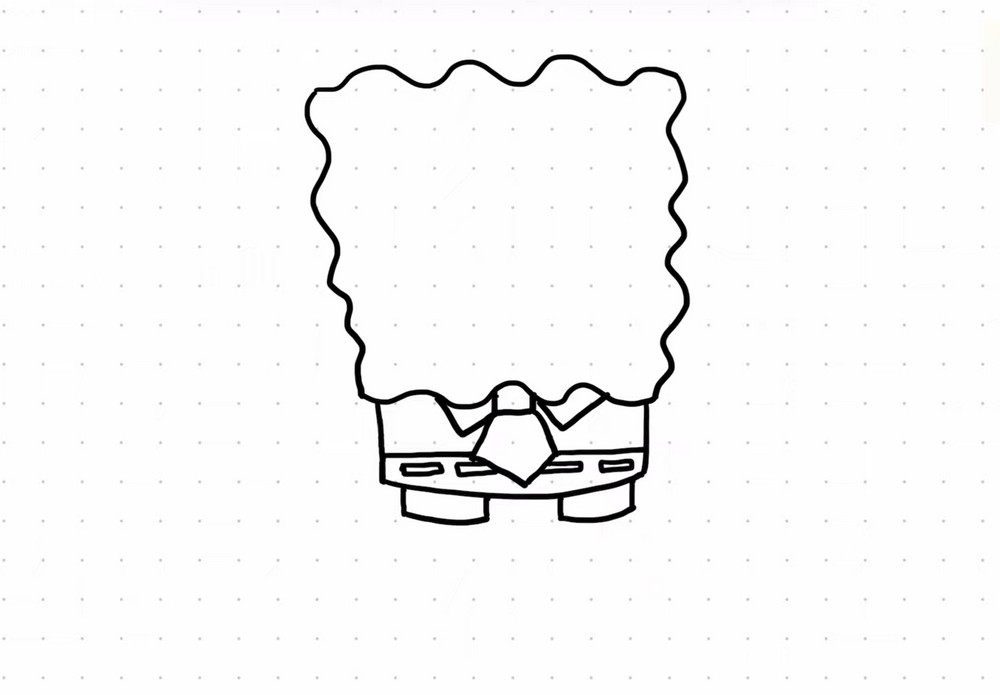
Draw the shirt points resting over the waistband, meeting at the center. Add a small knot and a diamond-shaped tie hanging down. Sketch a belt line across the shorts and two small rectangular belt loops or pockets. Use gentle curves; SpongeBob’s clothes sit rounded. Keep everything symmetrical around the tie so the pose reads straight and friendly. Refine overlaps with clean corners.
Legs, Socks, and Shoes
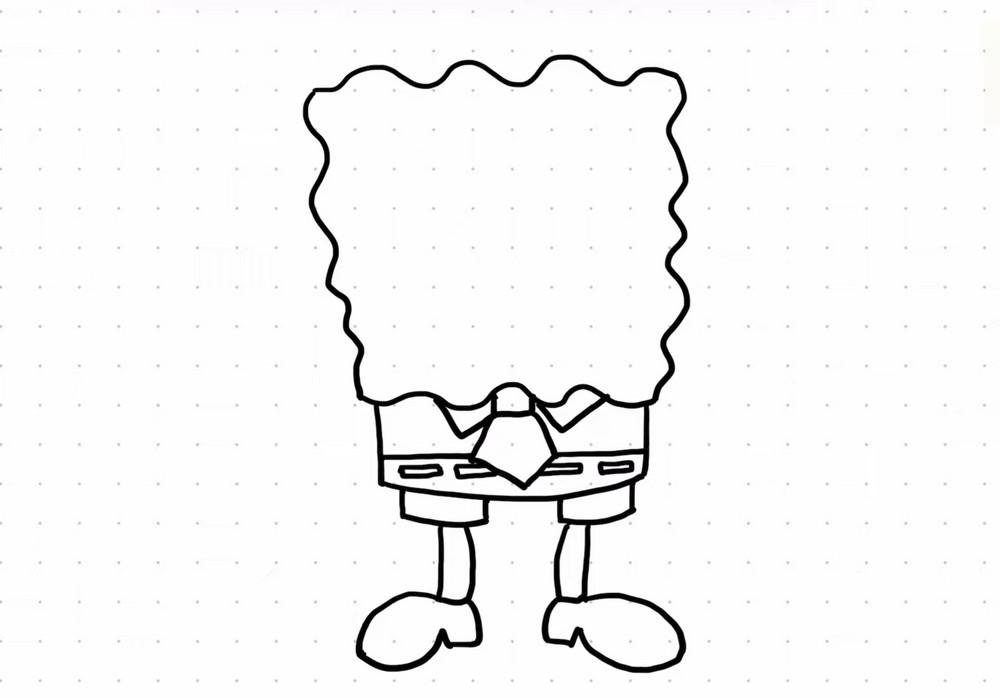
From each pant leg, draw a short cylinder for the leg, slightly tapered. Add a rounded sock cuff line near the bottom of each. Sketch big, simple shoes: oval shapes with a flattened top and a little notch in the front. Place them apart for balance. Check that legs are the same length and the shoes sit on the same ground line.
Sleeves and Arms
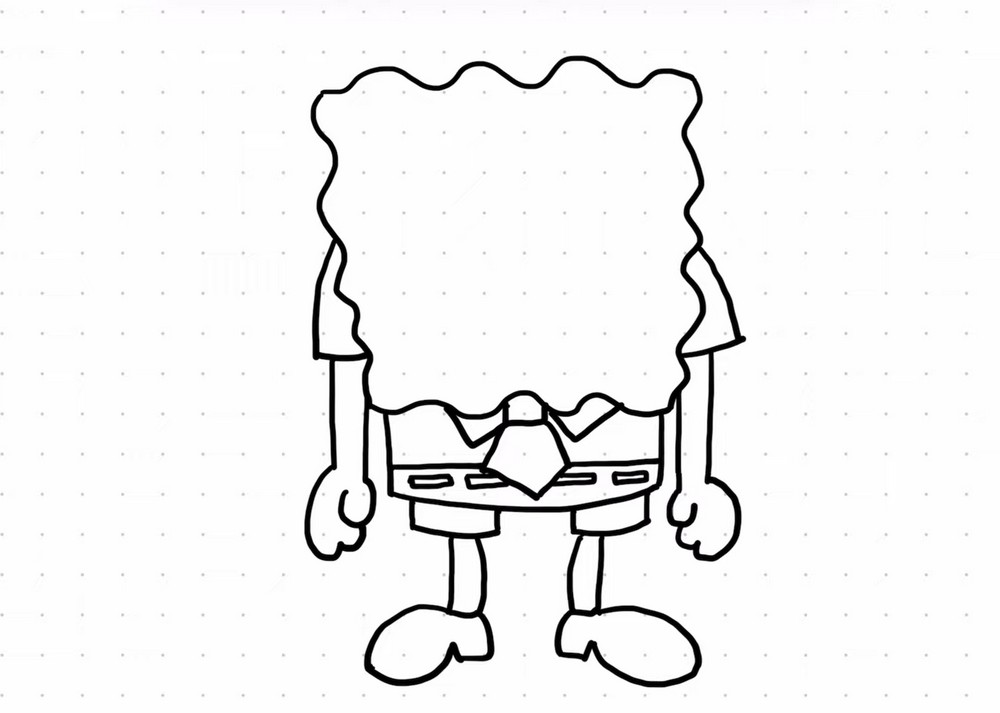
Add sleeves: short curved triangles hugging the sides. From each sleeve, draw a skinny arm using two parallel lines. Cap each with mitten-style hands—one thumb bump and a rounded palm. Keep the arms hanging relaxed and slightly forward so they feel natural. Erase overlaps where the sleeves cover the body edge. These simple shapes finish the main pose and silhouette nicely now.
Eyes, Nose, and Mouth
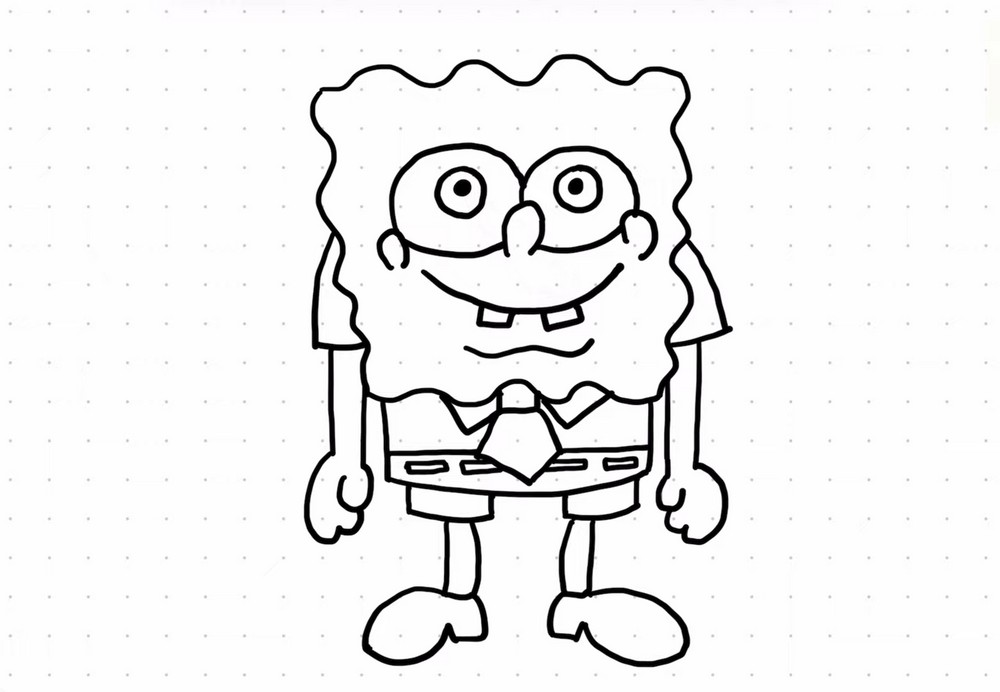
Draw two large circles for eyes, slightly overlapping near the center. Place a rounded nose between them, extending downward. Add a wide smiling mouth under the nose with a gentle curve, then a lower lip line. Inside the mouth, add two small square teeth. Keep features centered under the top ripple. Simple, oversized features create SpongeBob’s cheerful expression immediately. Lighten construction lines.
Sponge Holes and Accents
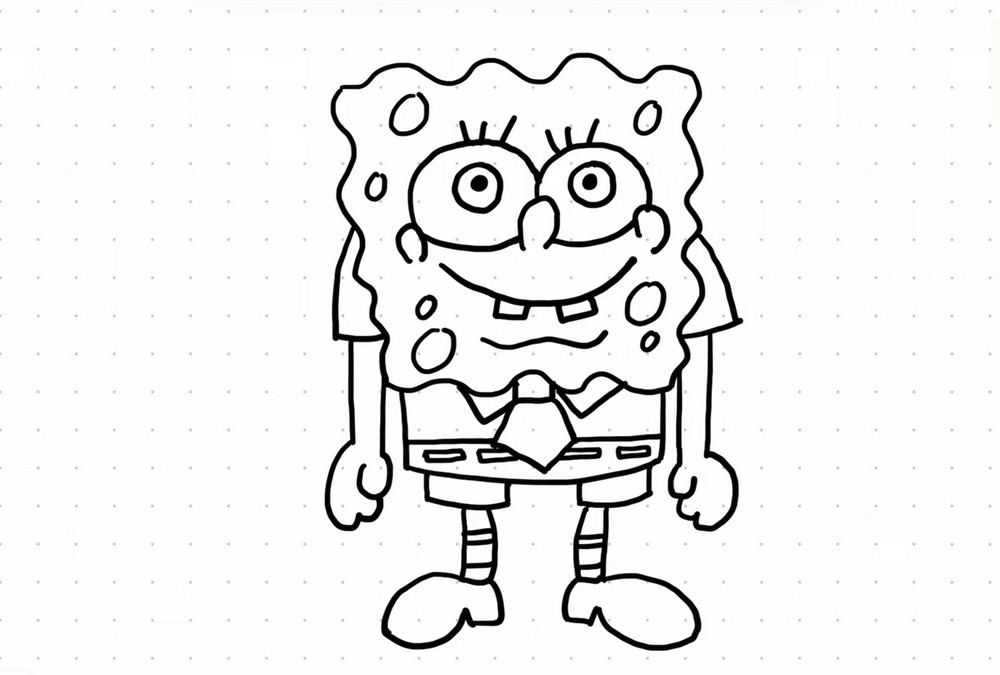
Add eyelids and lashes: draw short curved lids above the eyes and three lashes on each. Place circular and oval sponge holes around the face, varying sizes and spacing. Add a cheek line on the left and a dimple by the mouth corner. Draw horizontal stripes on each sock. These accents bring texture and personality while keeping the design clean and readable.
Ink and Base Color

Ink your final lines with a fineliner and let them dry. Erase pencil marks carefully. Lay a flat yellow across the entire sponge body, leaving the eyes and shirt white. Color the nose and cheeks the same yellow. Keep coverage even; a consistent base sets up later contrast. If using markers, move in one direction to avoid streaks and patchy areas now.
Final Colors and Shading
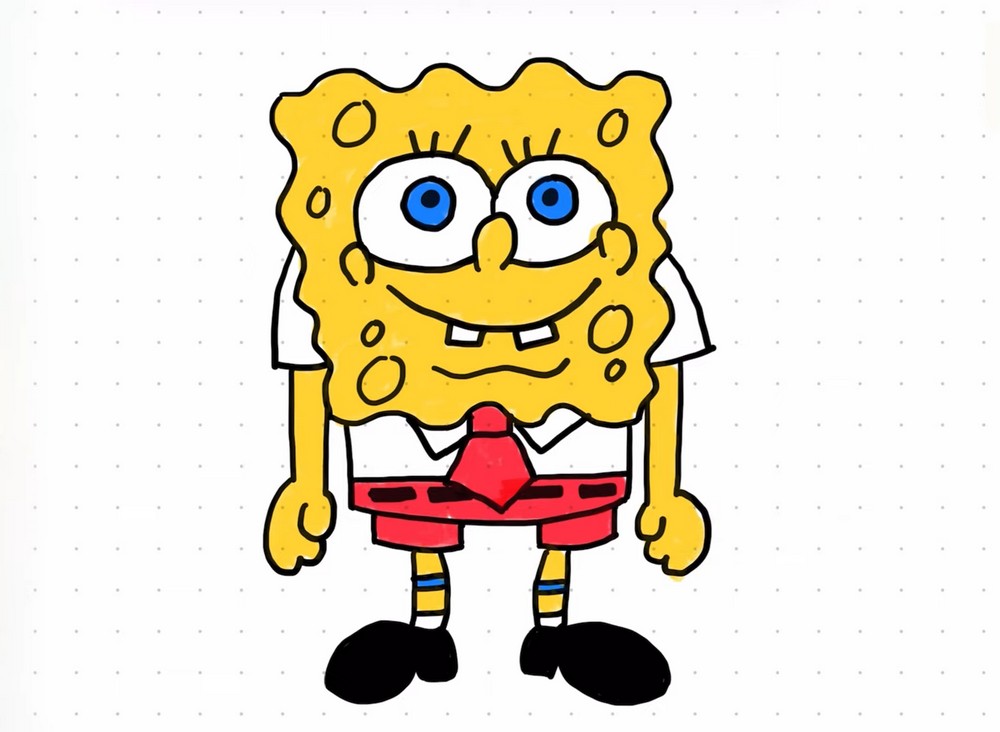
Finish colors: blue irises, light gray pupils, and a soft beige tongue if visible. Keep the shirt white. Make the tie bright red and the shorts warm brown with a darker belt. Add yellow-brown shading inside sponge holes and a gentle shadow under the chin. Stripe the socks yellow and blue, and color shoes black. Your cheerful SpongeBob is complete! Well done!
Conclusion
SpongeBob’s charm comes from bold shapes, clean edges, and details. If something feels off, check symmetry around the tie and eyes, then re-ink confidently. Try a thicker outline on the outer silhouette for a cartoony pop. Most of all, keep your hand relaxed and enjoy the character. Every drawing improves with practice, so revisit these steps and experiment with expressions.
A Bonus Tip
Keep pupils small and centered to avoid a cross-eyed look; add a tiny white catchlight last.
FAQs
Q: How long will this take?
A: Most beginners finish in 35–60 minutes, including inking and color.
Q: What paper size is best?
A: A4 (8.3×11.7 in) or 9×12 in gives comfy room for details without wasting supplies.
Q: My outline looks lumpy—help?
A: Redraw the outer edge in long, confident curves, then erase the rough under-sketch.
Q: Eyes don’t match. What should I do?
A: Box in a light rectangle to align eye tops and centers before redrawing circles.
Q: Where do I shade first?
A: Shade inside sponge holes and under the chin, then deepen shoe bottoms and belt.
Q: Markers or colored pencils?
A: Markers give flat, bold color; pencils offer soft blending. Use what you have and layer patiently.