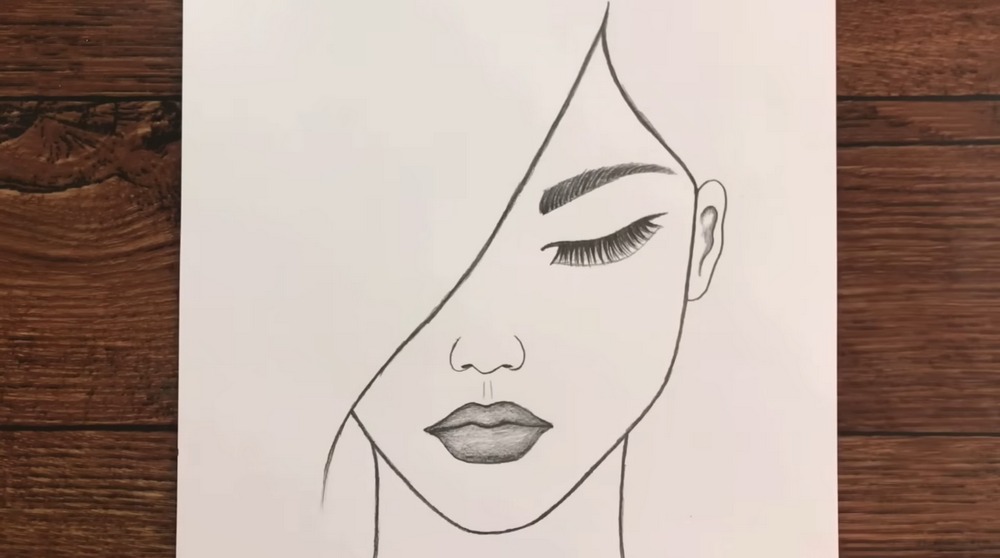
Easy Sad Girl Drawing – How To Draw
Here’s a simple, stylish portrait project: an easy sad girl drawing with one closed eye and sweeping hair. The look is calm and moody, perfect for practicing elegant curves, clean linework, and soft shading. We’ll build the face using a few guides, then add brows, lashes, lips, and flowing strands. Each step is gentle and forgiving, so beginners can follow comfortably and intermediate artists can refine control. You only need pencils, an eraser, and smooth paper. Work lightly at first, then darken the best lines. Keep edges soft where you want tenderness, and crisp where structure matters. By the end, you’ll have a minimal, expressive portrait with room for your own style—more lashes, bolder lips, or different hair shapes—all up to you. Adjust proportions slowly, comparing angles as you proceed.
Supplies for This Drawing
- Smooth drawing paper, A4 (8.3×11.7 in) or 9×12 in / ~180 gsm
- HB pencil for layout, 2B and 4B for shading
- Mechanical pencil (0.5 mm) optional for eyelashes/brows
- Kneaded eraser and plastic/vinyl eraser
- Blending stump or tissue/cotton swab
- Sharpener
- Ruler (for light placement guides, optional)
- Fineliner (optional for crisp final lines)
Prepare the Materials
- Clear and wipe your workspace; set good, even lighting.
- Tape paper edges to your board for stability.
- Sharpen pencils; keep HB longest.
- Make a few practice lashes on scrap.
- Place your references within eye level.
- Keep erasers and tissue within easy reach.
Special Features of This Drawing
- Elegant S-curve that controls composition and hair flow
- Minimal, suggested nose for a gentle look
- Closed eye with tapered lashes emphasizing mood
- Sculpted lips with soft gradient highlight
- Asymmetrical framing created by sweeping bangs
- Clean outlines contrasted with delicate shading
Tutor’s Suggestions
- Start ultra-light; darken only the best lines.
- Use quick, tapered flicks for lashes and brows.
- Build values slowly in layers—never press hard first.
- Compare angles often: brow to chin, hair to jaw.
- Keep edges crisp where structure matters; soften elsewhere.
- Take short breaks to spot symmetry issues.
- Lift mistakes with a kneaded eraser, not rubbing.
Uses
- Classroom portrait practice
- Sketchbook warm-up or style study
- Printable coloring page
- Minimal wall print or card design
- Fan-art base with custom hair and makeup
- Social post or avatar with mood
Level of Difficulty
Beginner-friendly — relies on simple curves, clean contours, and light shading that are easy to control and customize.
Flow Line

Lightly place an elongated S-curve from lower left toward upper right. This sweeping guide sets the fall of hair and the tilt of the face. Keep pressure soft so edits erase cleanly. Aim for a graceful, even arc without flat spots. If it wobbles, redraw beside it and keep the best line. Leave a small margin around edges for later adjustments too.
Face Boundary & Outer Hair

Add the forehead and cheek outline. From the top point, run a straighter line down, bending softly to form the brow, cheek, and jaw corner. Continue downward to a tapered chin area. On the right, sketch a long outer hair edge echoing the first curve. Keep angles gentle; think folded ribbon, not sharp corners. Light pressure helps edits blend without ghost lines.
Chin Curve and Neck

Shape the lower face and neck. From the jaw corner, glide a shallow U-curve to create the chin, then lift back to meet the opposite jaw. Drop two slim neck lines downward, slightly tapered. Add a short inner hair strand overlapping the neck at left. Check symmetry loosely; the head tilts, so chin can sit off-center. Erase construction specks before moving on.
Closed Eye and Lashes
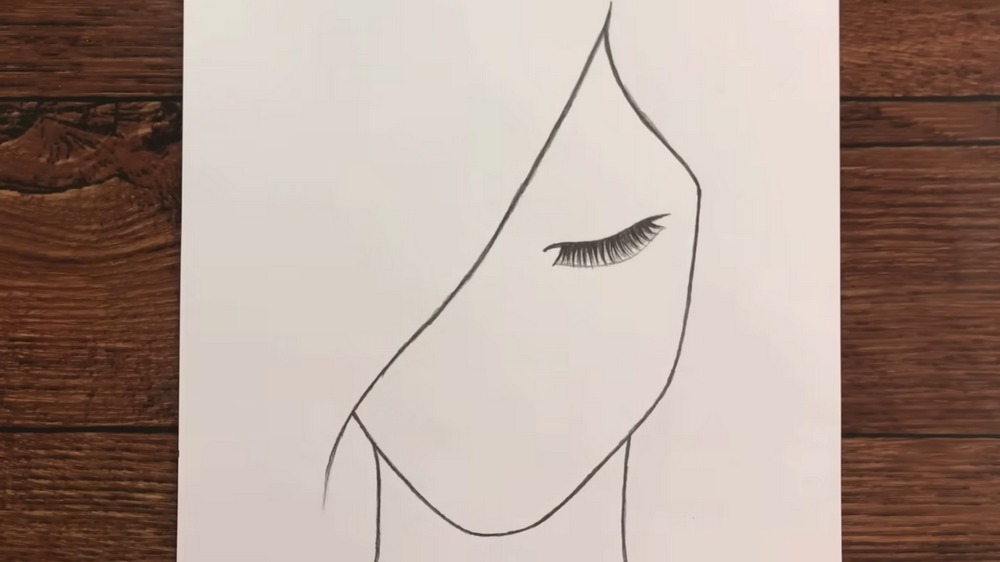
Place the closed eye midway between brow ridge and cheek. Draw a gentle crescent line angling up slightly at the outer end. Underneath, add layered lashes: short near the tear duct, longer toward the outside. Use quick, tapered strokes that start firm and lift away. Keep the lid thicker at center to suggest volume and mascara. Soften stray marks with kneaded eraser.
Eyebrow and Brow Bone
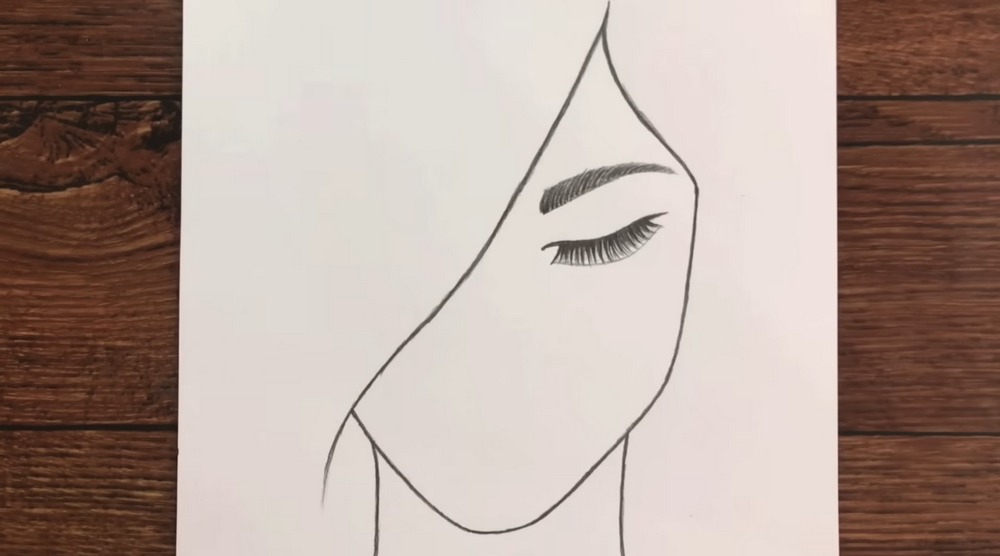
Sketch the eyebrow above the eye’s highest point, following the forehead angle. Block a soft triangular shape first, then fill with short hairlike strokes that flow upward and outward. Hint at a faint crease line underneath to suggest the brow bone. Keep the inner brow slightly thicker than the tail. Balance darkness with the lashes. Avoid outlines; let texture define edges subtly.
Nose and Shaded Lips
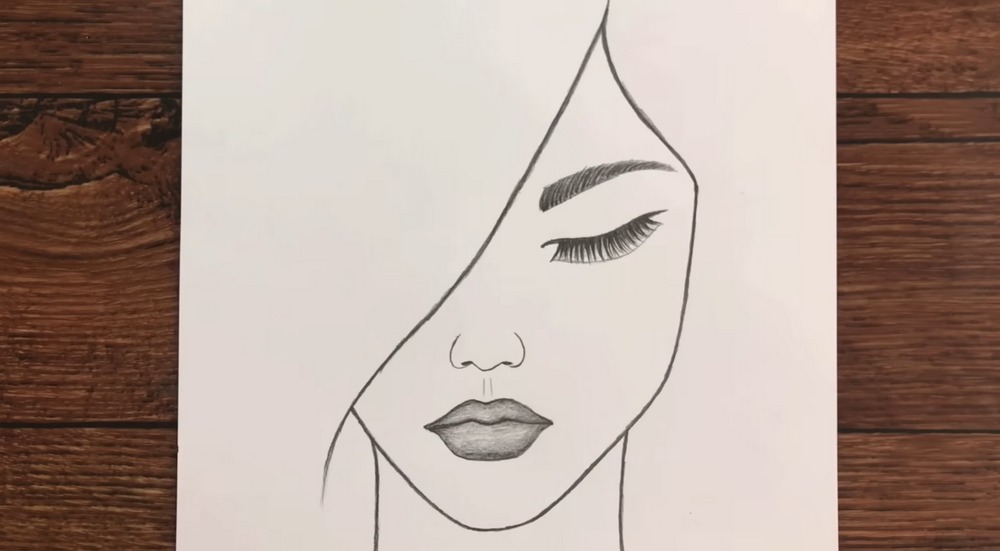
Mark the nose with two small vertical guides, then draw a soft S-shaped bridge and tiny nostrils. Keep everything light; this style favors suggestion over detail. Build the lips: outline the cupid’s bow, corners, and lower curve, then shade from the corners inward, leaving a highlight. Blend lightly with tissue to create velvety, dimensional softness. Deepen lower lip edge for gentle pout.
Ear and Cheek Contour
Add the ear where the brow line meets the nose line, tucked just inside the head’s outline. Draw the outer oval, then suggest inner folds with two simple curves. Reinforce the cheek contour on the right side, tapering into the chin. Keep shading minimal to preserve a clean, stylized look. Erase guide ticks you no longer need. Feather hairline for natural transition.
Final Hair Strands

Finish the hairstyle. From the top center, pull long parallel strands that sweep left across the forehead and down the cheek, echoing the first S-curve. Vary spacing and length so the hair feels airy. Shade roots slightly, leaving bright gaps for shine. Add a few loose ends near the neck to suggest softness and movement. Lightly blend edges to keep delicacy intact.
Conclusion
Small choices sell the mood: soft lashes, a quiet mouth, and drifting hair. Keep contrasts modest, saving your darkest accents for the brow, lashes, and lip center. Let open white paper suggest light. If something feels off, lighten with a kneaded eraser and redraw beside it. Simplicity carries emotion—trust the few lines you keep. Practice again with angles and hairstyles.
A Bonus Tip
Angle your paper slightly so wrist flicks follow the hair flow, giving lashes and strands natural taper.
FAQs
Q: How long will this take?
A: Most beginners finish in 30–50 minutes; add time for blending and hair details.
Q: What paper size works best?
A: A4 (8.3×11.7 in) or 9×12 in smooth paper keeps curves clean and blends well.
Q: My proportions look off. Fixes?
A: Lightly draw vertical guide marks for brow, nose base, and lip center; compare angles before darkening.
Q: In what order should I shade?
A: Eyebrow and lashes first, then lips, then soft nose accents; finish with subtle hair shadows.
Q: Can I use markers instead of graphite?
A: Yes—ink the contours with a fineliner, then add light alcohol-marker grays, keeping highlights as untouched paper.
Q: How do I color it?
A: Layer colored pencils gently over the graphite, or erase to faint lines before coloring to avoid muddy tones.