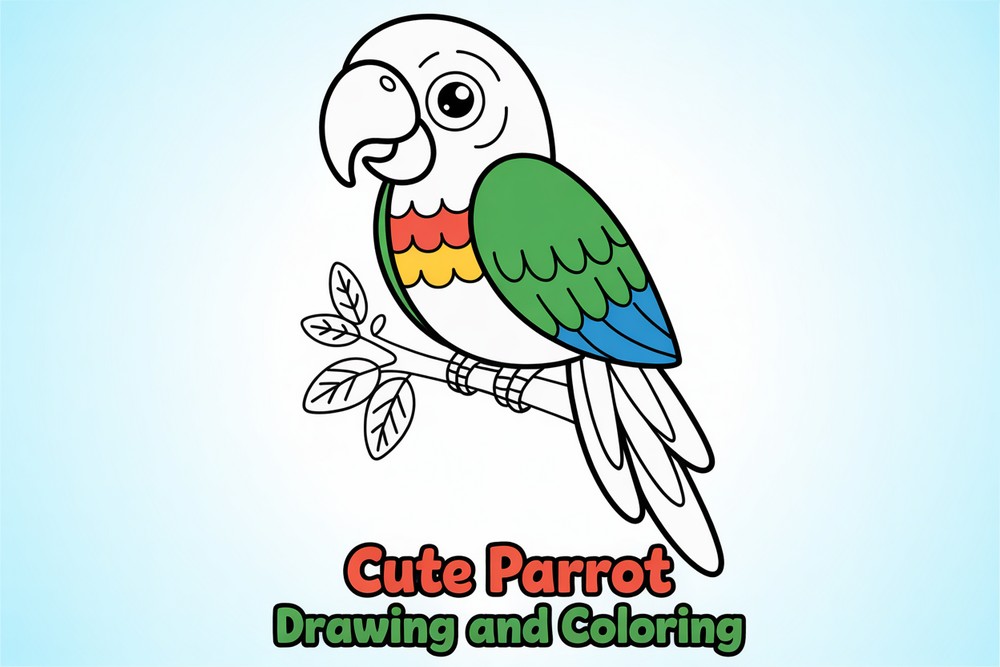
Cute Parrot Drawing and Coloring
Ready to draw a friendly parrot? This step-by-step guide turns simple lines into a fluffy, cartoon bird with big charm and bold colors. First, we’ll build the beak, then add the eyebrow ridge and a shiny eye. Next comes the ruffled body, wing, tail, and perching feet. After outlining, you’ll color with layered markers for a tropical finish. The photos show every stage, so match each caption carefully. Sketch lightly in pencil, ink confidently, and erase stray guides once dry. Keep your curves smooth and lively; parrots look best with rounded shapes. If you’re drawing with kids, work slowly and repeat shapes together. Adults can tighten proportions using a ruler for beak alignment. Let’s begin! Gather your supplies and clear space so your hand can move without bumps. Or snags.
Supplies for This Drawing
- HB pencil for sketching; 2B for darker guides
- Fineliner or brush pen (black, 0.5–0.8 mm)
- Alcohol markers or brush markers: orange/red-orange, mid-green, dark green, yellow-green
- White gel pen (optional highlights)
- Kneaded eraser + block eraser
- A4 (8.3×11.7 in) smooth paper, 160–200 gsm marker paper preferred
- Sharpener
- Ruler (for alignment checks)
Prepare the Materials
- Clear and wipe your workspace.
- Place reference images within eye level.
- Tape paper edges for a clean border.
- Sharpen pencils; test pens on scrap.
- Arrange markers light-to-dark.
- Warm up with a few curved strokes.
Special Features of This Drawing
- Expressive beak with layered plates
- Big, shiny eye and playful crest
- Rounded, fluffy body silhouette
- Simple, readable wing and tail shapes
- Bold tropical greens with quick texture lines
- Decorative leaves for balance and framing
Tutor’s Suggestions
- Sketch lightly; build forms before details.
- Keep curves smooth by drawing from the shoulder.
- Let ink dry fully before erasing.
- Layer markers from light to dark for clean blends.
- Follow feather direction with your strokes.
- Pause often and compare left/right spacing.
- If a line wobbles, thicken it purposefully.
Uses
- Classroom warm-up or weekend family activity
- Cute card or small print for a kid’s room
- Social post, sticker, or sketchbook page
- Coloring page for younger artists
- Marker practice for smooth fills and blends
- Portfolio exercise on simplifying animal forms
Level of Difficulty
Beginner-friendly — simple shapes, clear outlines, and forgiving coloring layers.
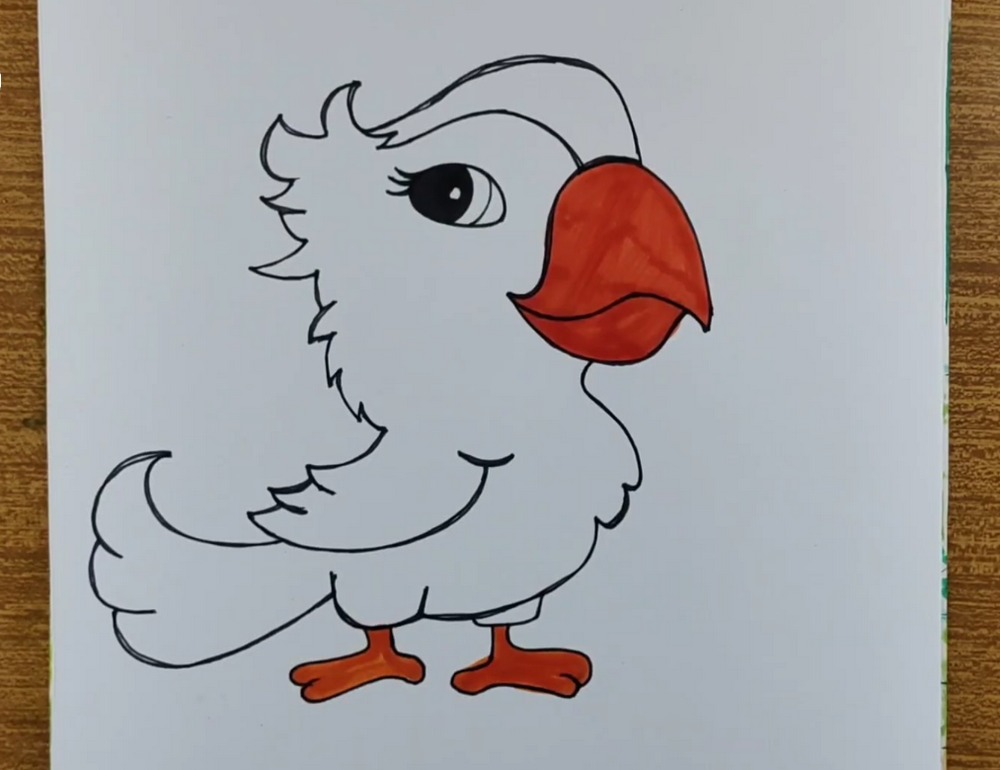
Beak and Head Shape
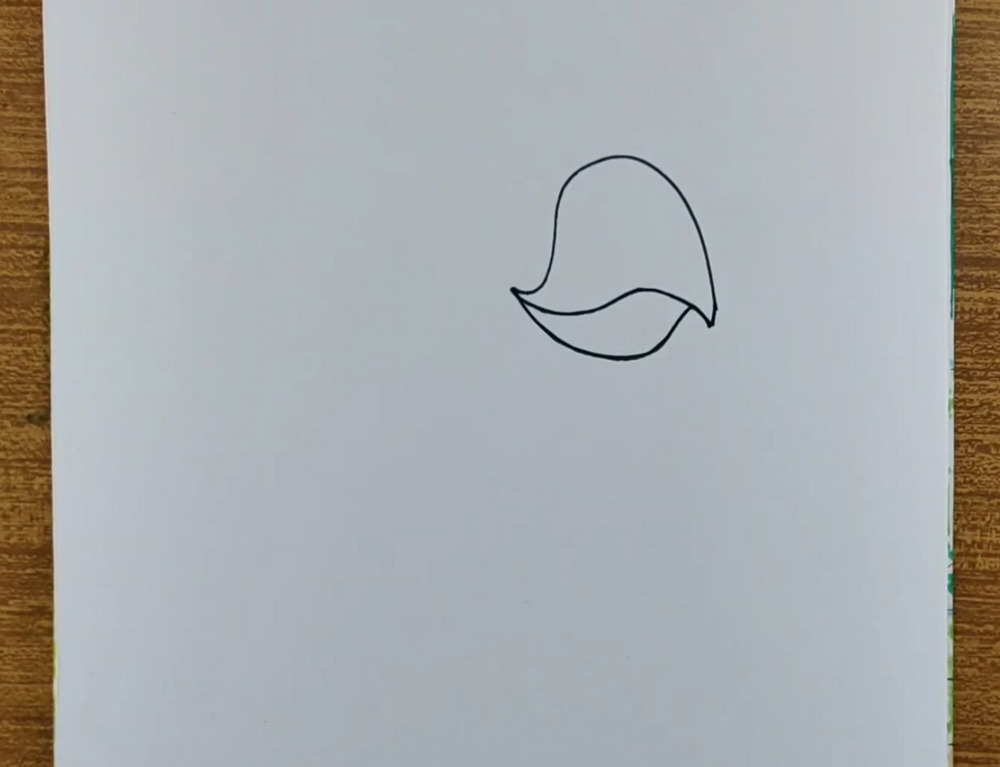
Start with the beak area in the upper-right of your page. Draw a rounded, droplet-like upper mass, then add a curving line inside to suggest the beak’s two plates. Close the tip with a short point. Keep it tilted upward, as if the bird is curious. Leave room on the left for feathers, wing, and tail. Stay light; corrections are easy now.
Brow and Second Beak Plate
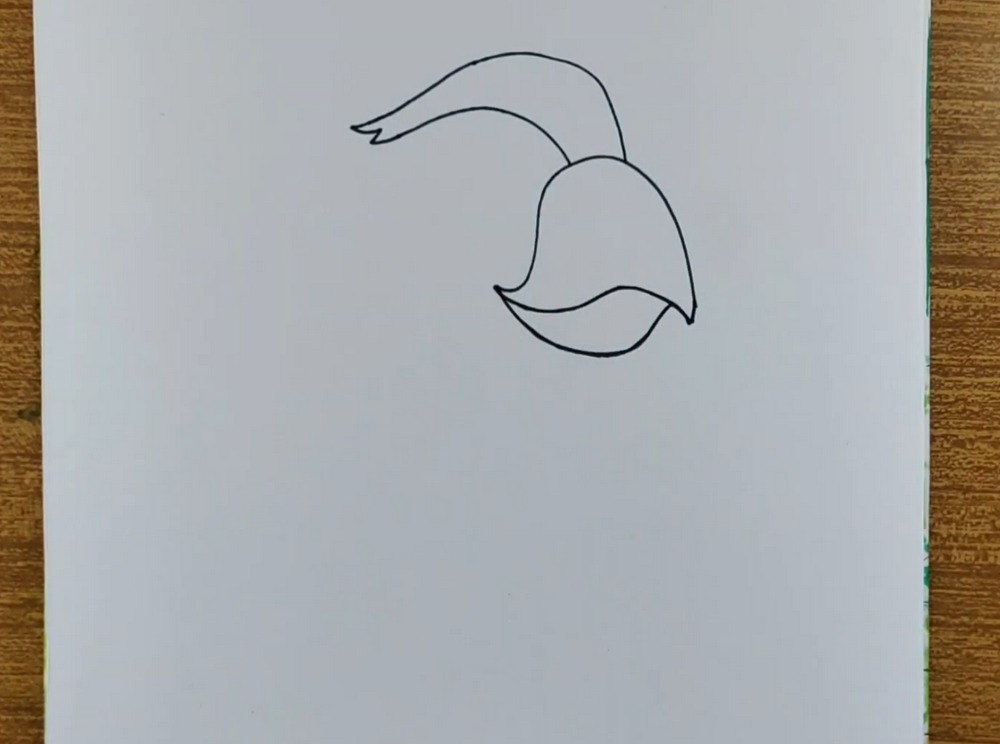
Add a long, curved ribbon across the top for the eyebrow ridge, pointing left. Beneath it, complete the beak by drawing the outer plate—another rounded triangle that meets the lower curve. Overlap the shapes a little so the beak looks layered. Keep lines smooth and confident, with a gentle hook at the tip to sell that parrot character. Keep proportions gentle overall.
Eye and Lashes
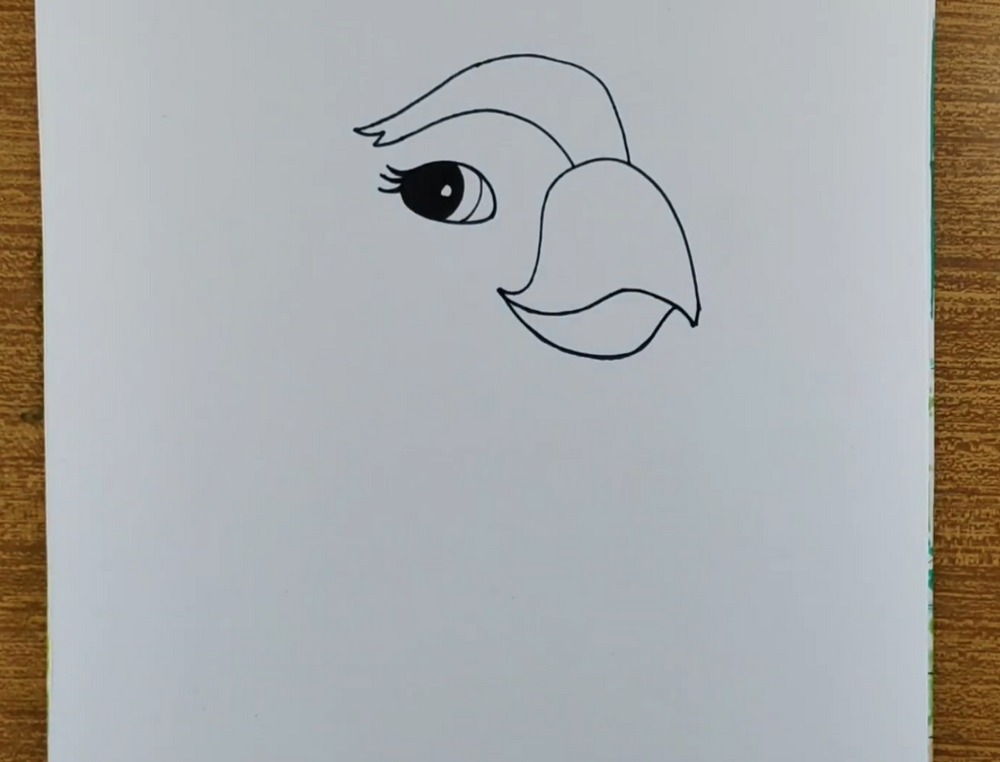
Inside the head space, draw a large oval eye with a crescent highlight to the right. Fill the pupil dark, leaving a small white dot. Add three short eyelashes on the left edge. Nest a curved line under the brow to connect the face. The bird already feels expressive; check spacing before moving on. Set eye slightly left of center for charm.
Crest and Fluffy Body Outline
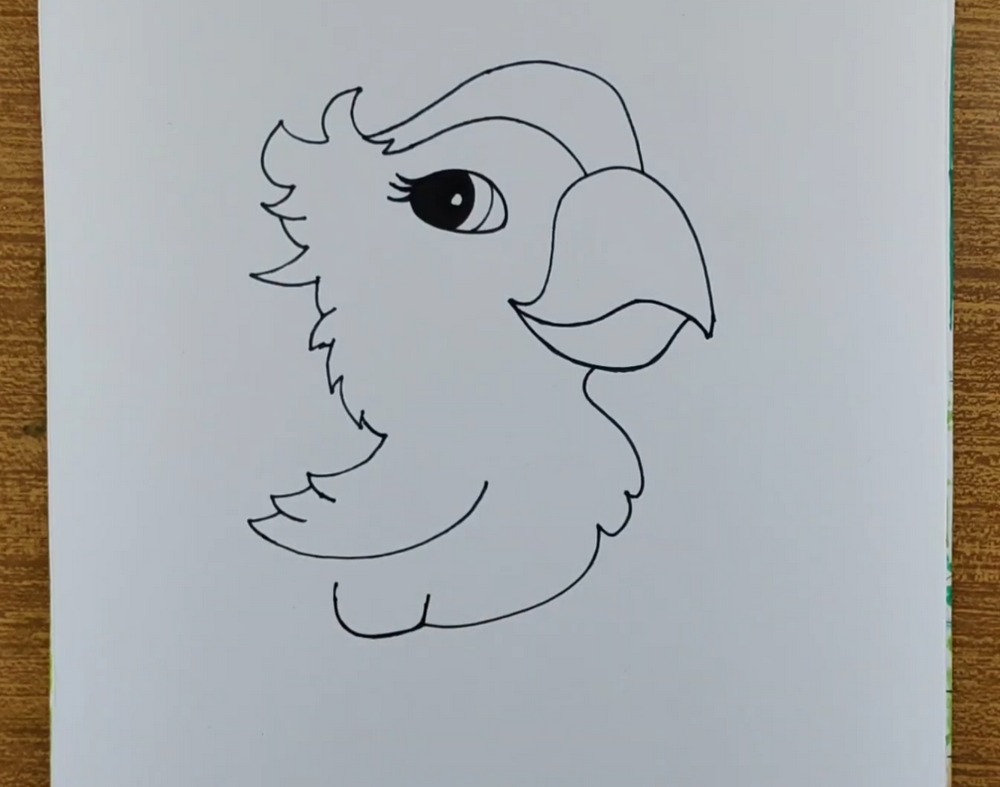
From the brow, sketch a playful crest of three bumps sweeping left. Continue down a shaggy cheek, then curve into the chest and rounded belly. Suggest layered feathers with little zigzag notches. End with a soft curve under the body to mark where the legs will go. Keep edges lively, not stiff. Keep the feather points varied in size for natural rhythm.
Tail and Wing Shapes
Extend a long, rounded tail behind the body, curling slightly upward at the tip. Add the wing as a simple, drooping oval tucked against the side, finishing with a few toothy feather notches. Place a short arc on the belly to show volume. The parrot now reads clearly, even without feet yet. Let the tail fill space without touching the paper edge.
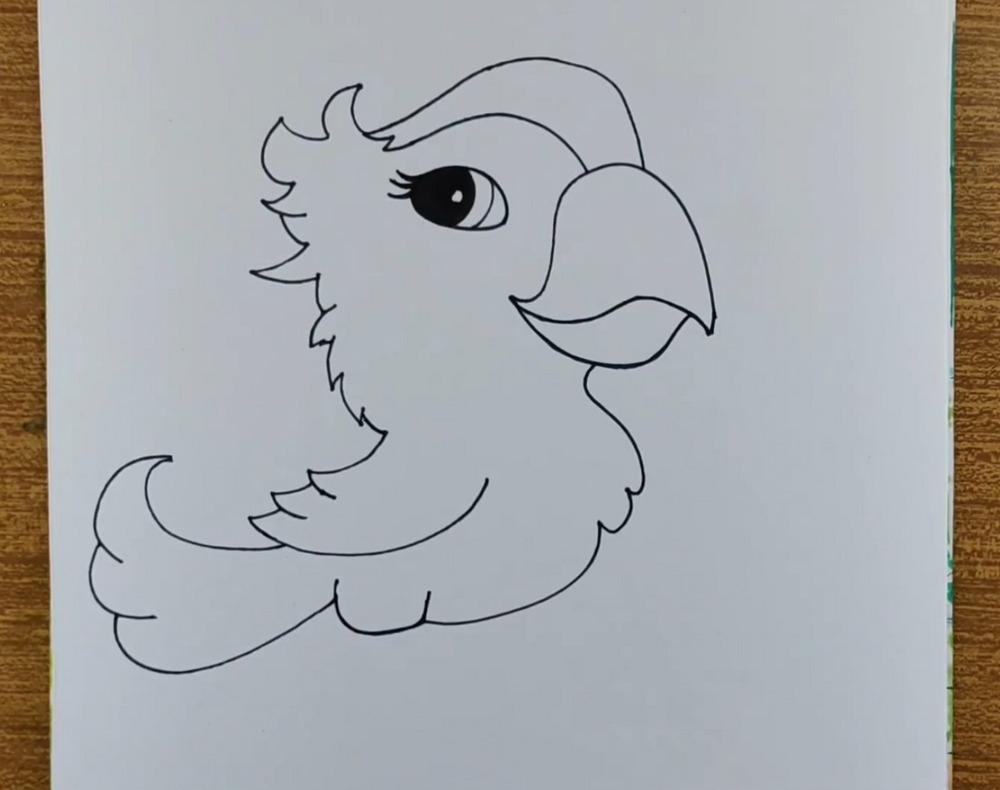
Feet and Perch Stance
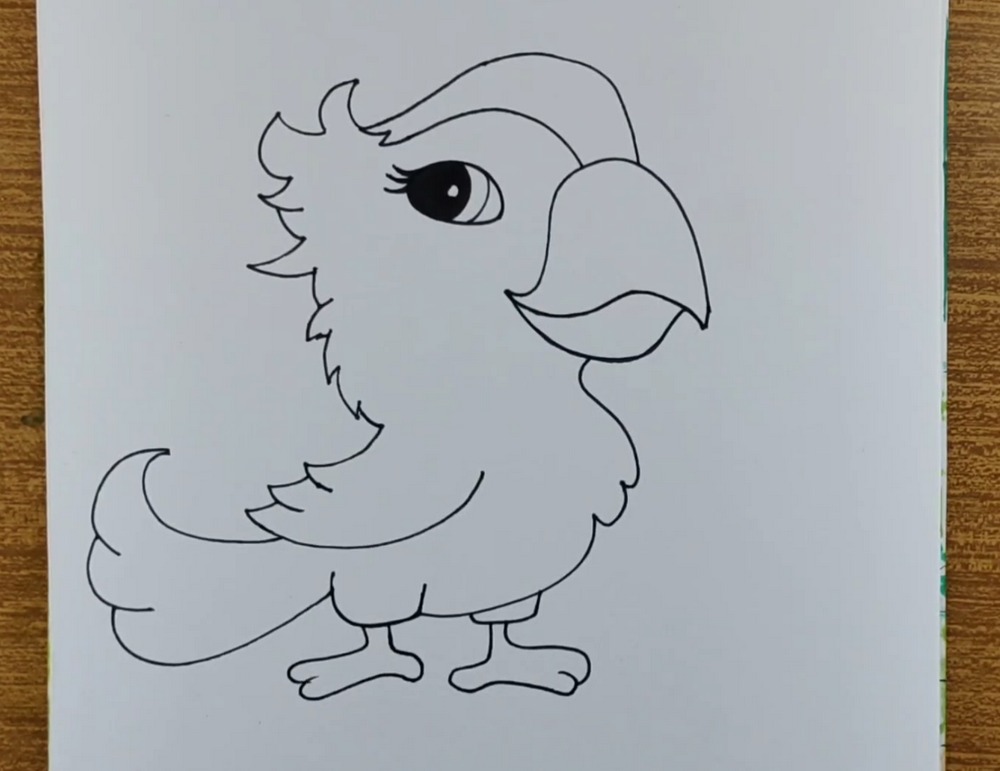
Under the body, draw two stubby legs with tube-like shanks. Add broad, three-toed feet that angle outward so the bird looks balanced. Suggest tiny ankle scales using short lines if you like. Re-trace your outline to strengthen it, and clean any construction marks. You’re ready for color once the ink is completely dry. Keep toes rounded and even for a cartoon look.
Color the Beak and Feet
Block in the beak with a warm orange or red-orange. Shade the upper plate deeper than the lower to show overlap. Color both feet the same hue for harmony. Leave the body white for now; we’ll layer greens next. Keep strokes following the contour so the beak feels rounded and shiny. Reserve a tiny highlight near the tip to suggest shine, nicely.
Green Body Base
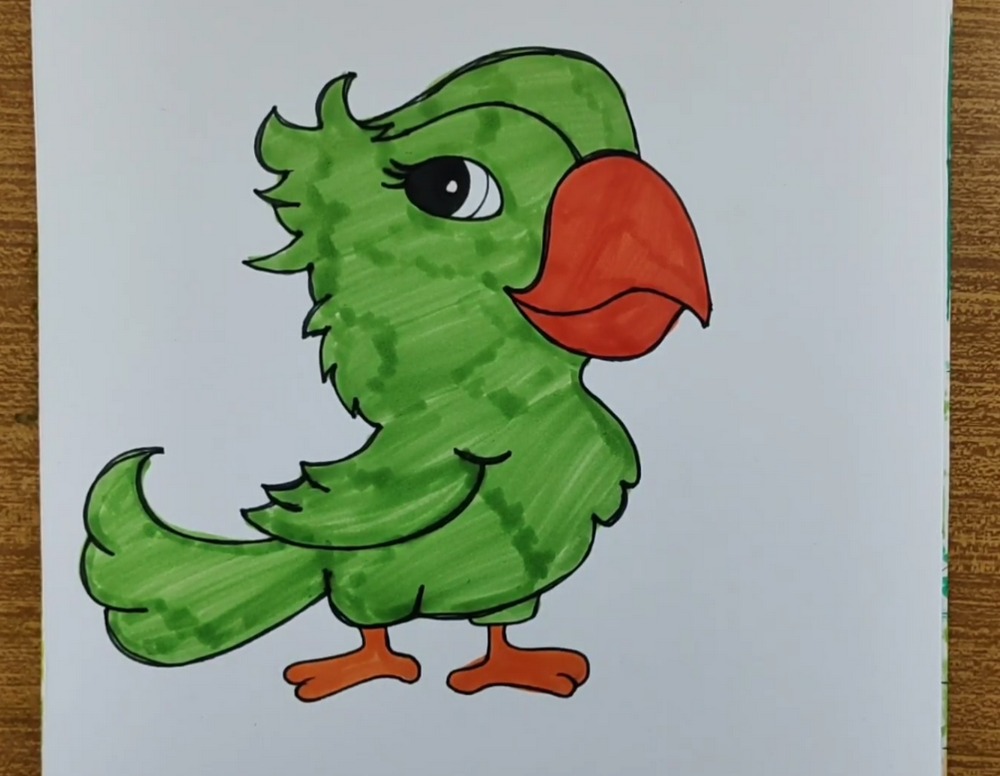
Lay a mid-green across the entire body, wing, and tail using quick, even strokes. Leave the eye and beak untouched. Add darker green stripes following feather directions to suggest texture without detailed rendering. Keep edges just inside the outline to avoid bleeding. The bird suddenly pops to life with bright jungle energy. Deepen shadows where wing meets body and under the belly.
Sketch Bonus Leaves
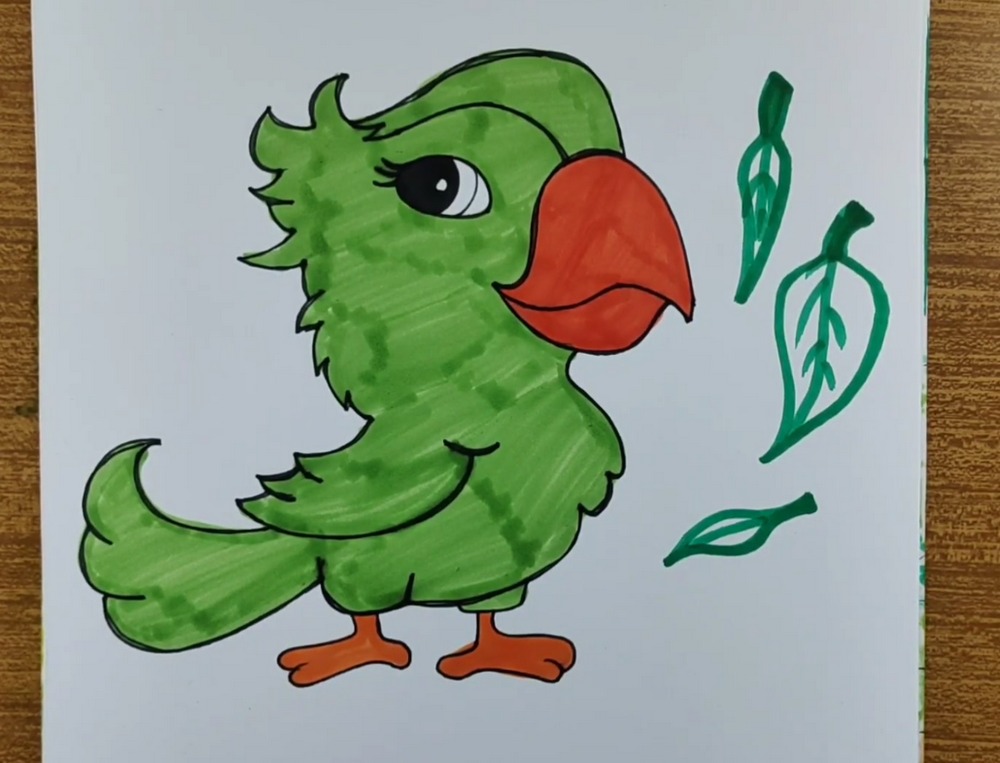
To decorate the scene, draw three simple leaves to the right—one tall, one round, one small. Use a single contour line for each shape, then add a central vein and a few short side veins. Keep them floating so they don’t distract from the parrot. We’ll color them next for a tropical vibe. Space them so the parrot remains the focal point.
Finish Leaves and Final Touches
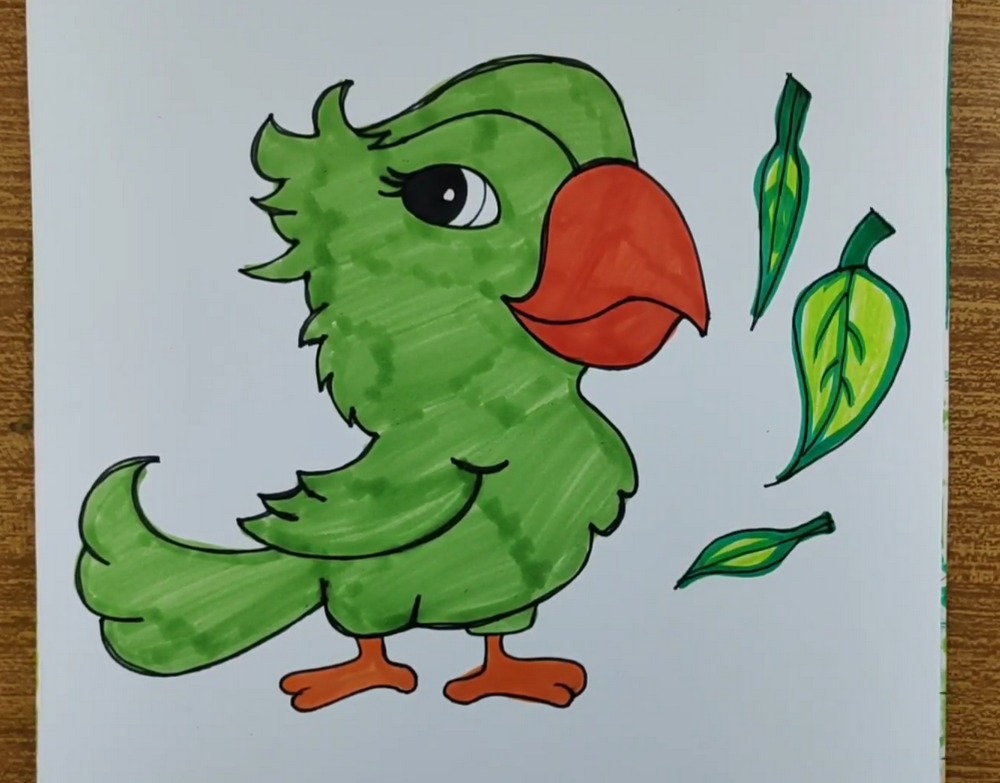
Color the leaves with yellow-green centers and darker green edges, letting the colors blend slightly. Reinforce the parrot’s outline where needed, and add a tiny shadow under the eye for depth. Check overall contrast: vivid beak, rich body, and clean highlights. Your cute parrot is complete and ready to show off. Soften any marker bands with quick passes in the same direction.
Conclusion
You just built an adorable parrot from simple shapes, confident lines, and layered color. If yours looks different, that’s great—personality matters. Try another version with a tilted head, different leaf shapes, or a bluer green. Switch to colored pencils for softer texture, or add a background circle. Keep your strokes light, deliberate, and curved. Most of all, have fun drawing.
A Bonus Tip
Put a tiny reflected highlight along the lower beak edge to boost shine without overworking the area.
FAQs
Q: How long will this take?
A: Most beginners finish in 30–45 minutes; kids may take longer when coloring.
Q: What paper size works best?
A: A4 (8.3×11.7 in) marker paper, 160–200 gsm, prevents bleed-through and keeps colors smooth.
Q: My proportions feel off. How do I fix them?
A: Lightly mark a centerline through the beak and eye, then compare distances left and right.
Q: In what order should I shade?
A: Lay the mid-green first, deepen shadows under the wing and belly, then add darkest accents.
Q: Can I use colored pencils instead of markers?
A: Yes. Start with light layers, burnish gently near highlights, and keep strokes following feather direction.
Q: Common mistakes to avoid?
A: Over-inking early, pressing too hard, and letting greens bleed past the outline. Work slowly and lift often.