
Easy Parrot Drawing For Beginners
Parrots look complex at first glance, but this beginner project breaks the bird into friendly, repeatable shapes. You’ll build a smooth outline, add a perch, place simple leaves, then finish with an easy beak, eye, and feather marks. Finally, you’ll bold the lines and color with markers or pencils. Each step uses gentle curves, short straight segments, and light sketching before inking. Work on A4 (8.3×11.7 in) paper so the silhouette has room to breathe. Keep your strokes relaxed, rotate the page for comfortable angles, and pause to compare distances. By the end, you’ll have a bright, friendly parrot on a branch, great for school projects or cards. We’ll start with one sweeping guide curve for head and back, close the body with a belly line, then anchor everything to a sturdy branch. Simple leaves frame the scene. A small hooked beak and round eye add personality. Short curve dashes suggest feathers. Thicker outlines tidy the silhouette and make coloring easy. Use any green; a red neck ring and orange beak pop against browns. Nicely.
Supplies for This Drawing
- A4 (8.3×11.7 in) smooth drawing paper, ~160–200 gsm
- HB and 2B pencils
- Kneaded eraser and vinyl eraser
- Pencil sharpener
- 0.3 mm and 0.5–0.8 mm fineliners (black)
- Alcohol markers or colored pencils: greens, brown, orange, red, yellow, dark gray
- Ruler (for page borders) and small compass (optional curve guides)
Prepare the Materials
- Clear your workspace and set good side lighting.
- Tape paper edges for a clean border.
- Sharpen pencils; test marks on scrap.
- Place references nearby and zoom to head size.
- Open markers/pencils you’ll use and arrange light-to-dark.
Special Features of This Drawing
- Built from one elegant guide curve
- Friendly proportions with a big, readable silhouette
- Simple leaf framing for context and depth
- Minimal feather texture using short curve dashes
- Bold outline style that welcomes flat or blended color
- Quick color scheme: green body, orange beak, red neck ring
Tutor’s Suggestions
- Start extremely light; darken only after shapes feel right.
- Compare distances: head to belly, belly to tail, tail to branch.
- Keep curves continuous—avoid choppy, pieced lines.
- Thicken shadow-side outlines for instant form.
- Layer color gradually; stop before surfaces look waxy.
- Lift mistakes with a kneaded eraser, not hard rubbing.
- Take two short breaks; fresh eyes catch proportion slips.
Uses
- Classroom warm-up or beginner workshop demo
- Greeting card or mini wall print
- Coloring page for younger artists
- Practice for inking control and smooth curves
- Quick fan art in different parrot colorways
Level of Difficulty
Beginner-friendly — simple curves, clean outline, and easy color blocks.
Basic Guide Curve
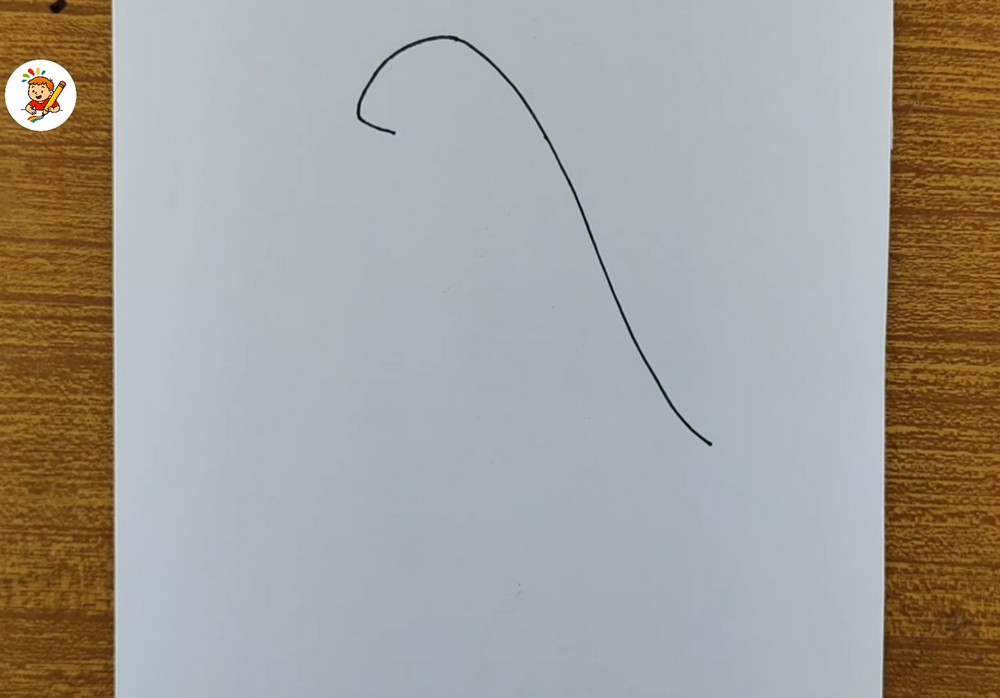
Draw one long, gentle curve that starts near the top left, arches over like a loose hook, then flows down toward the lower right. Keep the line smooth and continuous; this single stroke suggests the top of the head, back, and start of the tail. Use an HB pencil first if you’re unsure, then trace with a fineliner when satisfied. Aim for a relaxed S-like motion rather than a hard corner. Leave space underneath for belly and branch later. Below.
Close the Body Shape
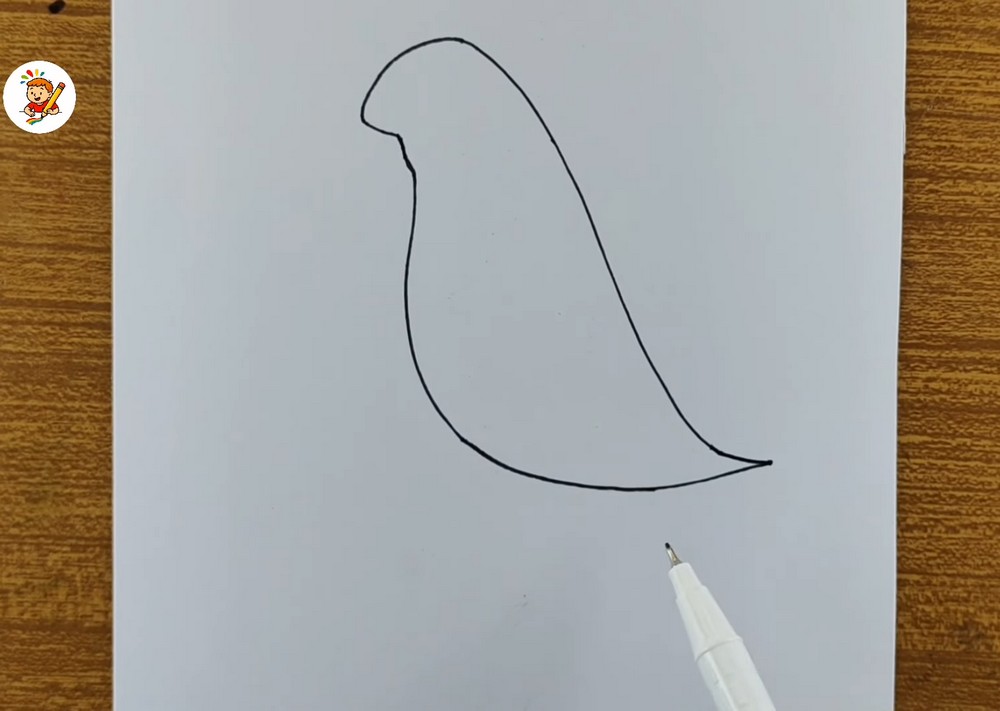
From the top curve, add a small rounded bump for the forehead and beak base, then drop a soft inward notch to suggest the cheek. Continue a smooth belly line downward and forward, curving toward the right until it approaches the tail tip. Connect this belly to the original long curve with a short point, forming a complete body silhouette. Check proportions: head small, body larger, tail tapering. Erase stray guides and keep the outer shape clean; details sit well.
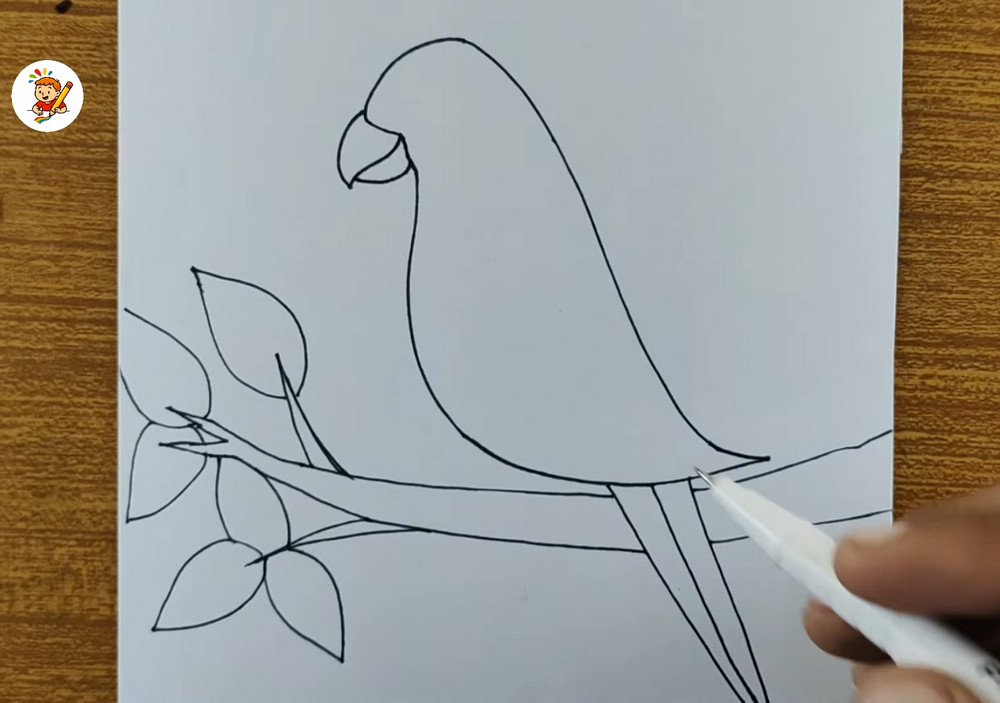
Add Branch and Tail
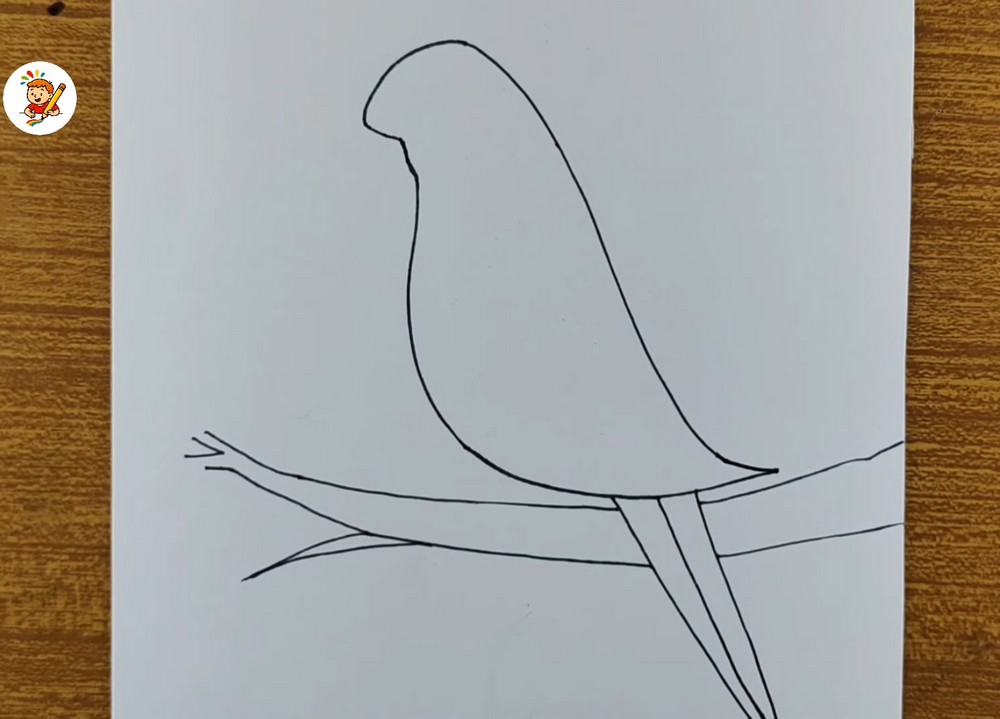
Sketch a horizontal branch beneath the parrot, letting it pass under the belly and extend on both sides. Add a thinner supporting twig crossing behind for depth. From the bird’s lower body, draw two long, narrow tail feathers pointing down and right, slightly overlapping. Keep them parallel with subtle tapering toward the tips. Add a small wedge near the body to hint at layered tail coverts. Make the belly touch the wood so the bird looks seated, not floating. Firmly.
Place Simple Leaves
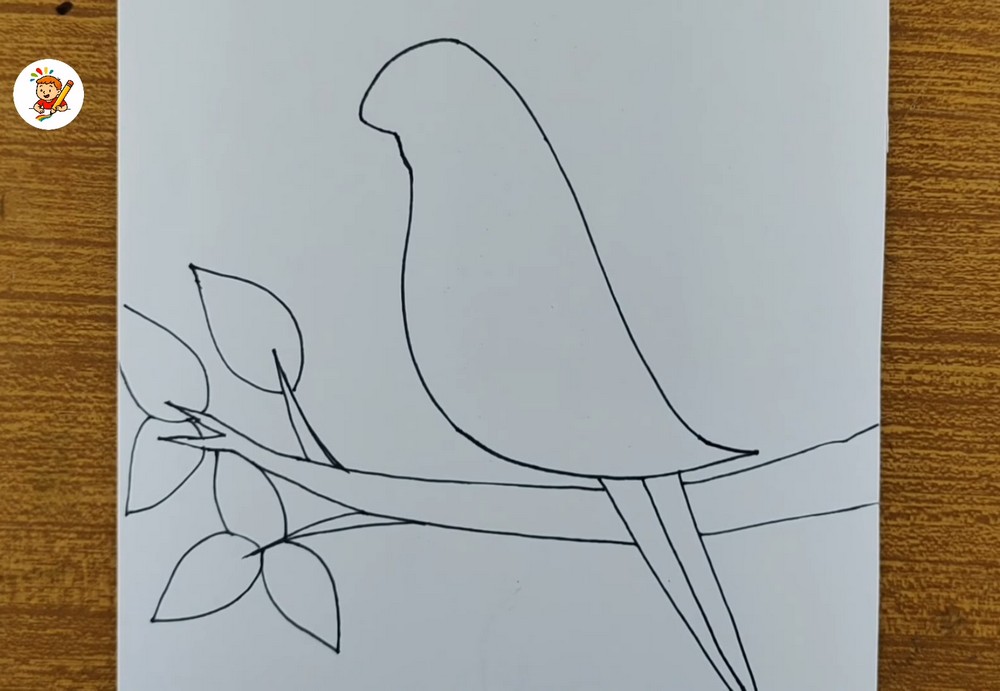
On the left side, add simple leaf shapes to decorate the branch. Use pointed ovals and pair a few along the twigs, varying sizes to keep it natural. Split each leaf with a single vein line from base to tip. Let one leaf overlap the branch slightly to create depth. Keep outlines light at first, then retrace confidently. The leaves frame the parrot and guide the viewer’s eye into the drawing while also giving nice spaces for later color blends.
Build the Beak and Neck Ring
Return to the head and build the beak. From the forehead bump, curve outward into a short upper hook, then dip back to meet the cheek. Add a smaller lower beak that tucks underneath. Keep both parts rounded, not sharp, for a friendly look. Trace a border line at the neck to suggest a ring marking later. Check the beak’s size: one third of the head height works well. Clean the cheek notch so the beak joins smoothly without gaps.
Eye and Feather Hints
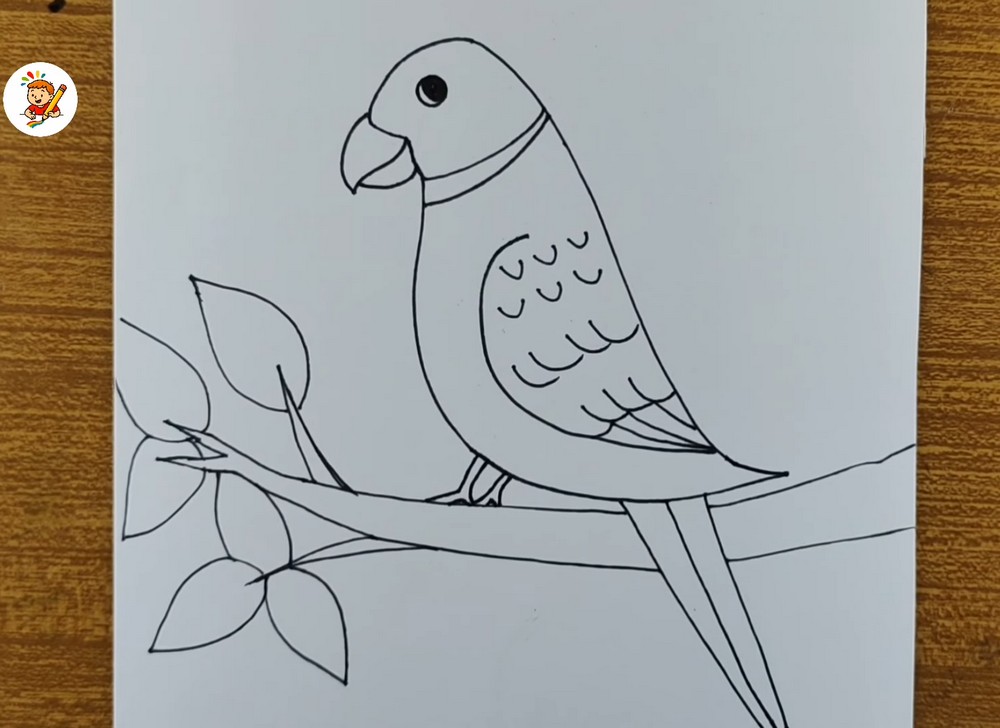
Place the eye slightly above the cheek notch: a small circle with a tiny highlight left uncolored. Outline a thin eyelid line on top for expression. Now suggest feathers with short curved dashes along the chest and shoulder, following the body’s flow. Add a scalloped line where the wing overlays the body, but keep it minimal. On the tail, draw a few faint lengthwise lines to hint at texture. Everything should stay simple and readable for easy coloring later. Too.
Ink and Thicken Outlines
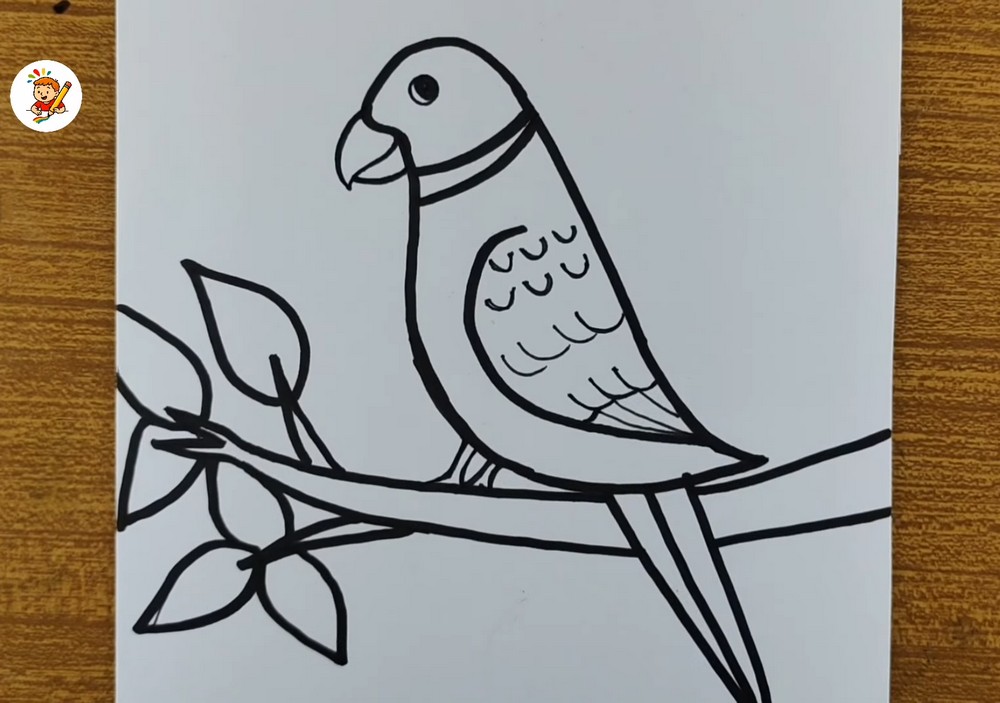
Switch to a 0.5–0.8 mm fineliner. Carefully ink the outer silhouette of the parrot, then the branch and leaves. Thicken the lower edges slightly to suggest weight and light coming from above. Keep interior details lighter and thinner so the face and feathers don’t overpower the outline. Let the ink dry, then erase all pencil lines gently with a kneaded eraser. Check for gaps and close them; clean, connected shapes will make the later coloring fast and tidy. And enjoyable.
Lay Base Colors
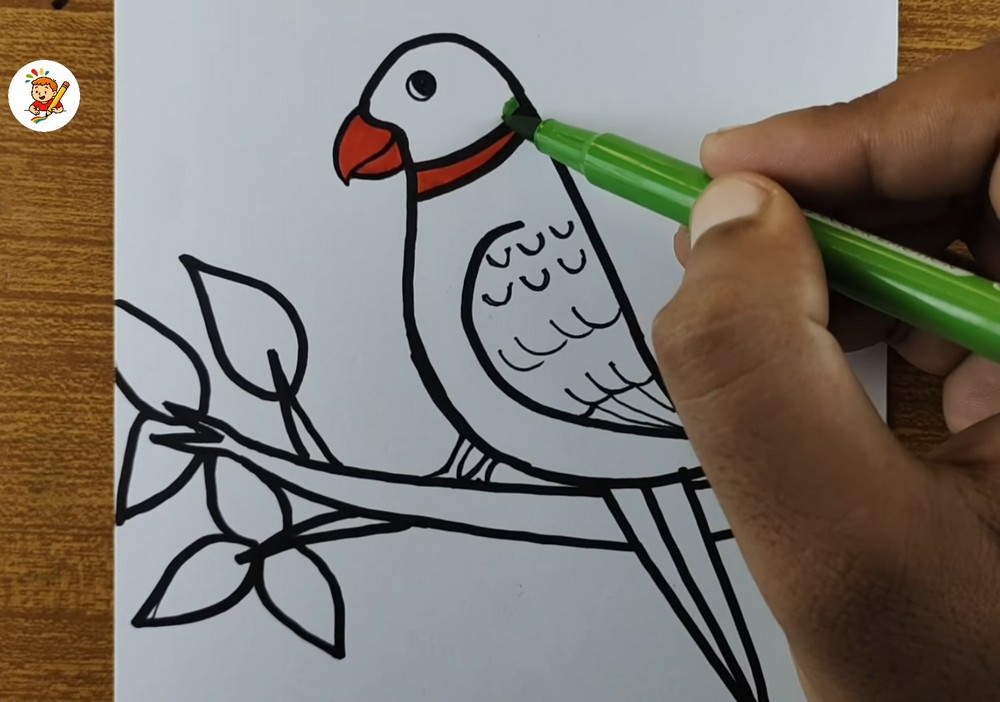
Begin with base colors. Lay a smooth orange over the beak, leaving the highlight white. Add a thin red ring line at the neck. Block the body with a light green, keeping strokes in the direction of feathers. Color the branch with a soft brown, staying inside the inked edges. Fill leaves with mid-green. If using markers, work light to dark to avoid streaks. If using pencils, keep pressure gentle at first so you can layer later without waxy buildup.
Shade and Finish
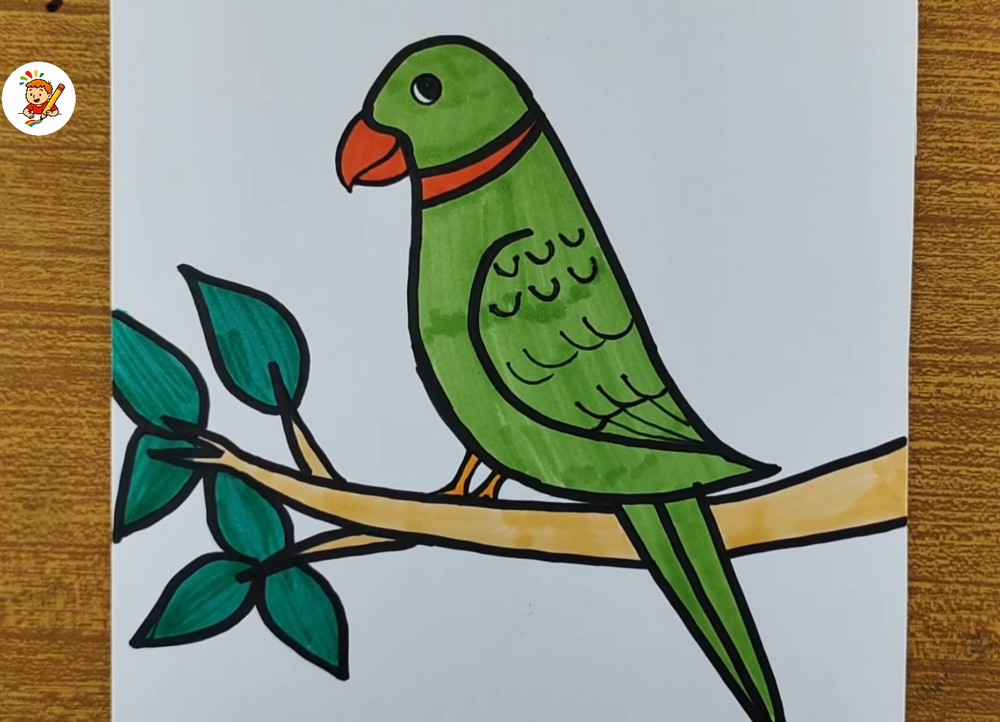
Deepen values. Glaze a darker green under the belly, beneath the wing line, and along the lower tail, leaving the top edges lighter. Warm the beak’s underside with a slightly deeper orange and add a tiny shadow where it meets the face. Darken the branch’s underside and near leaf overlaps for depth. Add a final crisp outline pass to fix any fuzzy edges. Step back, compare shapes, and balance contrasts until the parrot looks bright, friendly, and complete. And lively.
Conclusion
You just turned a few curves and simple shapes into a cheerful parrot with character. That’s the power of building from big forms, then adding small, confident details. Revisit any step and try a new angle, tail length, or leaf arrangement to make fresh versions quickly. Change colors for different species, or add a sky wash behind the branch. Most of all, keep your lines relaxed and your layers light. Practice while flow is warm.
A Bonus Tip
Angle your paper so the main back curve becomes a natural wrist motion—your line will look smoother instantly.
FAQs
Q: How long will this take?
A: Most beginners finish in 40–60 minutes, including coloring.
Q: What paper size works best?
A: A4 is perfect; go larger if you want broader color blends.
Q: My beak looks too big. What do I do?
A: Trim from the tip and re-round the curve; keep it about one third of head height.
Q: Should I shade before or after outlining?
A: Ink first, erase pencils, then shade; it keeps edges crisp.
Q: Markers or pencils?
A: Either works. Markers give flat, bright areas; pencils blend softly.
Q: How do I keep greens lively?
A: Leave small highlights, layer light to dark, and add a hint of yellow near top edges.


