
Boy and Girl with a Broken Heart Drawings
Draw a dramatic broken heart that holds two quiet profiles: a girl on the left, a boy on the right. The crack between them forms the space for their faces, so the design stays simple yet powerful. We’ll block a zigzag split, wrap a large heart around it, and carve clean silhouettes from smooth curves. Next, add hair shapes, closed eyes, and small tears for emotion. Finally, shade edges softly to make the figures feel carved into the heart. This project suits graphite, colored pencil, or ink. Work lightly early, then darken only the final lines. Keep tissues handy for gentle blending and crisp highlights. Use these steps as a template for any expression—sadness, longing, or peace—by changing eyelids, hair direction, or the sharpness of the crack. Shape proportions carefully.
Supplies for This Drawing
- A4 (8.3×11.7 in) 180–220 gsm drawing paper
- HB pencil for layout
- 2B and 4B graphite pencils for shading
- Kneaded eraser and vinyl eraser
- Blending stump or tissue
- Sharpener and soft brush
- Optional fineliner for crisp edges
- Optional workable fixative
Prepare the Materials
- Clear desk and set soft, even lighting.
- Tape paper edges for a clean border.
- Sharpen HB/2B/4B; knead the eraser.
- Keep tissue and stump beside your hand.
- Test gradients on scrap.
- Place reference steps within view.
Special Features of This Drawing
- Heart silhouette as a frame and symbol
- Split crack doubles as spacing guide
- Two mirrored profiles created from simple S-curves
- Clean glow borders for readability
- Expressive tears with glossy highlights
- Soft edge shading that adds volume
- Works in graphite, ink, or colored pencil
Tutor’s Suggestions
- Sketch lightly; save darkest lines for last.
- Keep a thin border of untouched paper along silhouettes.
- Shade in layers, blending only after establishing forms.
- Use long strokes for hair; avoid scribbling.
- Compare cross-heights: eyes and mouths on both sides.
- Lift highlights with a kneaded eraser tip.
- Step back often to check symmetry and spacing.
Uses
- Expressive sketchbook page
- Card or note illustration
- Poster or print with a quote
- Cover art concept for a song or poem
- Tattoo-style linework practice
- Classroom lesson on silhouettes and symbols
Level of Difficulty
Beginner-friendly — simple shapes, slow shading, and clear symbolism.
Crack Spine

Place the drawing in the center. With HB, draw a vertical zigzag made of three gentle angles. Shadow a parallel zigzag beside it to form a narrow crack channel. Keep both lines slightly tapering toward the bottom for drama. Work with light pressure so later erasing is clean. This spine sets the spacing between the two faces and guides the heart shape.
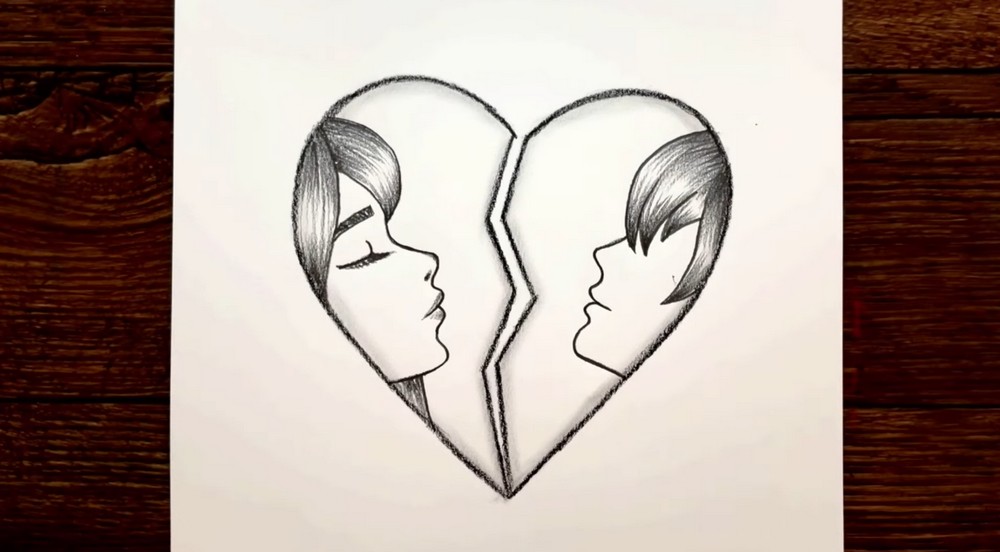
Heart Outline
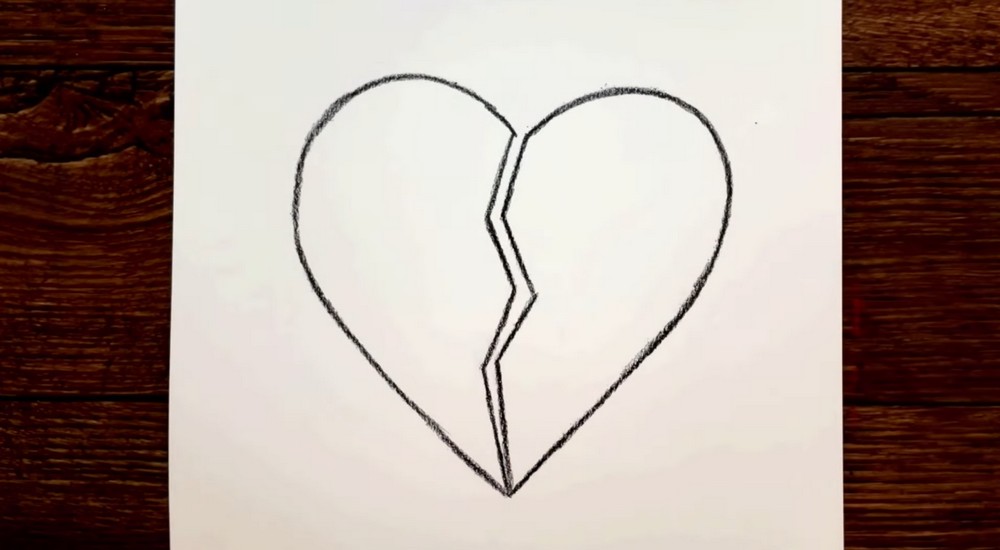
Wrap the broken outline. Starting above the crack, arc a large curve leftward to create the first lobe, then sweep down to a sharp bottom point. Mirror a matching arc on the right, meeting at the same point. Keep edges even but not stiff. Let the crack lines float inside. Soften any bumps with tiny passes to keep the symmetry readable overall.
Left Profile Map
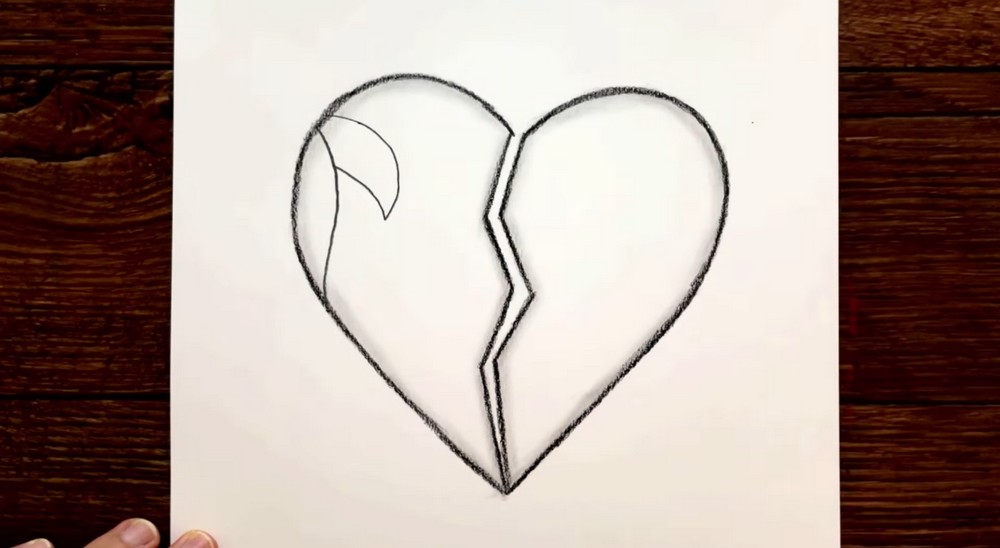
Lightly map the left profile. From near the top, drop a graceful S for forehead, nose, lips, and chin, ending above the heart point. Add a neck line down to the point. Sketch a curved hairline sweeping from the rim to the forehead. Keep everything inside the heart border, leaving a slim glow edge along the outline for later shading and contrast.
Hair and Face Form

Refine the girl’s features. Sharpen the nasal bridge and lip shapes with smooth, unbroken curves. Close the eye with a small almond and resting lid. Block her hair mass against the rim using long strokes that follow the curve. Darken near the rim and lighten toward the face, keeping a clean highlight edge. The broken channel separates her from the right half.
Eyebrow and Soft Modeling

Add expression. Sketch a tapered eyebrow parallel to the forehead curve, thicker toward the center, lighter at the tail. Draw a closed eyelid with a few short lashes. Gently model the cheek and under-lip with faint gradients; avoid heavy outlines along the silhouette. Keep a thin unshaded sliver between face and heart edge so the profile glows. Recheck proportions before moving on.
Right Profile Setup
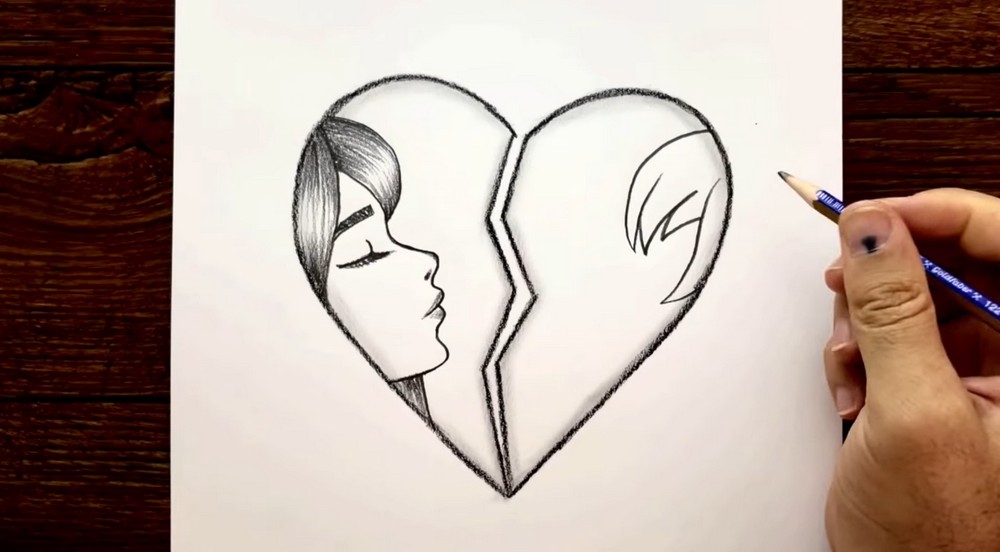
Begin the right profile. Inside the opposite lobe, sketch side-swept bangs that arc downward, then hook back. Keep the hair mass floated away from the rim to preserve a bright border. Indicate the forehead and nose placement with two light guide dashes. Make sure the features will mirror the girl’s height so eyes and mouths sit on similar levels across the crack.
Carve the Boy
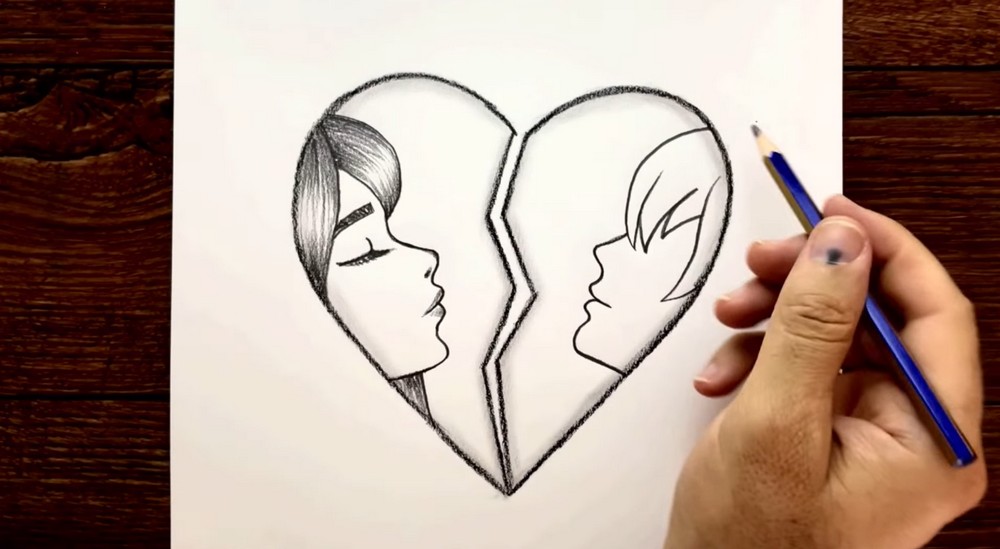
Carve the boy’s silhouette. From the hair edge, sweep a smooth line for forehead, nose, lips, and chin, echoing the girl’s rhythm in reverse. Keep the shapes simple and soft. Add a short neck tapering toward the heart’s point. Check that the mouth corners align roughly across the gap. Clean stray marks so the negative space between faces reads crisp and balanced.
Shade Hair and Crack
Shade the boy’s hair with directional strokes following the curve, darkest near the part and rim, lighter toward the face. Add a subtle eyelid line and tiny lower-lid shadow; keep the eye closed for calm. Maintain the bright border along the heart edge. Deepen the crack channel slightly to push depth, leaving its inner highlight untouched for contrast and emotional visual focus.
Add Tears
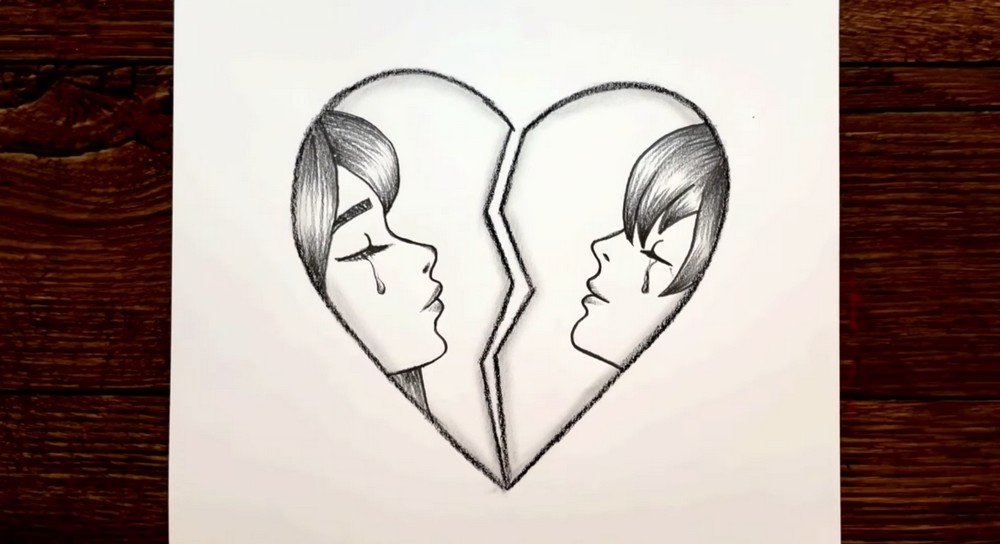
Draw a single tear under each closed eye. Use a teardrop shape with a tiny highlight near the top and a tapered tail below. Shade very lightly so they look glossy, not heavy. Add a soft cheek shadow beneath each tear to suggest moisture. Keep surrounding tones controlled; if everything is dark, the tears vanish. Reserve clean paper for sparkle and clarity.
Edge Glow and Finish
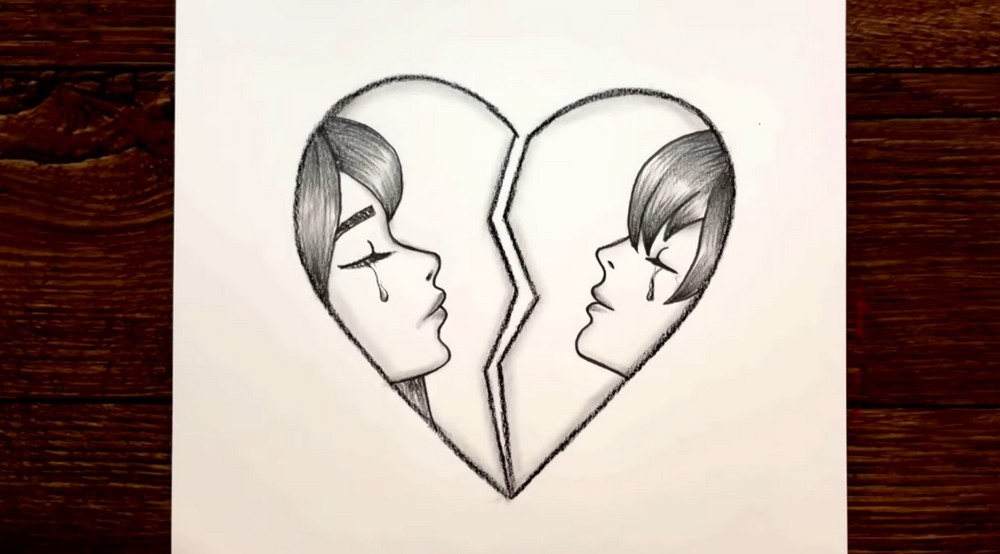
Finish with edge shading around the heart. Smudge a thin graphite halo along the outer contour to give the emblem volume while keeping the center bright. Reinforce a few silhouette lines and erase crumbs. Compare both profiles, nudging curves until the gap feels evenly spaced top to bottom. Sign small beneath the point and spray fixative if available for long-lasting smudge protection.
Conclusion
Strong shapes and soft shading sell the emotion here. You learned to build a heart, split it, and sculpt two profiles from simple curves. The bright borders and crack highlight keep everything readable. Try alternate hairstyles, open eyes, or a gentler fracture to change the mood. Colored pencils, ink, or watercolor glazes also work beautifully over clean graphite foundations too.
A Bonus Tip
Angle your light so it grazes the page; raking light reveals smudges and helps you keep the glow borders clean.
FAQs
Q: How long will this take?
A: About 30–50 minutes, depending on how much blending you do.
Q: What paper size is best?
A: A4 (8.3×11.7 in) or Letter; heavier paper blends more smoothly.
Q: My heart looks uneven. What helps?
A: Fold a scrap to make a quick half-heart template, trace one side, flip, and mirror.
Q: How do I keep the crack clean?
A: Shade beside it, not inside it. Leave a thin highlight along one edge.
Q: Can I color it?
A: Yes—add soft pinks or cool blues inside the heart and keep faces neutral for contrast.


