
Cute Cat and Mug Drawing
Bring this sweet cat-in-a-mug scene to life with simple shapes and clean lines. We’ll begin with a rounded head, add perky ears, and draw a soft rim so the cat looks like it’s peeking from warm cocoa. After that, we’ll block in the mug, handle, and a striped wafer stick for charm. No tricky anatomy—just curves, ovals, and gentle shading. Work lightly, refine, then outline confidently. Finish with soft graphite texture or a few pops of color. It’s perfect for beginners, classrooms, or a calm drawing break. Grab a smooth A4 sheet, sharpen your pencils, and let’s sketch step by step. You’ll learn depth with a clean ellipse, centered features, and shading that makes the cup round. Rotate the paper if needed. Ready for warm-up that gets smiles? Let’s begin.
Supplies for This Drawing
- HB and 2B pencils (graphite)
- 0.3 and 0.5 fineliners (waterproof, black)
- Kneaded eraser and vinyl eraser
- A4 (8.3×11.7 in) smooth drawing paper, 160–200 gsm
- Sharpener
- Tissue or blending stump (optional)
- Ruler (for quick horizontal checks)
- Colored pencils or alcohol markers (optional)
Prepare the Materials
- Clear your desk and angle the paper slightly.
- Set good lighting from the side.
- Tape paper edges to reduce buckling.
- Sharpen pencils and test pressure on scrap.
- Keep references visible and upright.
- Place erasers and fineliners within easy reach.
Special Features of This Drawing
- Cute peeking pose with simple, rounded forms
- Clean ellipse rim creating instant depth
- Balanced composition between cat, mug, and wafer
- Gentle graphite gradients for ceramic shine
- Line-weight contrast for a sticker-like finish
- Optional color accents that remain low stress
Tutor’s Suggestions
- Start ultra light; build lines gradually.
- Compare left/right distances often for symmetry.
- Use your whole arm to draw smooth ellipses.
- Erase in taps, not swipes, to avoid smudges.
- Build shading in thin layers; don’t rush.
- Thicken only the outer contour for clarity.
- Let ink dry completely before erasing.
Uses
- Classroom practice or warm-up sketch
- Cute postcard or greeting card art
- Social media post or sticker design
- Small wall print or mini poster
- Coloring page for kids’ activities
- Relaxing daily sketchbook prompt
Level of Difficulty
Beginner-friendly — basic shapes, gentle shading, and forgiving proportions.
Head and Ears Outline
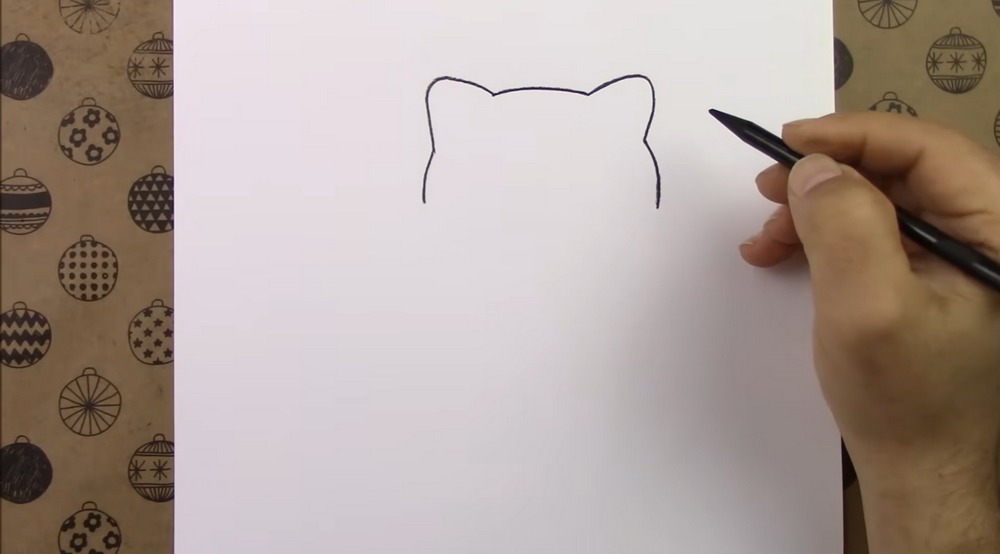
Lightly sketch a wide curve for the top of the head. Add two rounded triangles for ears, keeping them slightly tilted inward. Now draw short, gentle curves dropping from each ear to suggest the cheeks. Keep lines soft for now, then trace with a darker pencil once the silhouette looks even. Leave room below for the rim and cup to fit underneath.
Add Inner Ears and Rim
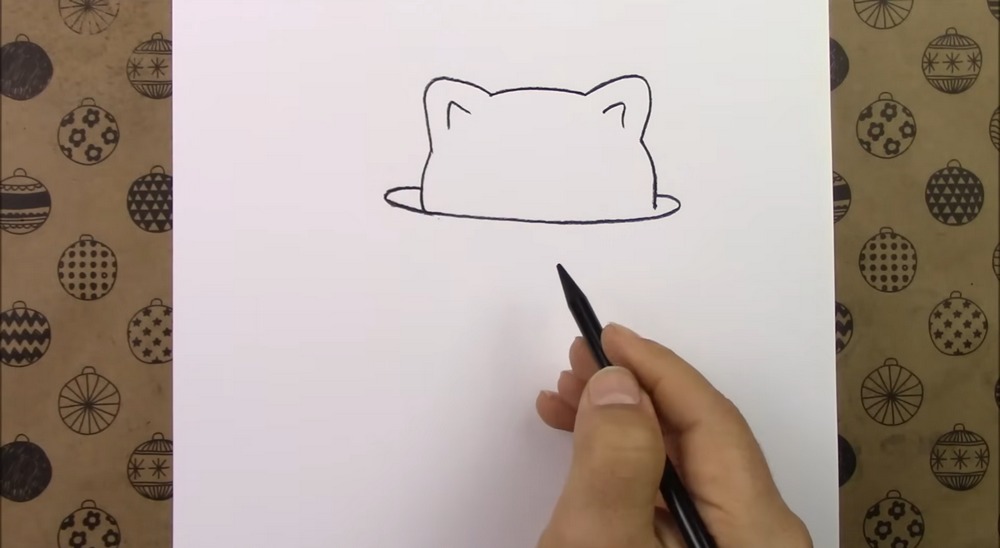
Inside each ear, draw a smaller curved triangle to show the inner ear fluff. Under the cheeks, sketch a shallow horizontal ellipse. This rim sells the idea that the cat is sitting inside something. Tuck the head’s lower line slightly behind the ellipse edges so it feels nested. Keep the ellipse smooth by moving your whole arm, not just your wrist, gently.
Face Guides and Features
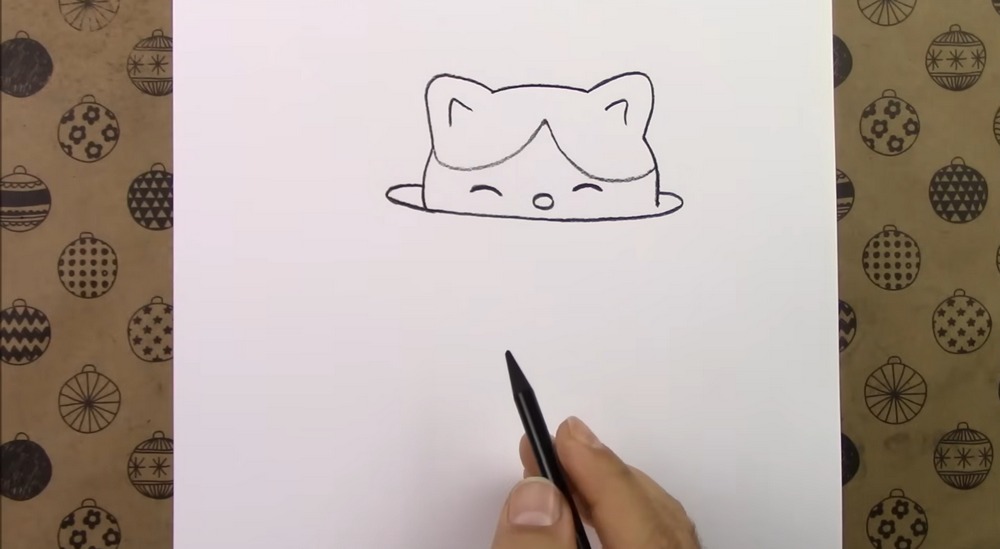
Lightly add a soft inverted V shape for the fringe between the ears. Place two tiny curved lines for closed eyes, spaced evenly from the center. Add a small oval nose right between them. Mark a gentle shadow line across the face where it meets the rim. Simplicity keeps the expression cute, so avoid heavy lines and keep everything balanced throughout nicely.
Place the Cup Walls

From the rim’s left edge, drop a straight, slightly leaning vertical line to begin the mug. Mirror it on the right, leaving space at the bottom for a rounded base. Keep the walls parallel so the cup looks sturdy and tall. Let the cat overlap the rim convincingly by erasing any lines that should sit behind its cheek and head shapes cleanly.
Add the Handle

On the left side, draw a big C-shape that attaches near the rim and midsection to form the handle. Inside it, add a smaller C to create thickness. Keep both curves smooth, like two nested tracks. Handles look best when their top and bottom attachment points align horizontally. Adjust until the shape feels comfortable to grip, then darken the outline confidently now.
Complete Cup Outline
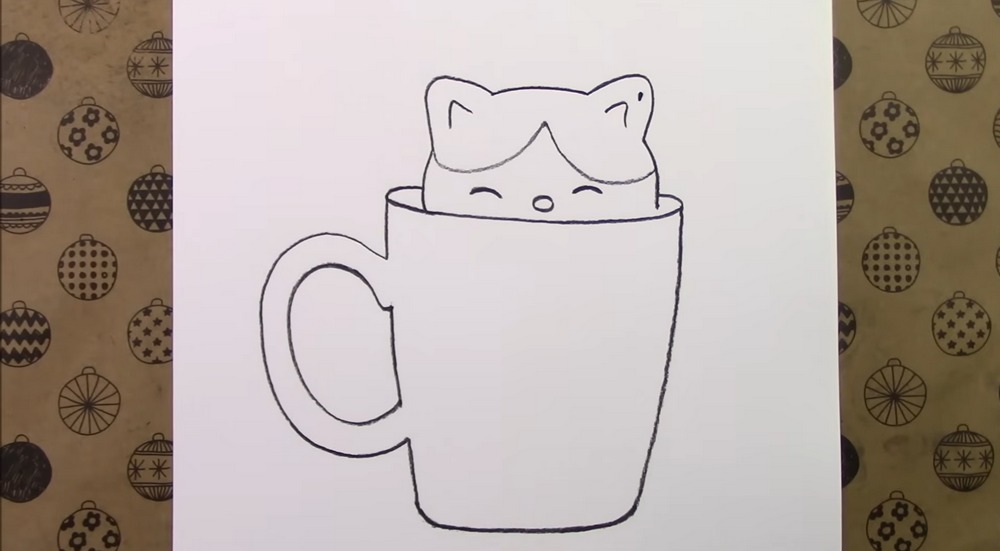
Close the mug by connecting the two wall lines with a soft U-curve to make the base. Keep it slightly flattened so the cup sits believably. Add a tiny lip thickness inside the rim if you like. Check symmetry: the left wall should taper like the right. Nudge edges with an eraser until the silhouette feels balanced and clean from all angles.
Draw the Wafer Stick
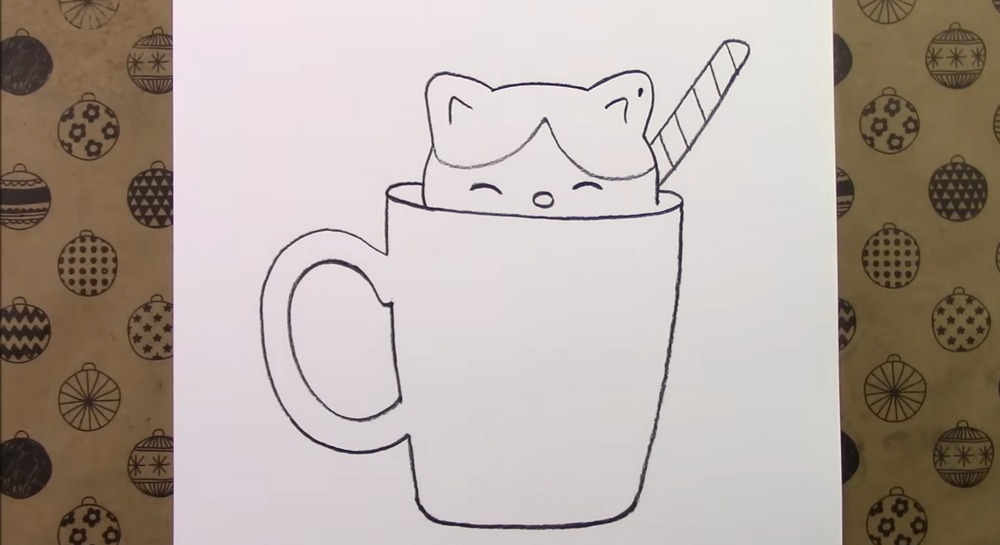
Behind the cat, sketch a tall, narrow cylinder leaning slightly to the right. Cap the top with an ellipse, and round the bottom where it meets the rim. Add diagonal bands for chocolate stripes, keeping spacing even as they wrap the form. This prop adds height and charm. Keep lines lighter than the cat so it reads as a background detail, pleasantly.
Refine the Cute Face
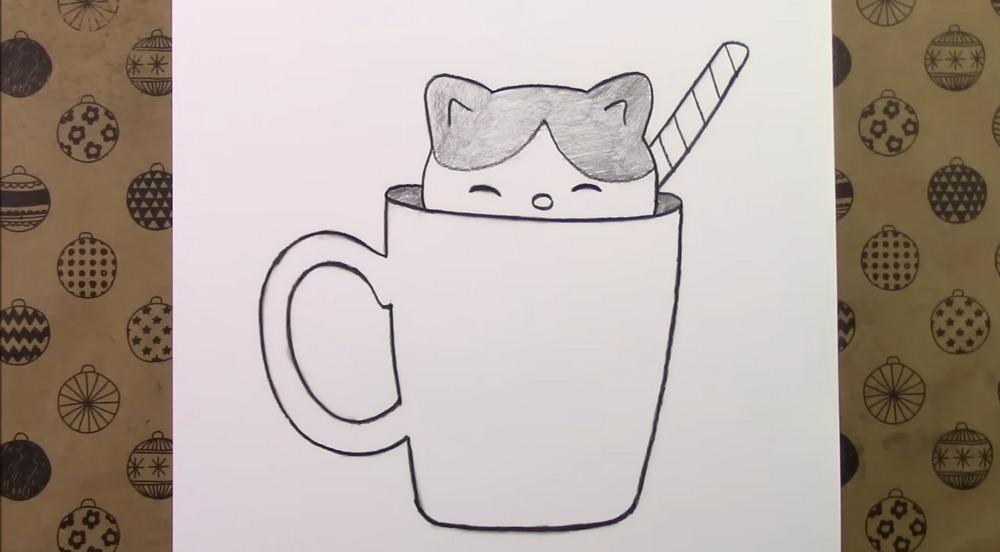
Deepen the closed eyes with smooth arcs and add short upward lashes at the ends. Shade the small nose and add a tiny highlight. Place three short whiskers on each cheek, fanning outward. Add gentle blush ovals if coloring later. Keep everything symmetrical by comparing distances to the center line. If something feels off, erase lightly and redraw smaller adjustments slowly, patiently.
Shade the Cup Gently
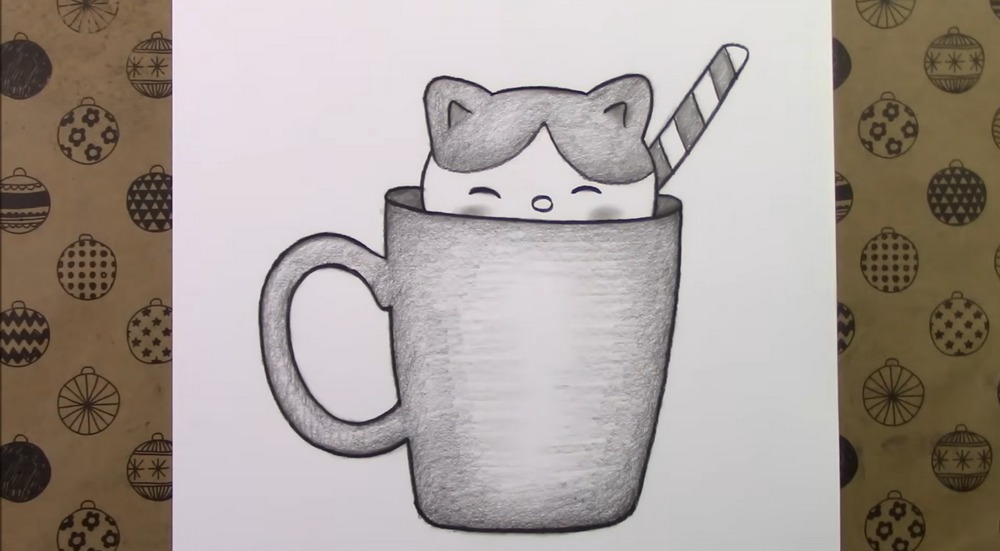
Using HB, build a light gradient from the mug’s sides toward the center to suggest roundness. Keep strokes following the curve. Deepen the cast shadow just beneath the rim where the cat blocks light. Add a faint shadow under the cup to anchor it. Blend lightly with tissue if desired, but keep edges clean so the drawing stays crisp and charming overall.
Ink and Add Accents
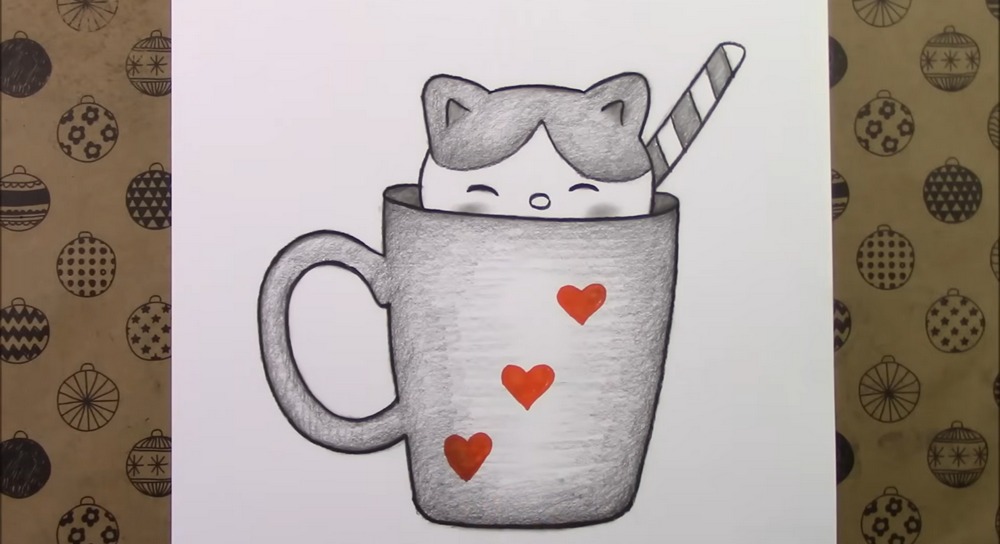
Trace final lines with a 0.3 fineliner, lifting on curves to keep them lively. Thicken outer contours slightly for a sticker look. Add soft pink to ears and cheeks, warm browns on the wafer, and a gentle cup color. Erase pencil when ink is dry. Finish with tiny highlights on ceramic to suggest gloss, and sign your adorable mug cat proudly, today.
Conclusion
You just turned simple shapes into a cozy, heartwarming scene. The peeking cat, clean ellipse, and gentle shading sell depth without stress. Keep practicing the rim and handle—they’re quick wins that boost realism fast. Try different mug colors, sprinkles, or little steam lines for mood. Most of all, keep strokes light, compare often, and enjoy the calm process, always, friend.
A Bonus Tip
Spin the paper slightly while drawing the ellipse; your shoulder follows the curve more naturally and keeps the rim smooth.
FAQs
Q: How long will this take?
A: Most beginners finish in 35–55 minutes, depending on shading and color.
Q: What paper size works best?
A: A4 or Letter is ideal; heavier 160–200 gsm paper resists erasing marks.
Q: My ellipse looks wobbly—help?
A: Lightly ghost the motion several times, draw with your whole arm, then trace the cleanest pass.
Q: Should I shade before or after inking?
A: Shade lightly first to plan values, then ink. Deepen graphite after ink dries if needed.
Q: Can I use markers instead of pencils?
A: Yes—ink first with waterproof liners, then add flat marker colors and finish with colored-pencil details.


