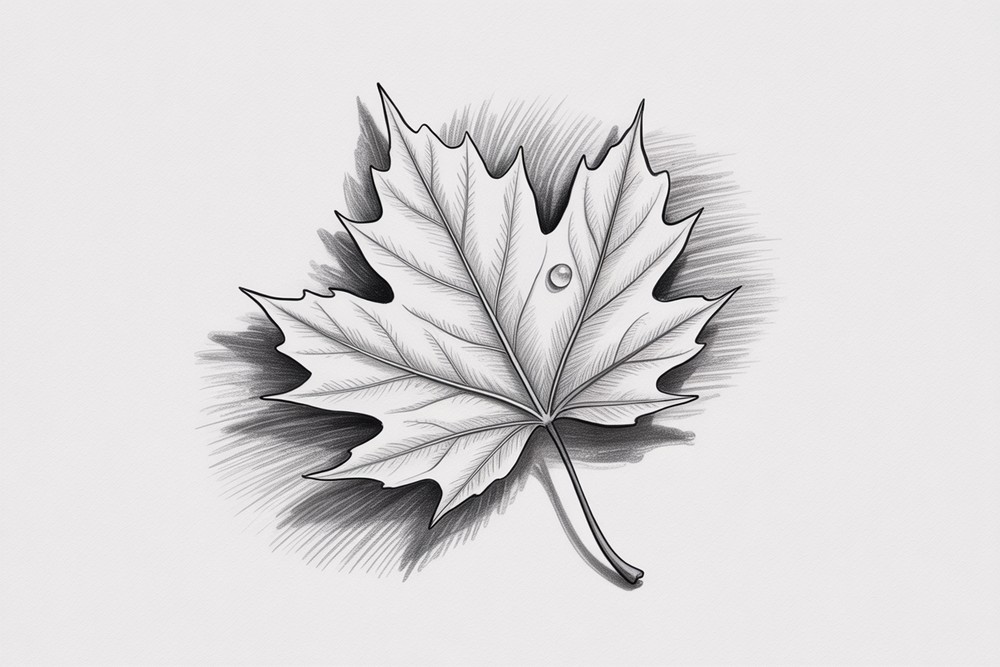
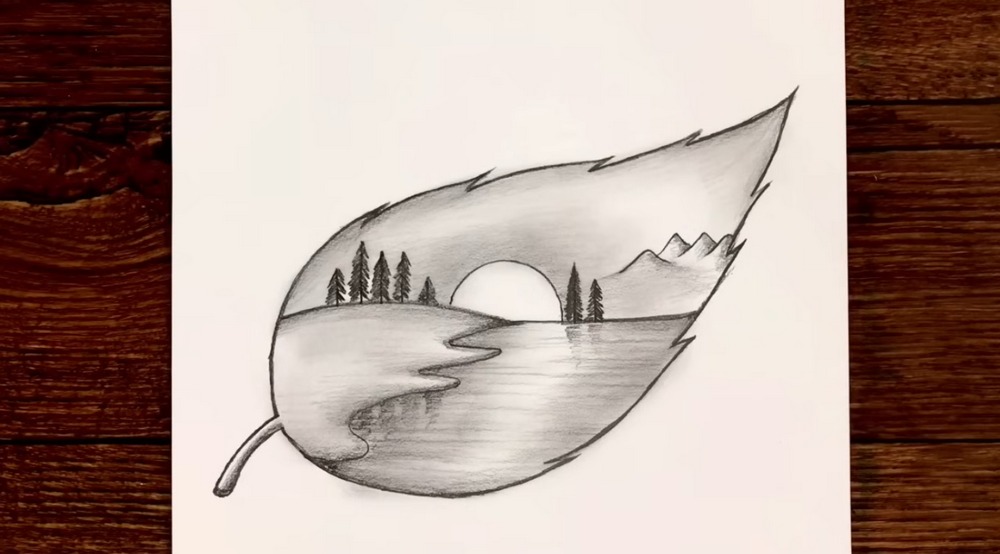
Easy Landscape Drawing
Today you’ll draw a calm sunset landscape tucked inside a simple leaf. It looks fancy, yet it’s beginner-friendly and forgiving. We’ll sketch smooth curves, add a zigzag edge, then place a shoreline, trees, mountains, and soft shading. You only need a pencil, eraser, and paper. A4 (8.3×11.7 in) or 9×12 in works well. Keep strokes light, then build values slowly. We’ll focus on clean outlines, gentle gradients, and crisp water reflections. You’ll practice pressure control, edge contrast, and tidy blending. Take your time and compare proportions often. By the end, you’ll have a modern piece ready for framing or gifting. The project fits into one sitting, and you can customize the scene with trees or clouds. Use light guidelines, erase stray marks cleanly, and keep your hand off shaded areas.
Supplies for This Drawing
- HB and 2B pencils (plus optional 4B for deep shadows)
- Plastic eraser and kneaded eraser
- Blending stump or tissue
- A4 (8.3×11.7 in) or 9×12 in paper, ~160–200 gsm
- Optional black fineliner (0.3–0.5 mm) for the outline
- Sharpener (handheld or rotary)
- Ruler (for a light horizon guide, optional)
Prepare the Materials
- Clear your workspace and set good front-side lighting.
- Tape paper edges for a clean border if desired.
- Sharpen pencils; keep HB for layout, 2B/4B for shading.
- Make a small value scale on scrap paper.
- Place reference images where visible and steady your sketchbook.
Special Features of This Drawing
- Nature scene nested inside a single bold silhouette
- Serrated leaf edges for character and rhythm
- Soft graphite gradients that read as sky and terrain
- Simple geometric trees and mountains for quick depth
- Reflective water built from short horizontal strokes
- High contrast focal area around the sun
- Clean, modern outline suitable for inking
Tutor’s Suggestions
- Sketch lightly first; commit to darker lines last.
- Use the side of the lead for smooth shading.
- Keep your eraser tidy to avoid dirty smears.
- Build values in layers rather than pressing hard.
- Compare left/right edges so the leaf stays balanced.
- Rest your hand often; smudges flatten contrast.
- Step back to judge values before adding details.
Uses
- Classroom practice on gradients and silhouettes
- Minimalist wall art or framed gift
- Journal or sketchbook cover motif
- Greeting card, bookmark, or sticker idea
- Tattoo concept or logo sketch
- Relaxing warm-up before larger landscapes
Level of Difficulty
Beginner-friendly — simple shapes, limited details, and forgiving shading.
Curved Top Edge
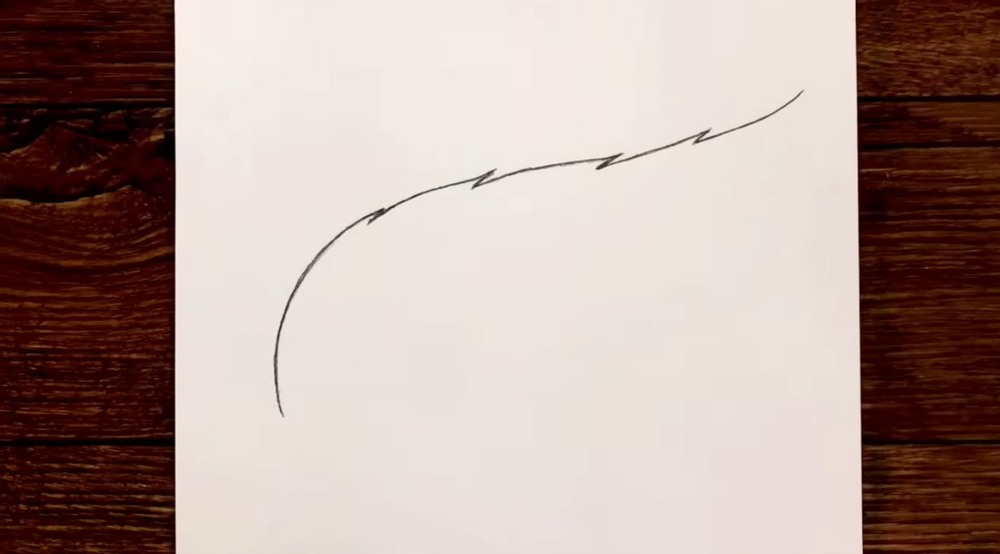
Start at the left and sweep a long, smooth curve upward to the right. Break the line a few times with small lightning-style notches to suggest a serrated leaf edge. Keep your wrist loose and draw lightly, so adjustments are easy. Aim for a gentle rise that ends near the upper right corner, tapering to a fine point. Leave a clean margin.
Stem and Lower Curve
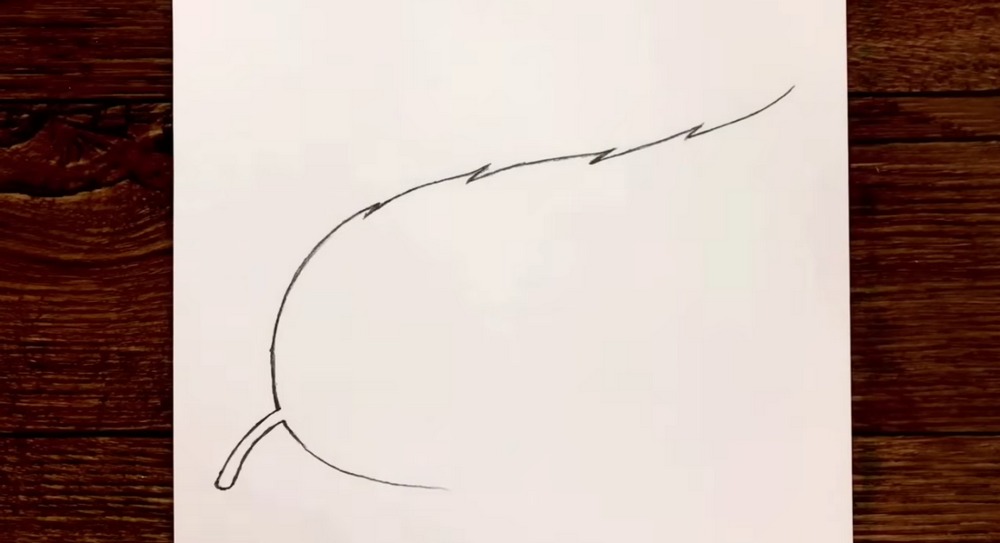
Return to the left end of the line. Draw a short bent stem that curves downward and right, ending bluntly. From the stem’s tip, sweep a long undercurve toward the right, mirroring the top’s flow. Keep it roomy, since the landscape will sit inside. Leave gaps for tiny notches so both edges feel slightly toothed and natural. Keep your pressure very light.
Close the Leaf Shape
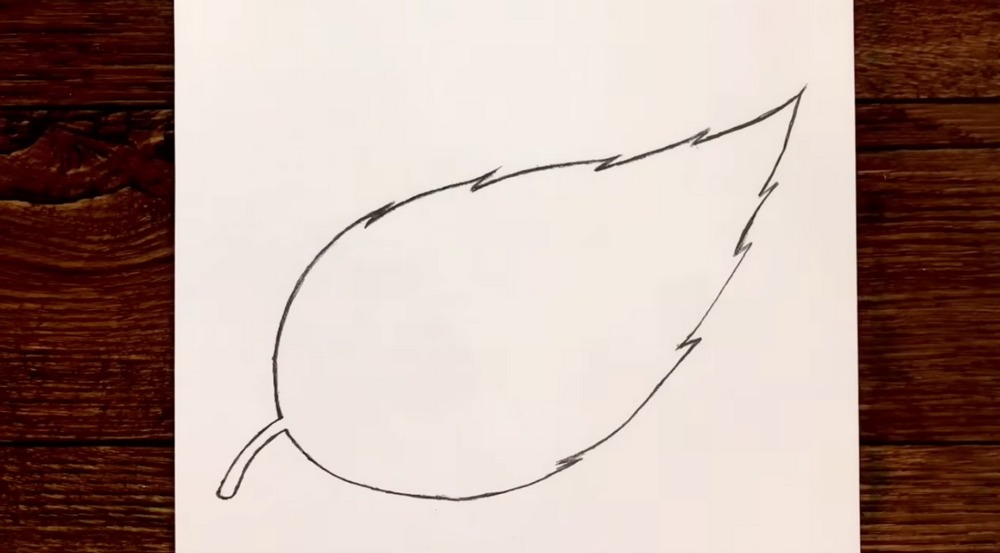
From the top line’s end, angle a sharp point. Then run the right edge down toward the lower curve, adding a few small zigzags to match the top. Connect neatly at the bottom. Check that the leaf looks balanced and slightly tilted forward. If needed, nudge the outline with soft erasing and redraw light, confident lines over corrections. Keep corners crisp throughout.
Draw the Horizon Band
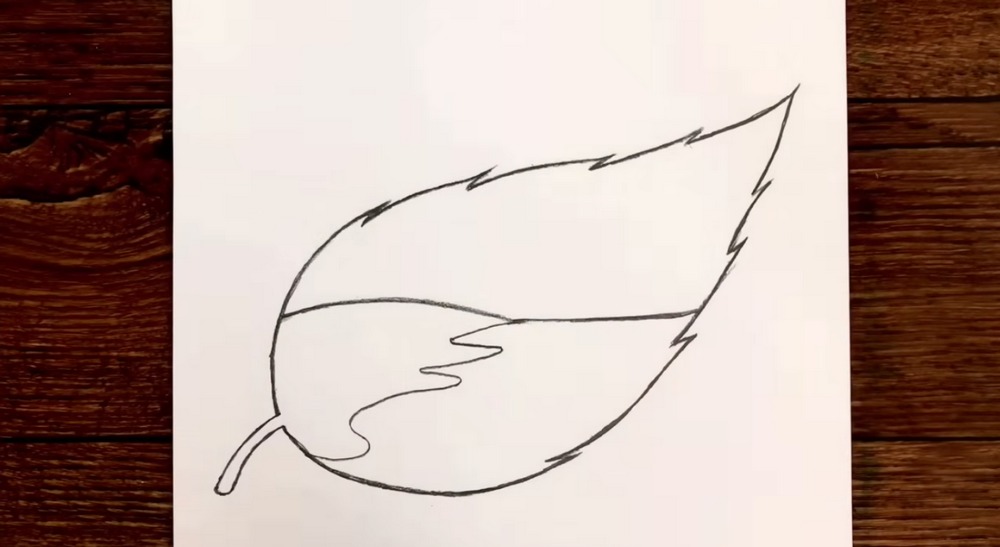
Lightly sketch a long, slightly rising line across the leaf, about one third from the bottom. On the left, let the band thicken and drift inward as a soft, splash-shaped inlet. Keep the curves organic and smooth, avoiding perfect symmetry. This band will separate land from sky and water, so keep the line clean and continuous across the right side. Very lightly.
Shade the Foreground
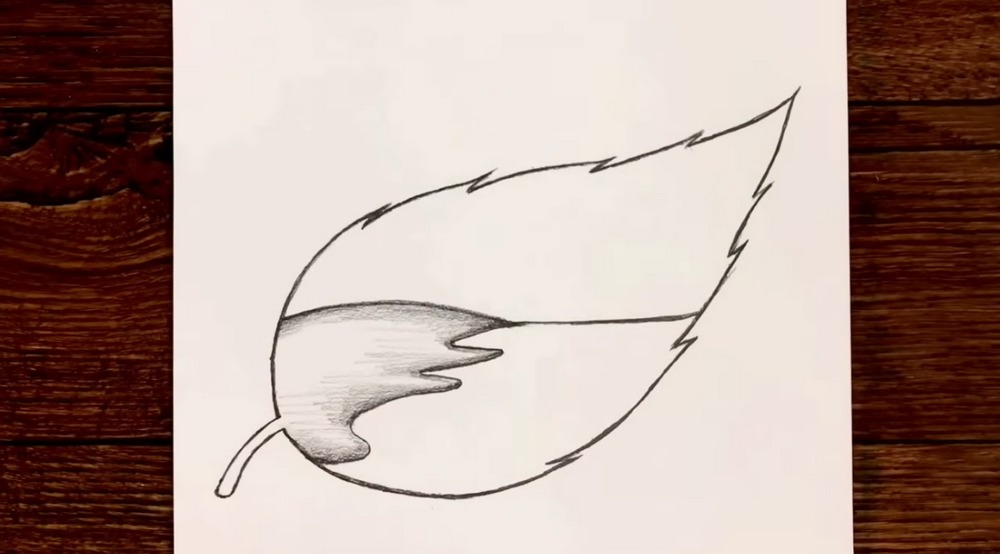
Using an HB pencil, shade the large shape inside the inlet on the lower left. Start dark near the horizon band and fade toward the stem with softer pressure for a smooth gradient. Keep strokes short and even. Blend gently with a tissue or stump if you like. Leave the water area open and lightly suggest a few horizontal strokes. Very soft.
Add Sun and Trees
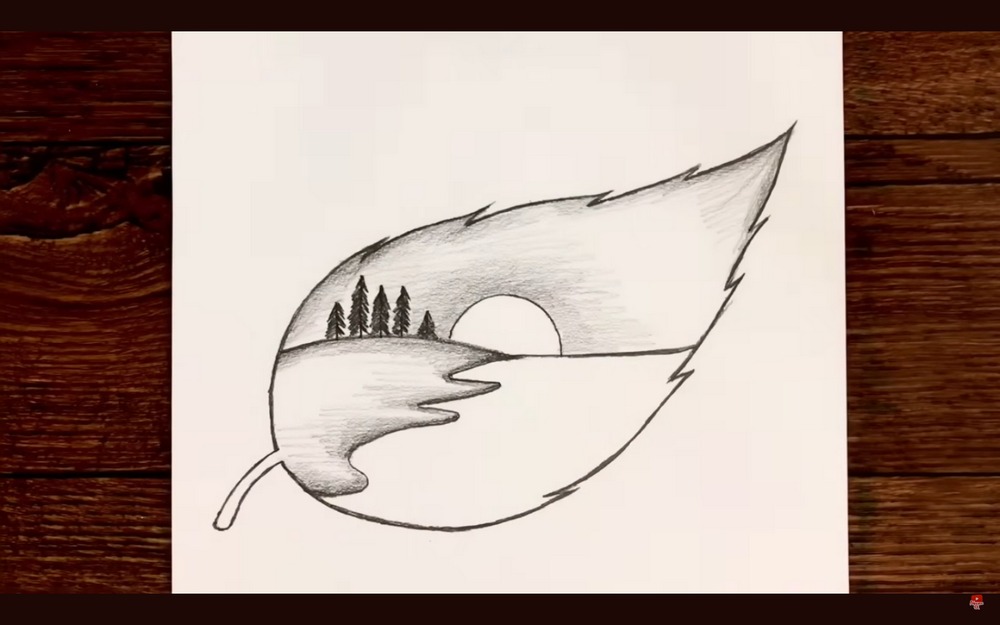
Place a half circle for the sun resting on the horizon near the center. On the left hillside, draw five quick triangular pine silhouettes, each slightly different height. Deepen the shading above the horizon on the left interior, keeping the sky lighter around the sun. Maintain the leaf edge clean. These simple contrasts instantly sell depth, distance, and evening light. Look carefully.
Mountains and Reflections
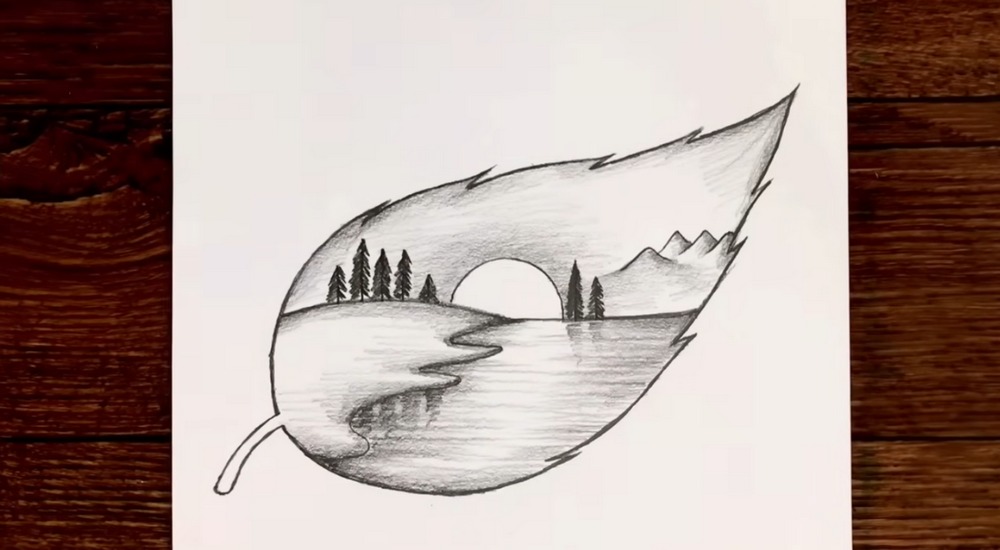
Sketch a small range of angular mountains on the right side of the horizon, keeping peaks modest so the leaf’s point stays dominant. Under the horizon, suggest water by pulling several short horizontal strokes that mirror the sun and trees. Vary spacing and length. Darken a few strokes near the inlet to create reflections, and soften others for shimmering light. Avoid overworking.
Clean Up and Polish
Trace the leaf outline with a steady, darker pass, keeping the notches sharp. Deepen shadows beneath the horizon band and softly shade the upper leaf interior so it fades toward the tip. Erase stray guidelines. Add a thin highlight ribbon along the water. Step back, compare values, and even everything out so the scene reads clearly against the crisp leaf. Nicely balanced.
Conclusion
You just turned a simple leaf outline into a peaceful landscape using clean lines and careful shading. This project rewards patience and light pressure more than fancy tools. Repeat the steps with different leaf shapes, tree counts, or cloud bands to build confidence. Keep your values organized, leave breathing space, and the tiny scene will always feel calm. Draw often.
A Bonus Tip
Lightly erase a thin strip along the waterline to create a crisp glow that separates land from reflection.
FAQs
Q: How long will this take?
A: Most people finish in 25–45 minutes, depending on shading time and corrections.
Q: What paper size works best?
A: A4 (8.3×11.7 in) or 9×12 in gives comfortable room for the notches and shading.
Q: My leaf looks lopsided. Fix?
A: Compare distances from stem to tip on both edges. Lightly redraw the weaker side and blend the old line away.
Q: Should I shade before or after inking?
A: If you ink, outline first, let it dry, then shade to avoid dragging wet ink.
Q: Can I use markers instead of pencil?
A: Yes. Keep the outline in fineliner, use light gray markers for gradients, and reserve the sun and reflections as white.