How to Draw Cute Cloud with Hearts
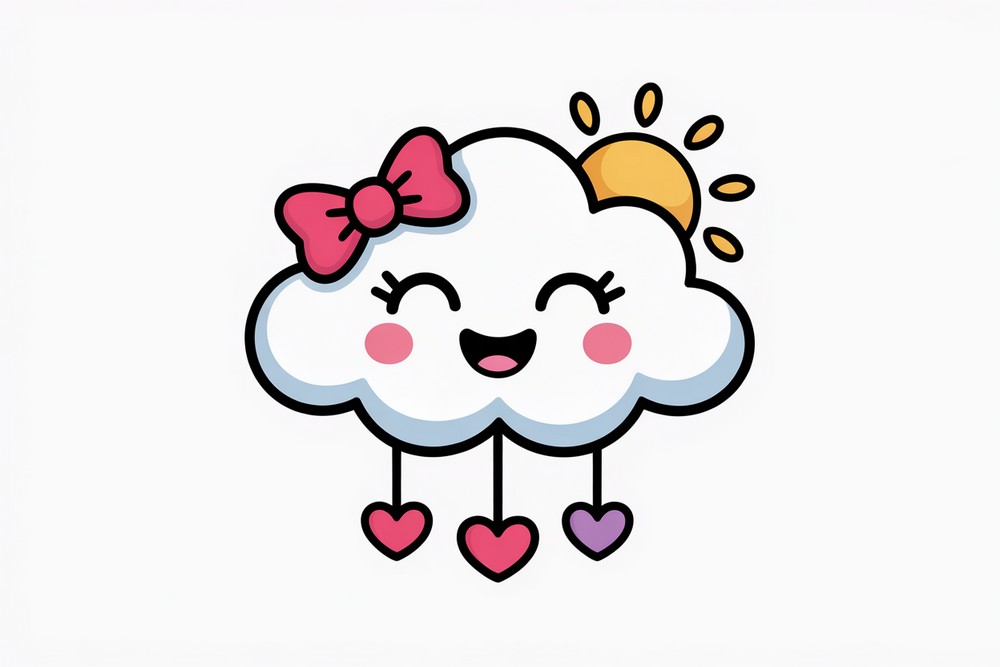
Here’s a quick, cheerful project: a cute cloud with dangling hearts and a bow. It’s perfect for cards, classroom walls, or a rainy-day sketch. You’ll build the cloud from simple scallops, add three strings, and finish with friendly details and color. No advanced shading needed—just steady lines and playful shapes. Use pencil first if you like, then trace with marker. We’ll color the hearts in alternating pinks, keep the cloud bright, and add a tiny sun for extra charm. The steps fit on one A4 (8.3×11.7 in) sheet and work with any markers or colored pencils. Beginners will feel successful, while experienced artists can personalize spacing, bow tilt, or heart sizes for style. Ready to start drawing? Gather your tools, clear space, and relax—this drawing invites gentle, happy lines today.
Supplies for This Drawing
- HB pencil and 2B pencil
- Fineliner or black marker (0.5–1.0 mm)
- White eraser and kneaded eraser
- A4 (8.3×11.7 in) 160–200 gsm paper
- Ruler (for straight strings)
- Compass or circular object (optional, for sun)
- Alcohol markers or colored pencils: pinks, yellow, warm red/orange
- Sharpener or spare leads
Prepare the Materials
- Clear your workspace and set good lighting.
- Tape the paper edges if you want a clean border.
- Sharpen pencils and test markers on scrap.
- Place the reference images nearby.
- Lightly sketch with HB; keep the eraser handy.
- Open caps only for colors you’ll use first.
Special Features of This Drawing
- Built from simple scallops and arcs.
- Dangling hearts create movement and rhythm.
- Optional stacked heart on the center string.
- Kawaii face with closed eyes and blush.
- Warm bow for contrast against the white cloud.
- Peeking sun adds balance and a bright accent.
Tutor’s Suggestions
- Sketch lightly; commit with ink only after proportions feel right.
- Use a ruler’s edge to guide straight strings without pressing hard.
- Vary heart sizes slightly for charm, not perfection.
- Keep marker strokes in one direction for smooth fills.
- Leave white breathing space inside the cloud.
- Thicken the outer cloud line to emphasize shape.
- Take brief breaks to check symmetry with fresh eyes.
Uses
- Classroom warm-up or rainy-day craft.
- Sweet greeting card or mini poster.
- Nursery or kids’ room wall print.
- Coloring page for young artists.
- Social post or sticker design.
- Gift tag for birthdays or Valentine’s Day.
Level of Difficulty
Beginner-friendly — simple shapes, clean lines, and easy coloring.
Fluffy Base
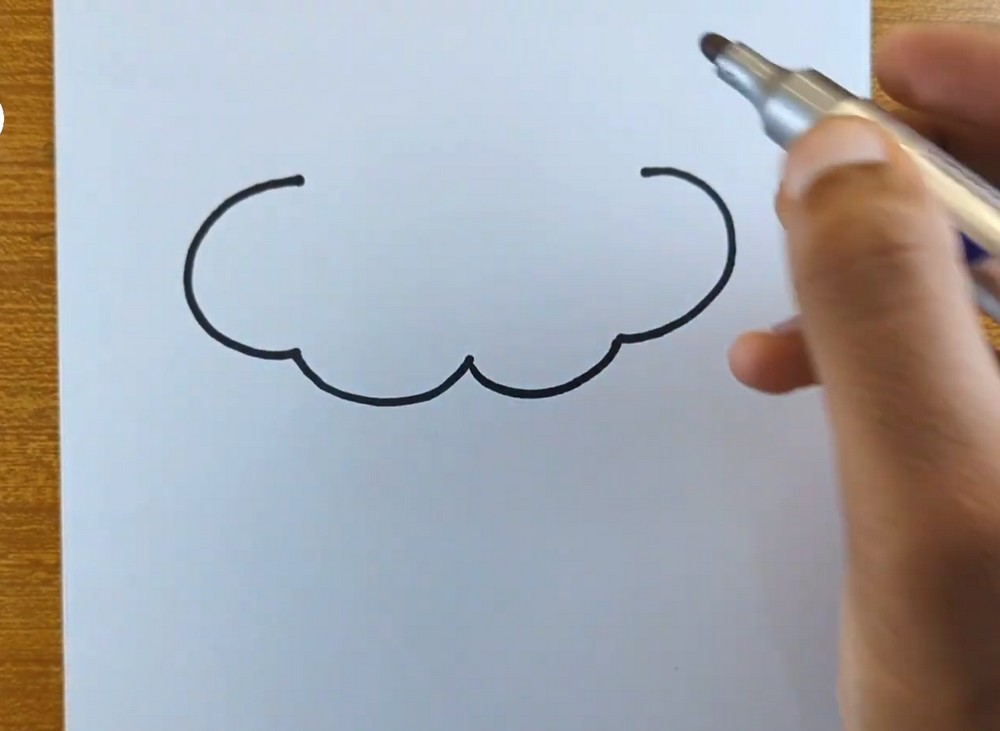
Start near the lower middle of your page. Using a light HB pencil or a fine marker, draw three connected scallops for the bottom of the cloud. Add a larger curved arc on the left and another on the right, leaving small gaps at both ends. Keep the arcs smooth; this will set the cloud’s fluffy shape and room for hanging strings.
Add a Bow
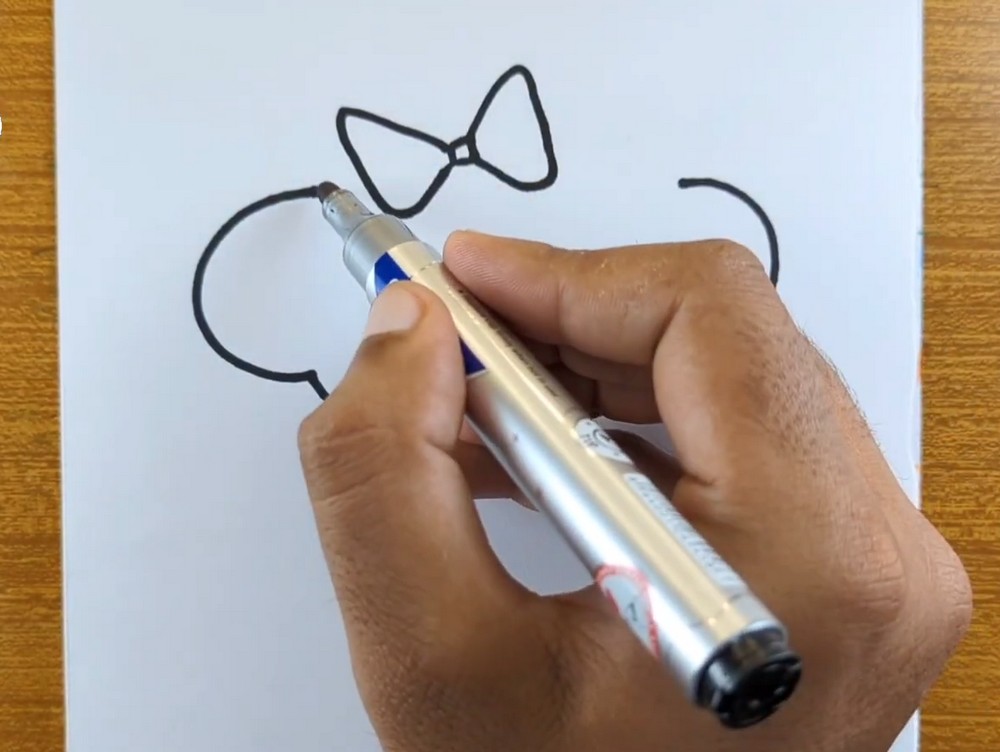
Above the center gap, sketch a small diamond knot. From its left and right corners, draw two soft triangular loops to form a bow. Let each loop taper back toward the knot. Add a slight fold line inside each loop. Keep the bow tilted slightly for cuteness, and stay clear of the outer cloud arcs so you can connect them later cleanly.
Close the Cloud & Strings
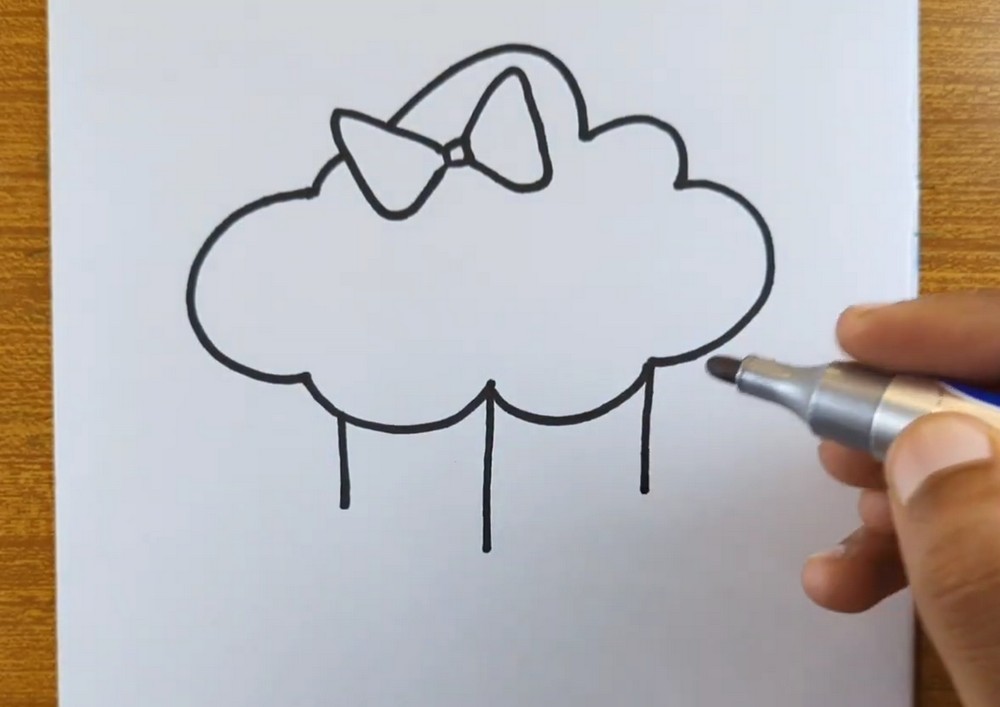
Now finish the cloud outline. From the left gap, curve upward, around the bow, and down to the right gap using overlapping scallops. Keep the top big and puffy. Under the three lower scallops, drop straight lines for strings—left, center, right. Make them slightly different lengths to feel playful. Keep lines vertical and even, stopping before the hearts you’ll draw next soon.
Hearts on Strings
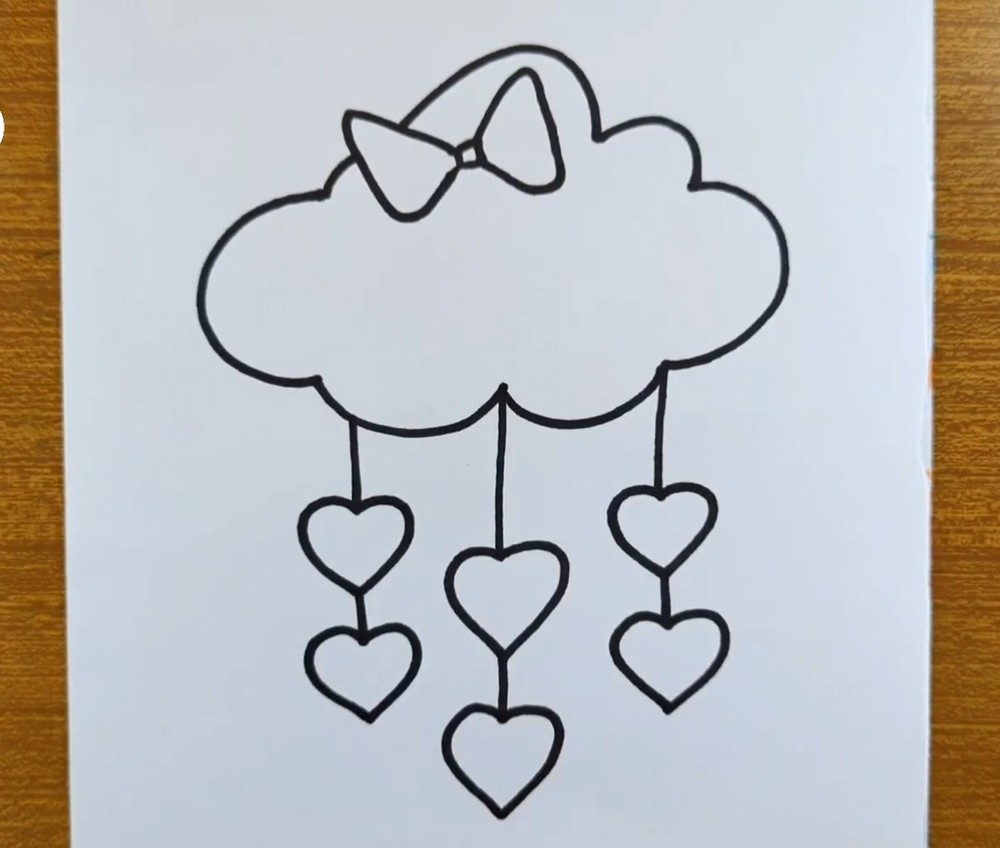
At the end of each string, outline a small heart. Start with a narrow V, then add two rounded bumps on top, touching the string. Repeat for all three, keeping sizes balanced and spacing comfortable. If you like, stack a second heart on the center string for extra charm, aligned beneath the first. Trace everything with a steady, confident line to finish.
Cute Face Details

Give the cloud a cute face. Add two closed eyes: short upward curves with tiny eyelash ticks on the ends. Place them diagonally under the bow. Between the eyes, sketch a small smiling mouth shaped like a shallow U. Keep features centered and low so the hanging hearts don’t crowd them. Thicken the outer cloud line if needed for clarity and balance.
Color the Hearts
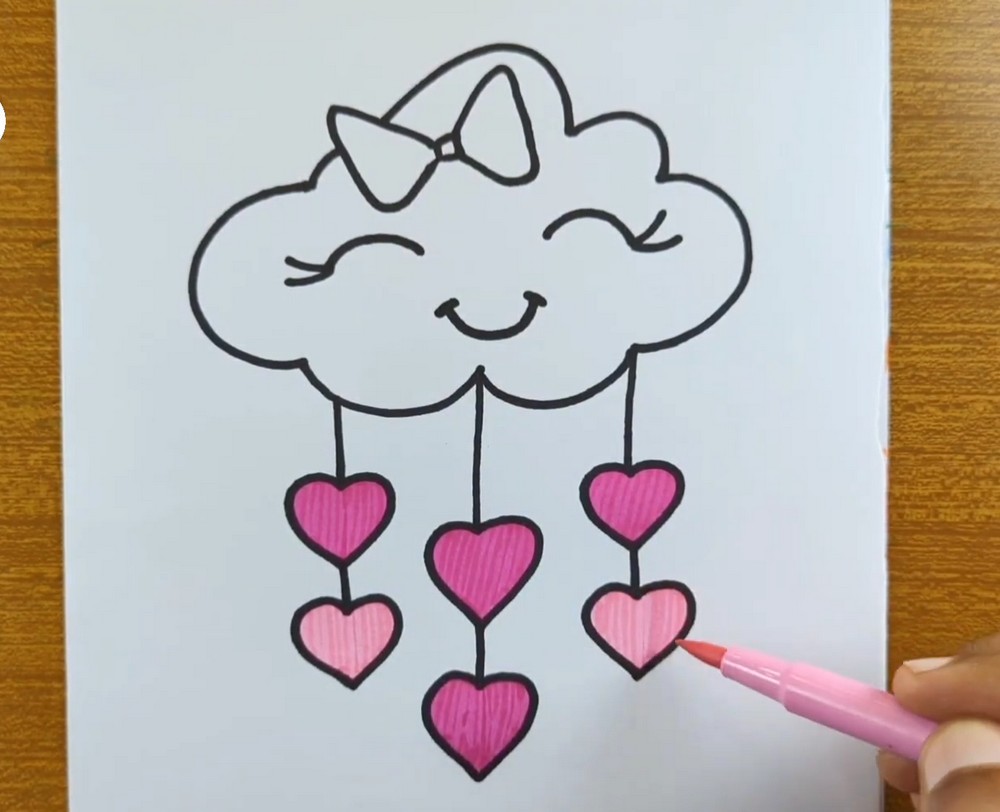
Color the dangling hearts first. Use three pinks—light, medium, and dark—to create variety and rhythm. Fill each heart in one direction to avoid streaks, then add a second pass near the edges for a subtle darker border. Alternate shades across the strings. Leave the cloud white for now; its clean contrast makes the hearts pop and keeps everything readable from a distance.
Bow & Cheeks
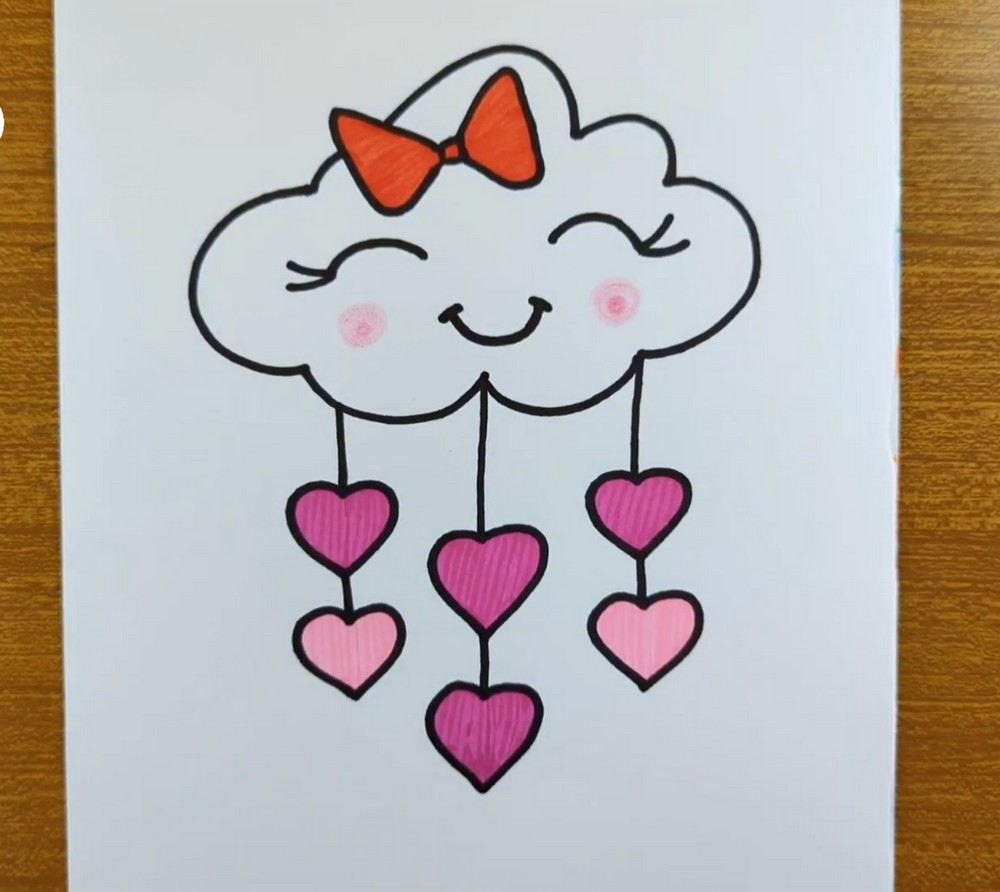
Next, color the bow a cheerful warm hue—red or orange looks sweet. Fill each loop evenly, leaving a tiny highlight near the top curve. Darken the knot slightly for depth. Add two soft pink circles as cheeks beneath the eyes. Keep them light so the cloud still feels airy. Check outlines and retrace any faded edges with your pen for crisp definition.
Sunny Finish
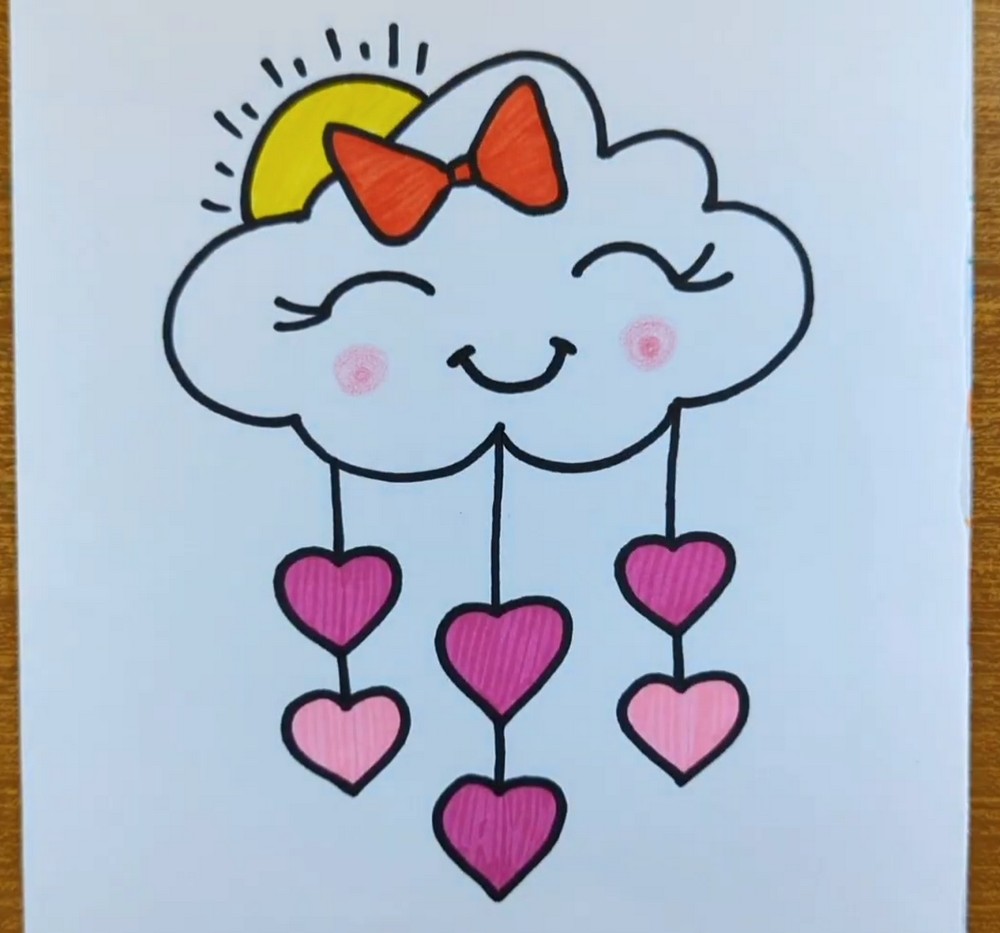
Finish with a sunny touch. Behind the top-left of the cloud, draw a half circle to suggest the sun peeking out. Add short dashes around it for rays. Color the sun yellow, keeping the rays simple. This final accent brightens the mood and frames the bow, while the white cloud remains the star against your page for a friendly finished look overall.
Conclusion
Simple shapes make this cloud sweet and approachable, yet small choices create personality. Vary heart sizes, bow angle, and string lengths to match your style. Keep lines confident, and don’t overwork the coloring; the white cloud needs breathing room. Add a name, sparkle dots, or patterned paper behind it. Display the finished piece or gift it to someone you love.
A Bonus Tip
Outline the hearts last with a slightly thicker line than the strings—this subtle contrast makes them read clearly at a glance.
FAQs
Q: How long will this take?
A: Most beginners finish in 25–40 minutes, including coloring.
Q: What paper size works best?
A: A4 (8.3×11.7 in) or US Letter is perfect; choose 160–200 gsm for crisp marker edges.
Q: My cloud looks lopsided—how fix it?
A: Add or trim a scallop with your pencil, then re-ink the outer contour.
Q: Should I shade the cloud?
A: Keep it mostly white; a faint 2B edge shadow under the bow is enough.
Q: Markers or pencils?
A: Either works. Markers give flat, bright hearts; colored pencils blend softly.
Q: How do I avoid streaky fills?
A: Color in one direction, overlap slightly while still wet, and make a quick second pass near edges.