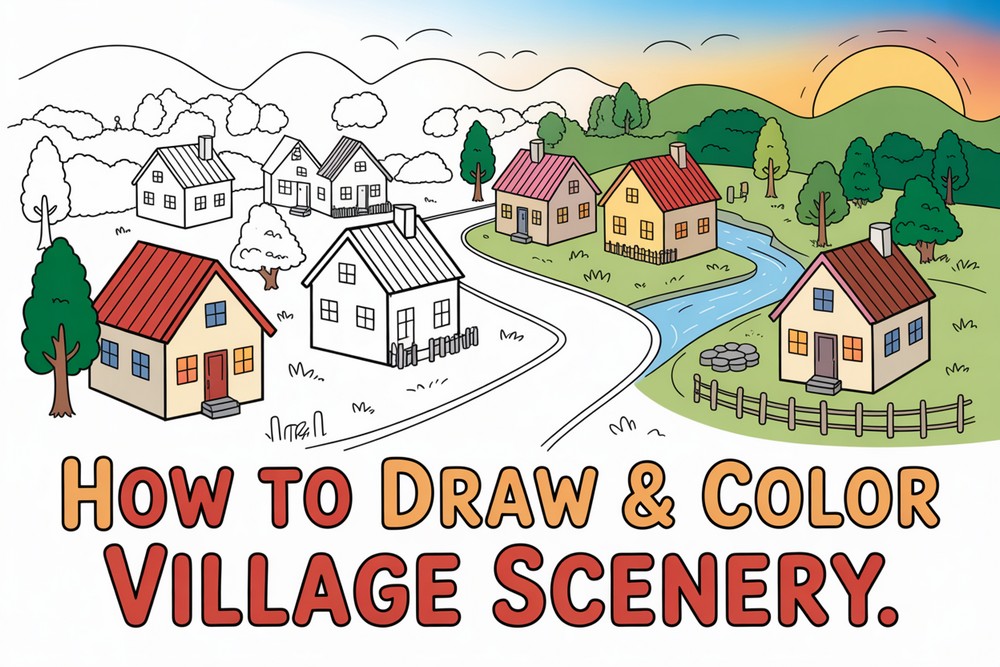
How to Draw & Color Village Scenery
This simple village scenery is perfect for beginners and anyone who likes relaxing line drawings. You’ll build a calm riverside scene using easy shapes: two shorelines, three huts, a few palm trees, a fisherman, and small boats. We’ll sketch lightly, ink cleanly, then color with pencils for soft blends. You only need basic materials and a steady pace. Follow each step image, match proportions, and keep lines gentle. Add ripples, shadows, and grassy textures to suggest depth. We’ll layer greens on the banks, warm oranges on the huts, and sky blues across the water. Small details—window blocks, curved roofs, and boat reflections—make everything feel alive without becoming hard. Take your time, pause between steps, and compare angles. By the end, you’ll have a peaceful landscape ready to display or gift.
Supplies for This Drawing
- A4 (8.3×11.7 in) smooth paper, 160–200 gsm
- HB and 2B pencils
- Vinyl eraser + kneaded eraser
- 0.3 mm and 0.5 mm black fineliners
- 30 cm (12 in) ruler
- Colored pencils: greens, blues, yellow, brown, orange/ochre, red, black, white
- Sharpener and tissue/blending stump (optional)
Prepare the Materials
- Clear a flat, well-lit workspace.
- Tape paper edges to a board.
- Sharpen pencils and test strokes on scrap.
- Keep references visible beside you.
- Place colors in drawing order.
- Warm up with a few straight and curved lines.
Special Features of This Drawing
- Simple horizons and banks create strong depth.
- Repeating huts and palms add rhythm and charm.
- Foreground fisherman anchors the scene.
- Easy boats introduce reflections without complexity.
- Pencil layering builds soft, natural textures.
- Limited warm/cool palette keeps harmony.
Tutor’s Suggestions
- Begin with light, loose pencil; commit with ink later.
- Use the ruler only for the first horizons.
- Keep vertical hut edges straight; compare to page edge.
- Press lightly when coloring; layer slowly for richness.
- Leave tiny white edges along roofs and ripples.
- Step back often to check balance and spacing.
- Re-ink final accents sparingly.
Uses
- Classroom perspective and composition practice
- Relaxing sketchbook study
- Handmade greeting card or postcard
- Wall print for a child’s room
- Social post or time-lapse reel
- Gift for someone who loves countryside life
Level of Difficulty
Beginner-friendly — basic shapes, clear layers, and forgiving coloring.
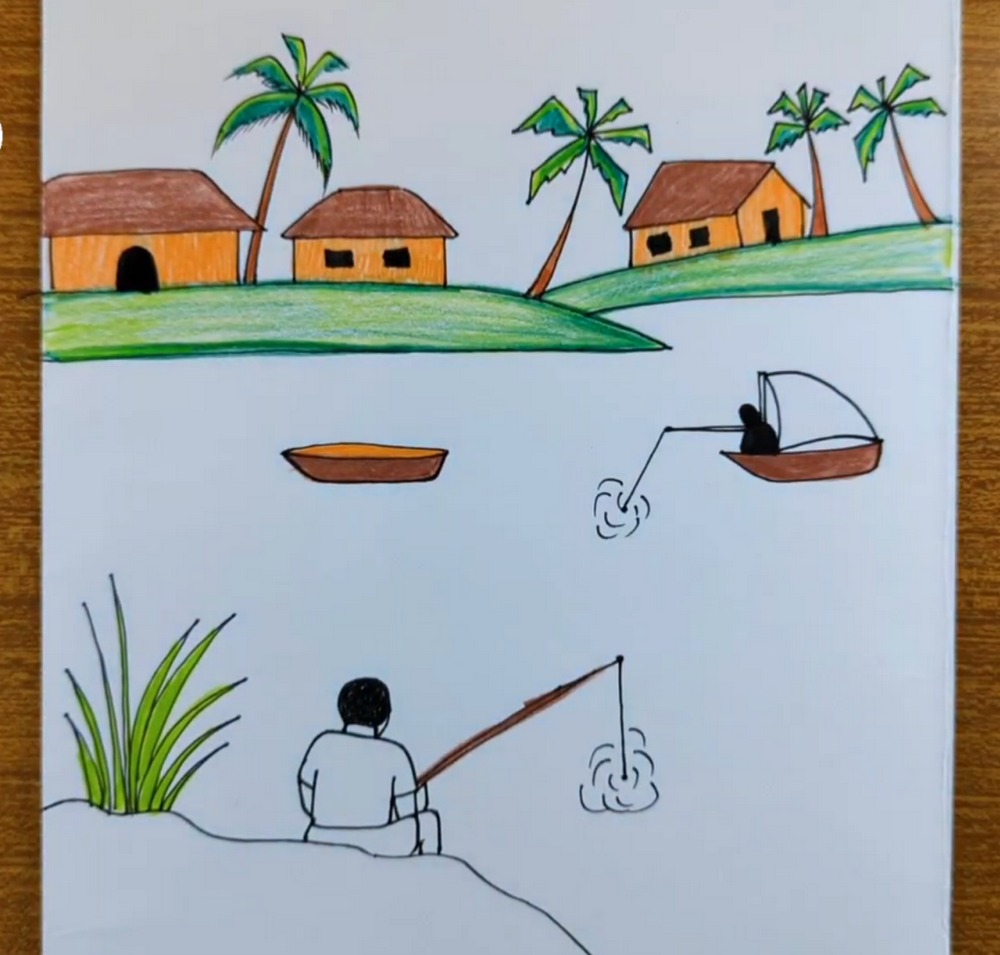
Laying the Riverbanks
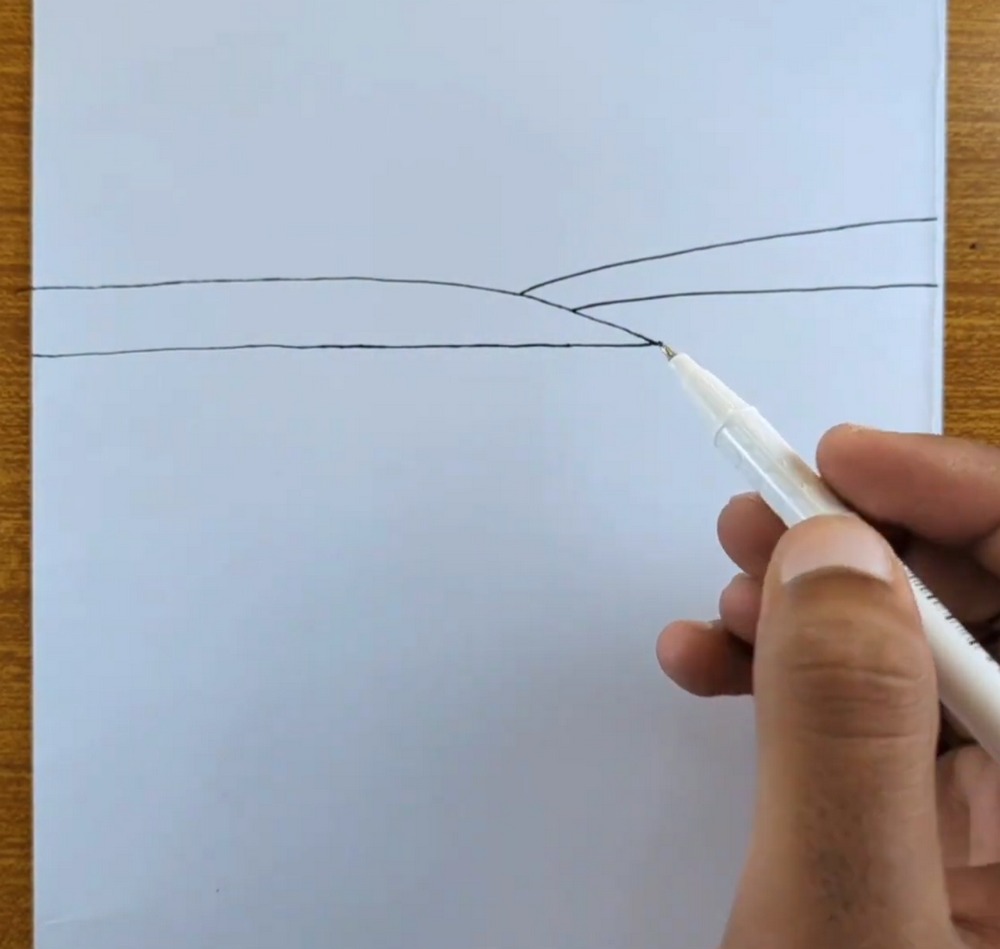
Lightly sketch two long horizontal lines across the upper page to form far and near shores. Let them meet in a small pointed spit of land. Keep the lower line straighter and the upper line slightly curved. Ink both shorelines with a fineliner, using confident strokes. Leave the broad lower area open for water and foreground details later, reserving clear space throughout.
Sketching the Huts
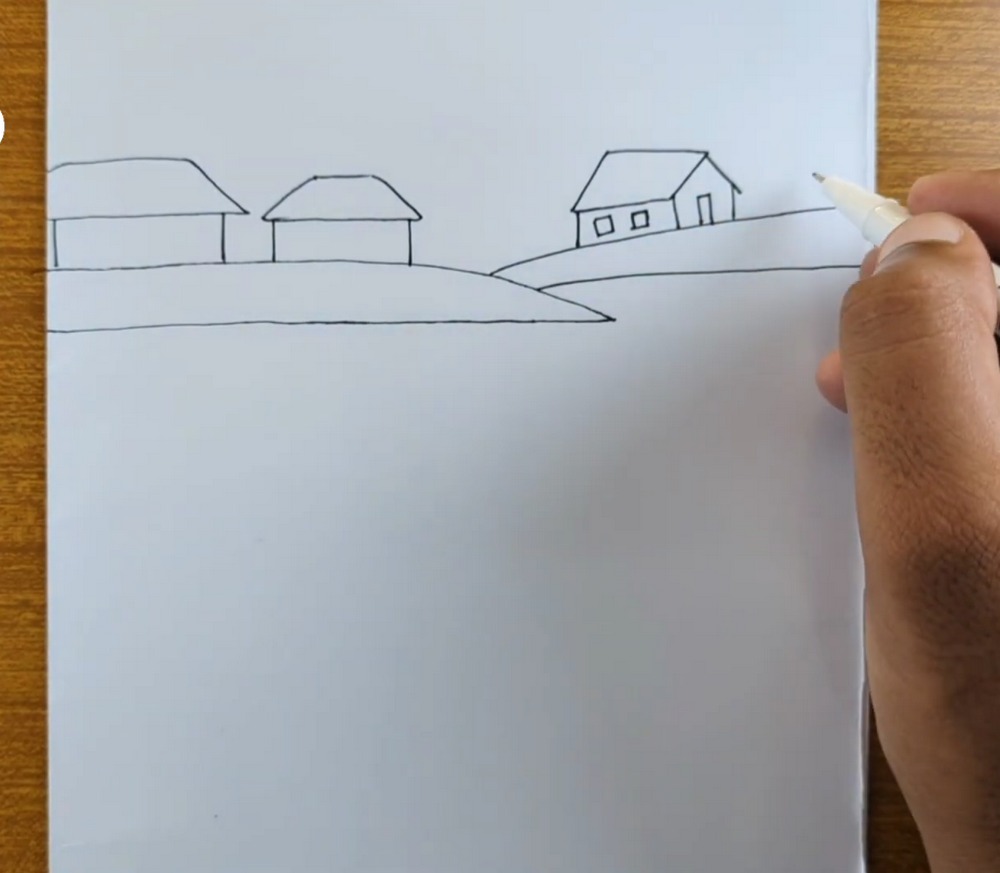
Place three simple hut shapes along the upper shore: two on the left and one on the right. Use rectangles for walls and trapezoids for sloped roofs. Add a door and small windows. Keep sizes smaller toward the right to suggest distance. Ink the outlines neatly, keeping verticals straight. Maintain clear gaps under roofs so we can shade eaves later, carefully.
Adding Palm Trees
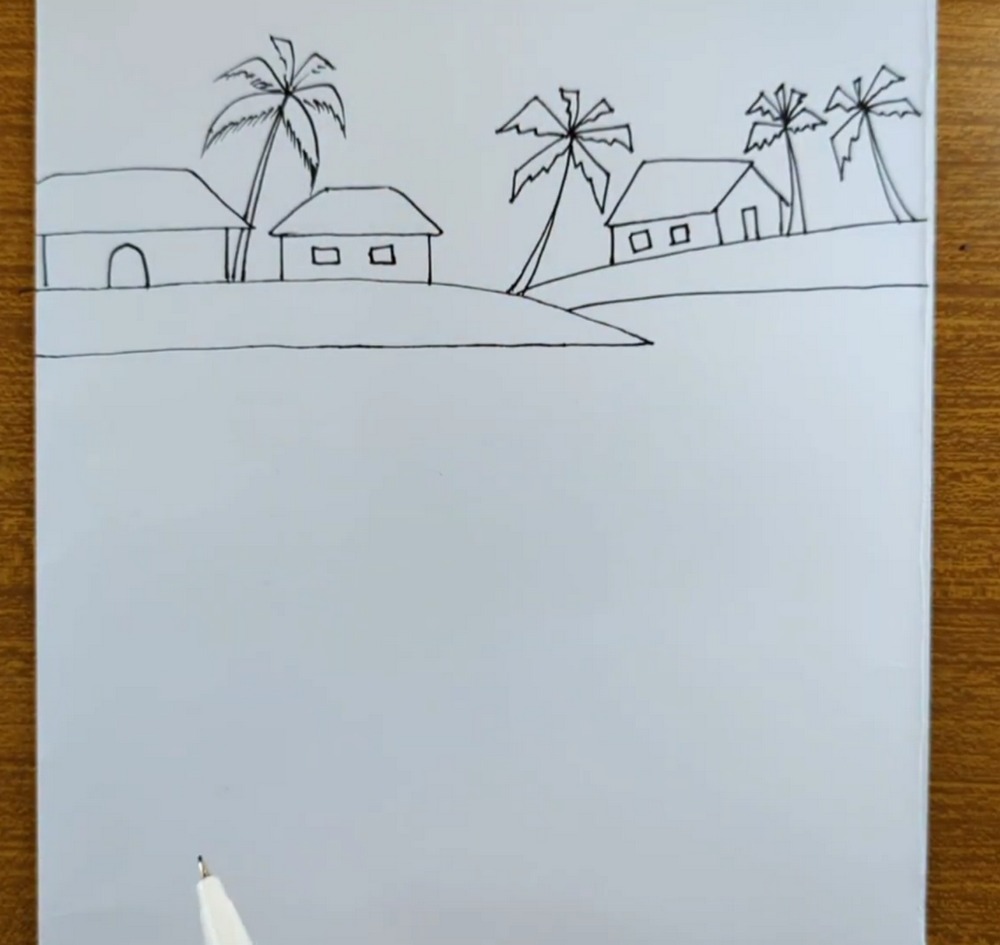
Behind the huts, draw several tall, leaning trunks that widen at the base. Cap each with a star of long fronds made from gently curved, pointed leaf shapes. Vary heights for rhythm. Let one big palm overlap the left hut, and group three smaller palms near the right hut. Ink trunks with tapered lines and hint short hatching for natural bark texture.
Foreground Fisherman
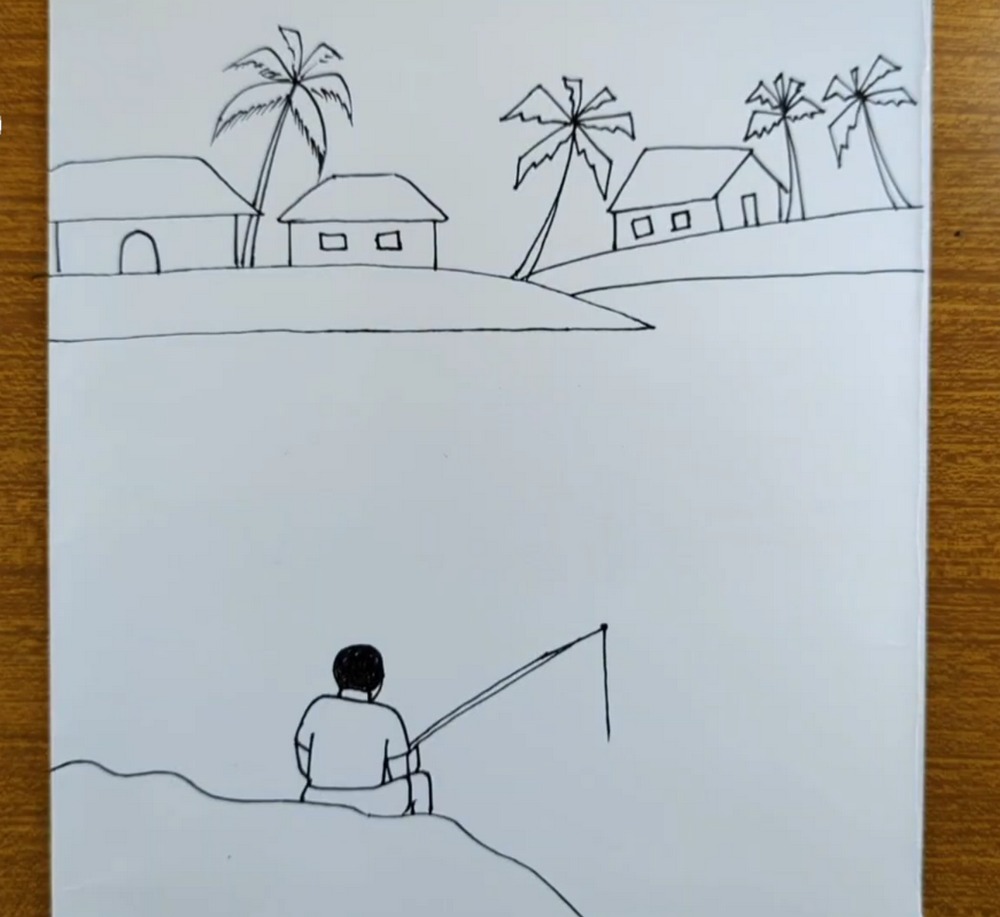
On the lower left, outline a rocky bank with a few soft curves. Draw a seated figure facing the water: rounded head, simple shirt, and bent legs. Add a slim fishing rod angled toward the center. Keep the figure slightly below the horizon to enhance depth. Ink the silhouette cleanly, leaving the shirt unshaded for coloring later, suggesting quiet focus.
Boats and Reeds
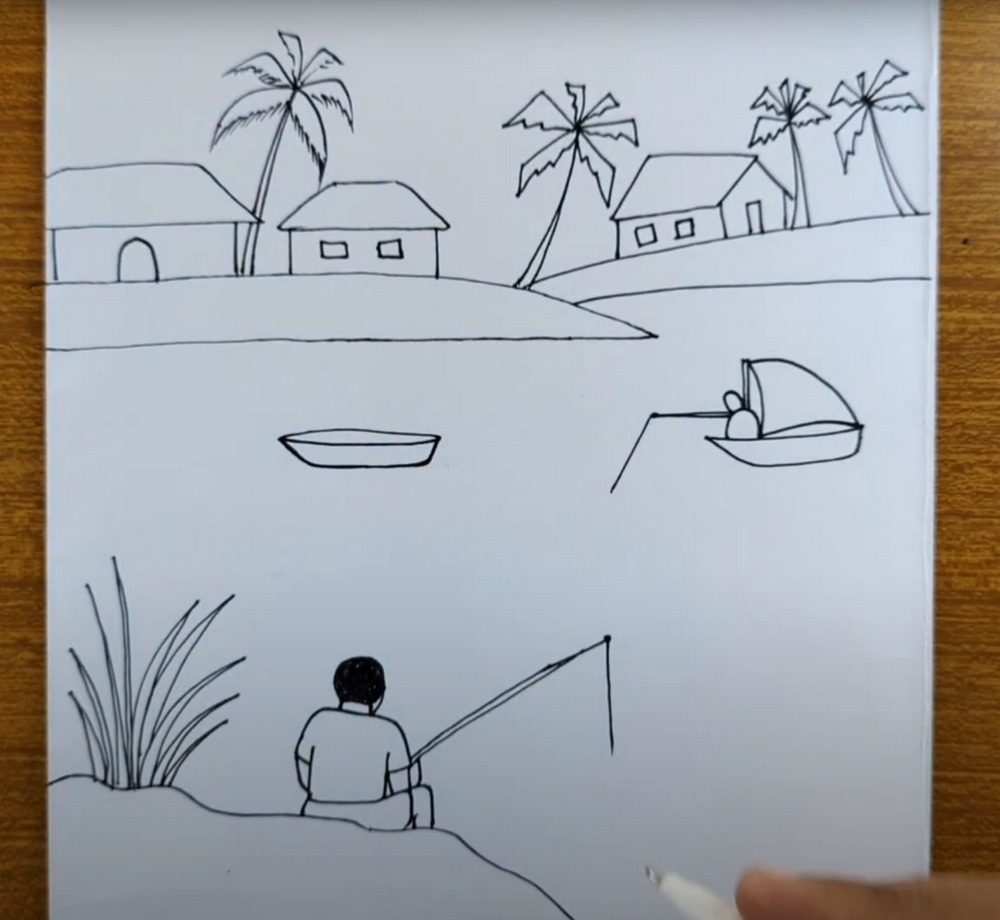
In the midwater, add a small rowboat: a narrow oval for the rim and a curved hull beneath. On the right, sketch a second boat with a canopy and a seated angler. Connect a fishing line to the water. Plant tall grasses near the left bank using quick upward strokes. Keep the scene uncluttered with generous water space for clear reflections.
Coloring the Land
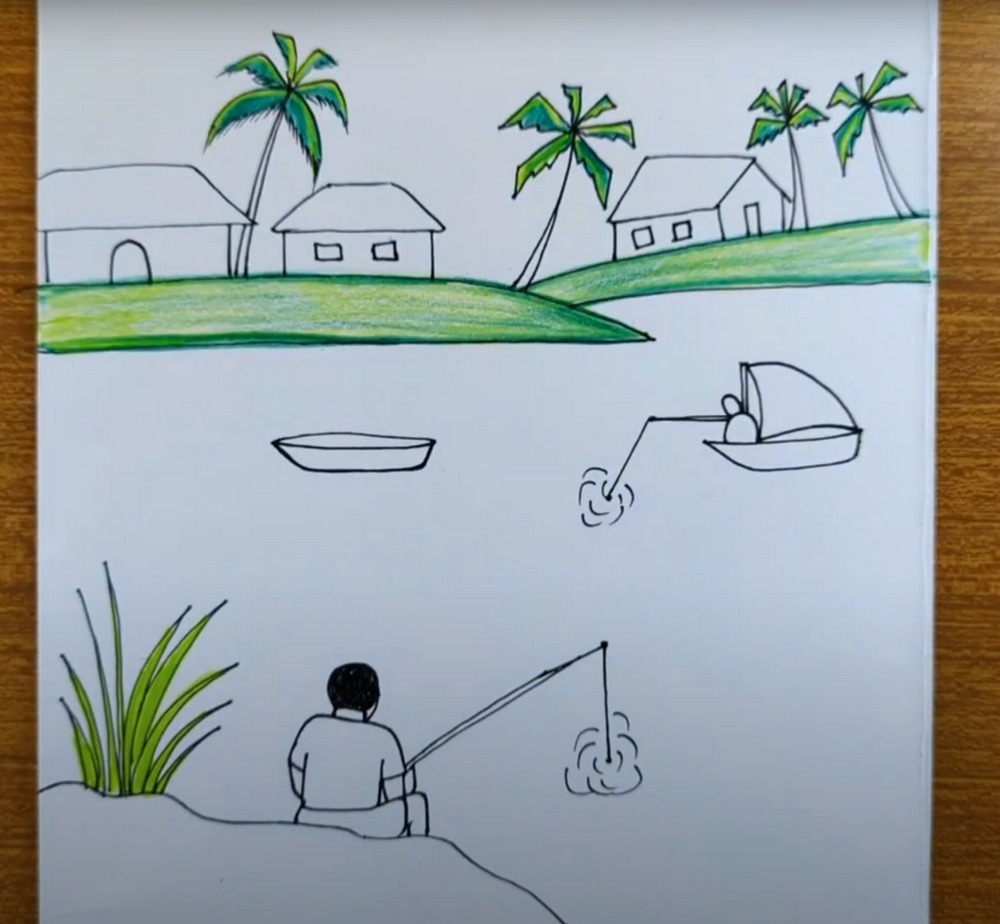
Start coloring the banks with soft layers of light green, mid green, and a touch of yellow. Keep the top edges brighter and the lower edges darker to suggest slope. Shade palm fronds with alternating strokes, leaving slim highlights. Add small ripple rings where fishing lines touch water. Avoid pressing too hard so blends stay smooth, even, and pleasing overall.
Coloring Huts and Boats
Fill the huts with warm oranges or ochres, leaving roofs slightly darker. Darken windows and doorways to form simple shadows. Color the wooden boats medium brown; tint the canopy a contrasting red. Deepen the fisherman’s hair and rod with dark pencil or pen. Re-outline any edges that softened during coloring to keep the village crisp, organized, and readable throughout.
Water and Finishing Touches
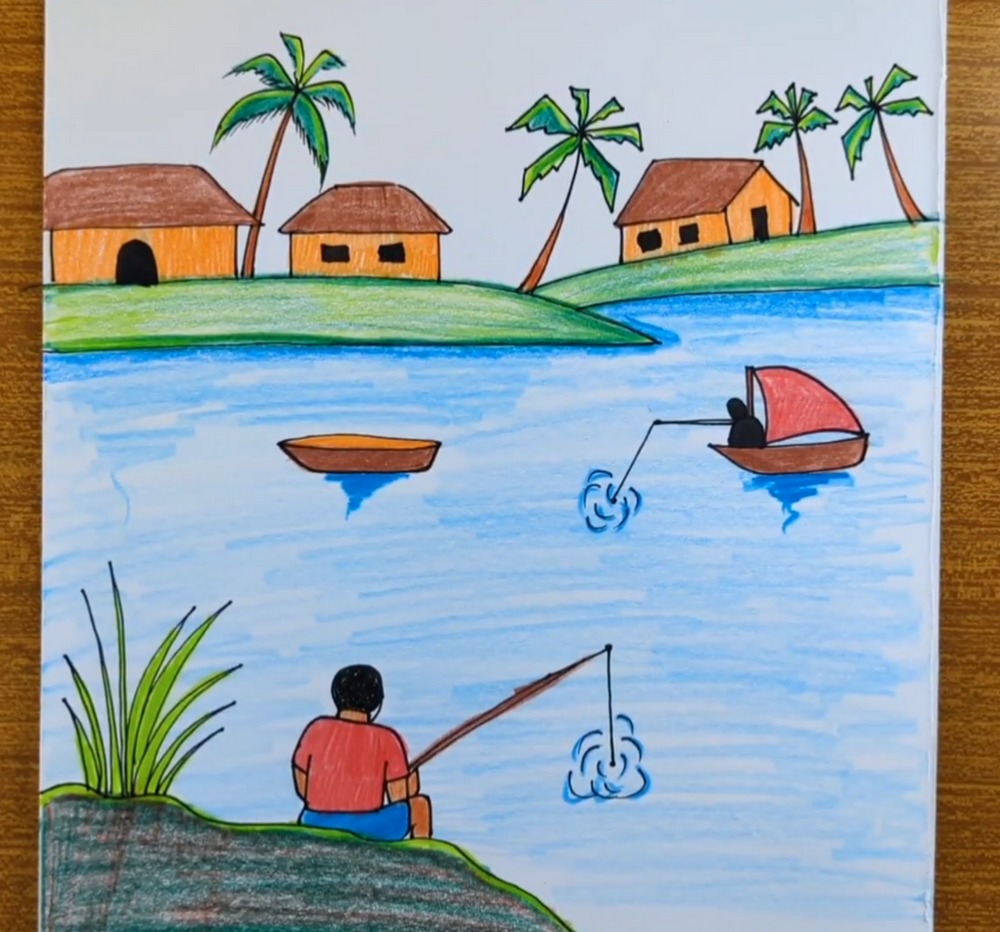
Lay a light blue over the entire water area, then build mid tones with gentle horizontal strokes. Keep lighter bands near the horizon and darker shapes beneath boats for reflections. Reinforce ripple rings with thin blue outlines. Darken shoreline undersides for contrast. Add final grass accents and tiny roof edges. Clean stray marks and sign your work proudly today.
Conclusion
Great village drawings come from simple shapes placed with care. Keep your horizon quiet, vary roof angles, and repeat palms for rhythm. Gentle color layering creates believable banks and water. When in doubt, lighten pressure and leave small highlights. Step back once, check balance, then add the last dark accents. Frame it or gift it proudly, with gratitude and joy.
A Bonus Tip
Tilt a few palms and rooflines slightly different from each other; that asymmetry instantly makes the village feel lively and real.
FAQs
Q: How long will this take?
A: Most beginners finish in 40–60 minutes, including coloring.
Q: What paper size works best?
A: Use A4 (8.3×11.7 in); larger A3 is great if you want more detail.
Q: My huts look crooked—help?
A: Check verticals against the page edge and redraw lightly before inking.
Q: Should I shade before coloring?
A: Keep graphite minimal; colored pencils handle the shading.
Q: Markers or pencils for water?
A: Pencils blend softly and are easier to control; markers can streak.
Q: How do I color reflections?
A: Add darker blue ovals beneath boats, then soften edges with light horizontal strokes.