Easy Flower Drawing for Beginners
Want a simple flower that looks clean and cheerful? This beginner-friendly project walks you from a tiny circle to a bright blossom with two leaves. Use easy shapes, smooth curves, and bold outlines so the drawing reads clearly with markers, pencils, or crayons. Follow the photos in order, keep your pencil light at first, and don’t stress about perfect symmetry—flowers love variety. You’ll draw a center, add guide arcs, shape five rounded petals, then sketch leaves, veins, and a few accent lines. Finally, we’ll color the leaves green and the petals sunny yellow with a warm blush near the center. The process is quick, relaxing, and great for all ages. Steps and simple tools mean you’ll finish with a friendly flower you can frame, gift, or turn into a card.
Supplies for This Drawing
- HB pencil for sketching; 2B for soft details
- Fineliner or marker: 0.5–0.8 mm black
- Colored pencils or alcohol markers: light green, dark green, yellow, orange/pink option
- White gel pen (optional highlights)
- Kneaded eraser + vinyl block eraser
- A4 (8.3×11.7 in) smooth paper, 160–200 gsm
- Sharpener, ruler, small compass or coin
Prepare the Materials
- Clear, well-lit workspace.
- Tape paper edges if using markers.
- Sharpen pencils; test fineliner on scrap.
- Arrange colors in drawing order.
- Keep reference images visible.
- Practice a few petal curves on scrap.
Special Features of This Drawing
- Big, readable shapes perfect for beginners
- Gentle curves that create a friendly mood
- Simple vein pattern that adds depth fast
- Clean outlines that suit markers or pencils
- Limited palette with warm center glow
- Overlap and asymmetry for natural charm
Tutor’s Suggestions
- Start with light, erasable lines; build confidently.
- Compare petal widths to the center often.
- Curve strokes in the leaf direction to sell form.
- Layer color gradually; avoid heavy first passes.
- Keep outlines even; fix wobbles with small dashes.
- Step back briefly to check balance.
- Erase crumbs before inking to protect pens.
Uses
- Classroom warm-ups or beginner lessons
- Handmade greeting cards and tags
- Quick wall print or notebook cover
- Coloring page for kids’ activities
- Simple fan art or sticker designs
- Relaxing daily sketch routine
Level of Difficulty
Beginner-friendly — large shapes, forgiving curves, and minimal details.
Draw the Center
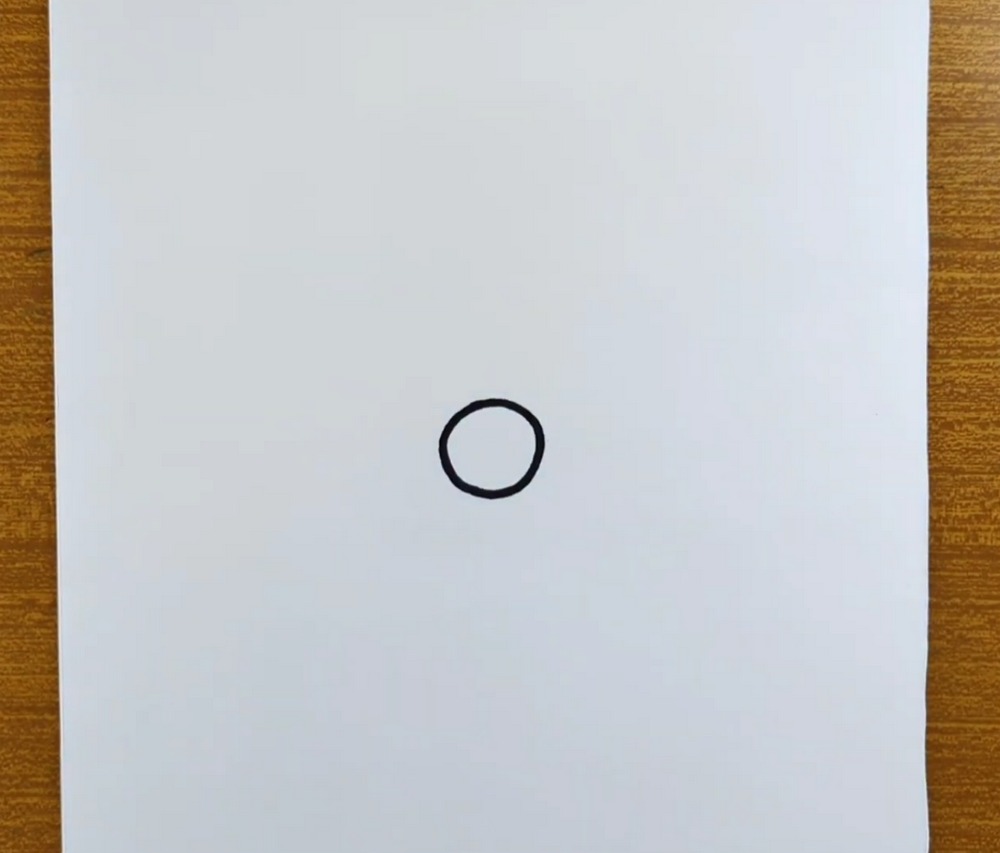
Place a small circle slightly below the page middle. Keep it neat and bold; this dot becomes the flower’s center and an anchor for every curve that follows. Use a coin or compass if you want perfect edges, or freehand for a softer look. Leave space around it for five large petals and two leaves that will wrap diagonally. Keep strokes confident.
Add Curved Guides
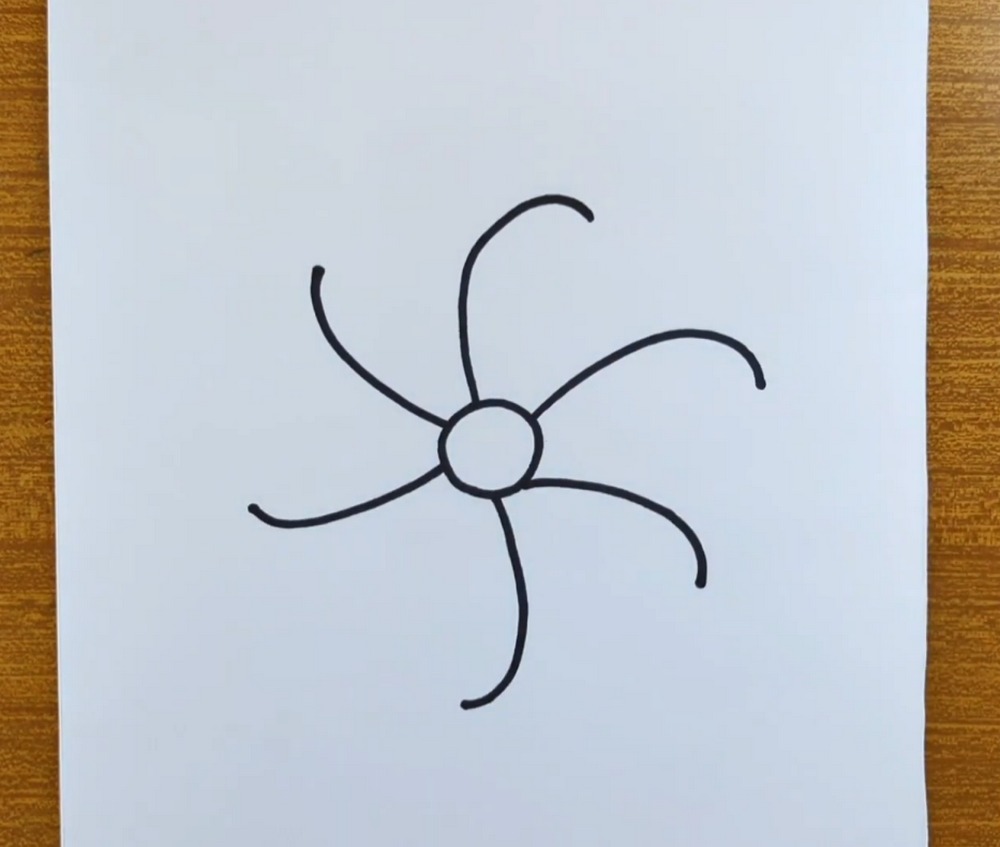
From the circle, sketch six long, light, curved arms like bent spokes. Space them evenly so they swirl around the center. These guides mark the direction and reach of your petals. Vary the curves a little to keep the bloom lively. Don’t worry about thickness now; keep lines slim. Make sure there’s room for two leaves tucked top left and bottom right.
Shape Five Petals
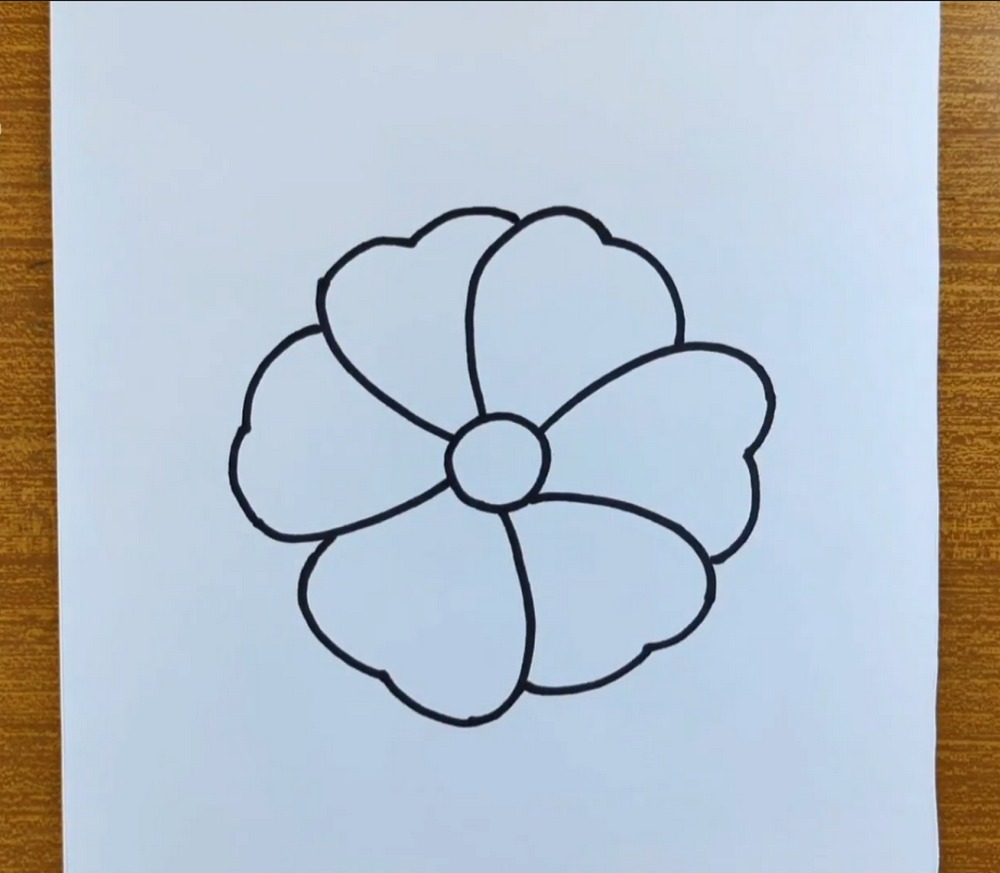
Use the guides to outline five big rounded petals. Start each at the circle’s edge, arc outward, then return with a soft dip near the tip. Let petals overlap slightly so they feel connected. Erase the extra guide curves that poke past edges. Aim for varied sizes: one smaller, one larger, for natural charm. Close gaps where petals meet the center circle.
Leaves and Petal Folds
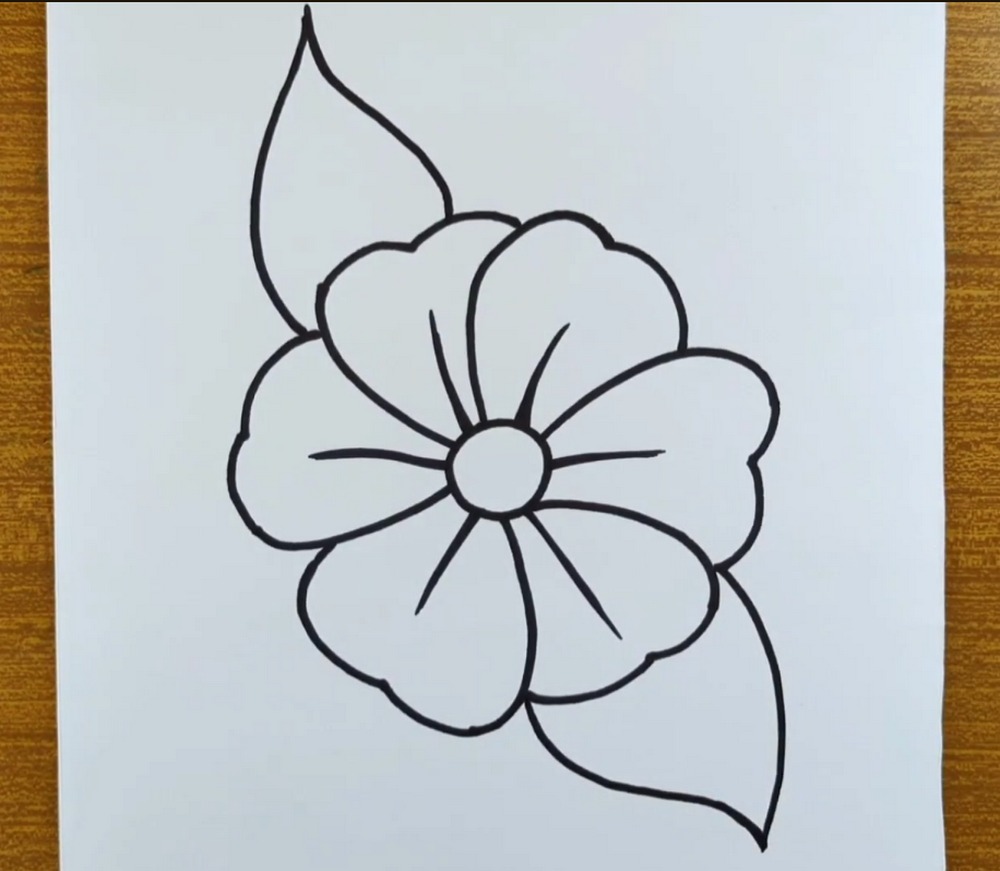
Add two leaf shapes: one pointing up-left behind the petals, one pointing down-right. Keep their tips gently sharp and bases tucked under the flower. Inside the bloom, draw slim teardrop lines from the center toward each petal’s middle to suggest folds. These inner strokes should stop halfway. Trace the main outlines with a steady pen or marker to lock the design. Cleanly.
Leaf Veins and Refinements
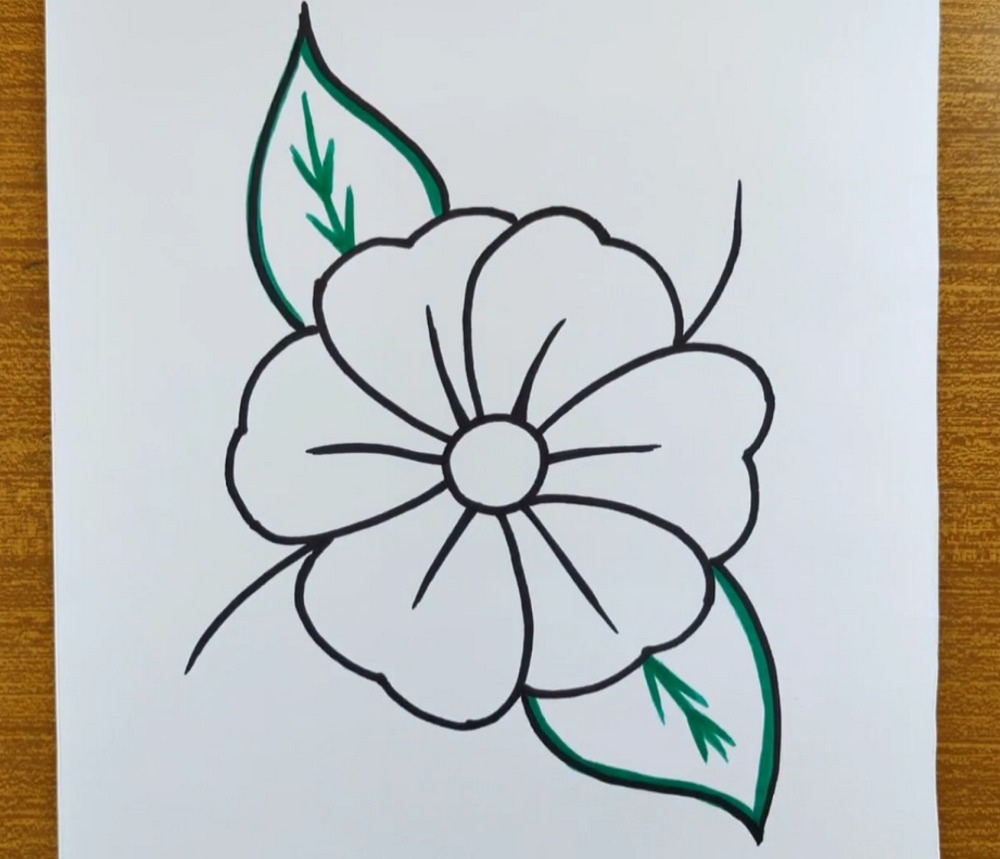
Inside each leaf, draw a central vein from base to tip. Add two short side branches shaped like tiny arrows pointing outward. Keep all lines slightly curved to match the leaf contour. Soften any petal lines that feel heavy, and round the petal tips if they look too pointy. Everything should feel smooth and relaxed before you begin coloring. Little tweaks help.
Color the Leaves
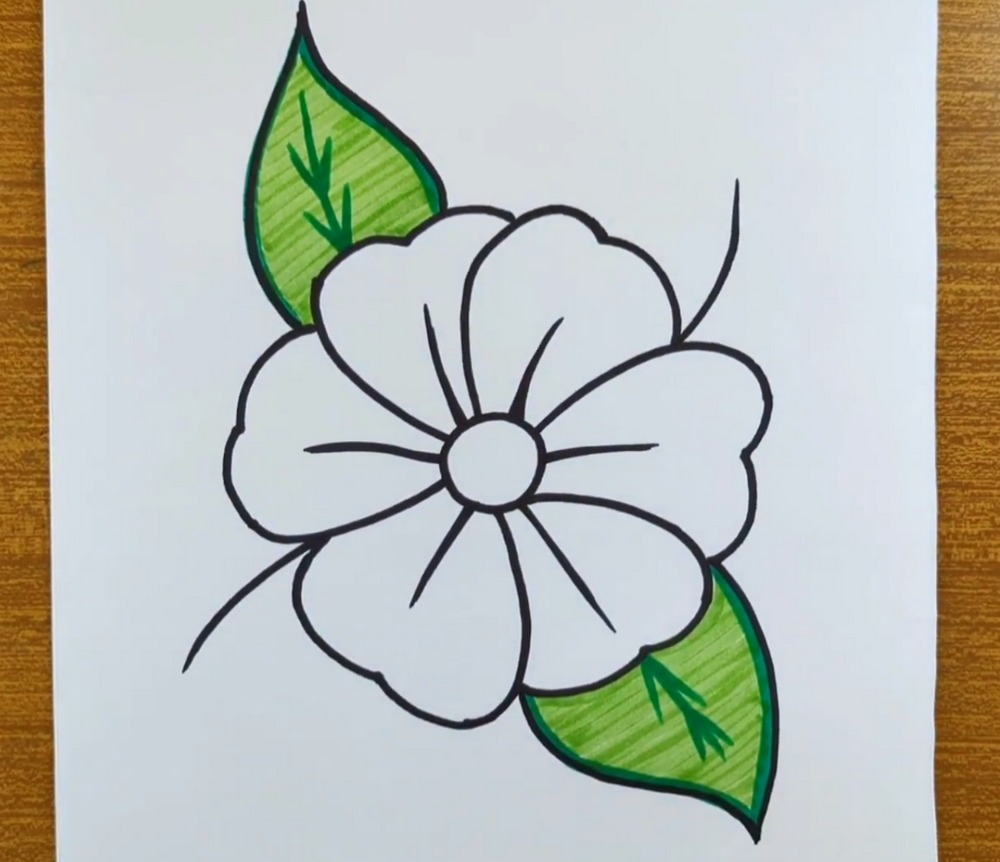
Color the leaves first. Fill each leaf with a lighter green, moving your strokes in one direction to keep the texture tidy. Then outline the leaf edges with a darker green line for contrast. Add a few darker streaks along the central vein to suggest depth. Leave small slivers uncolored for highlights so the leaves look fresh and glossy. And lively overall.
Yellow Petal Base
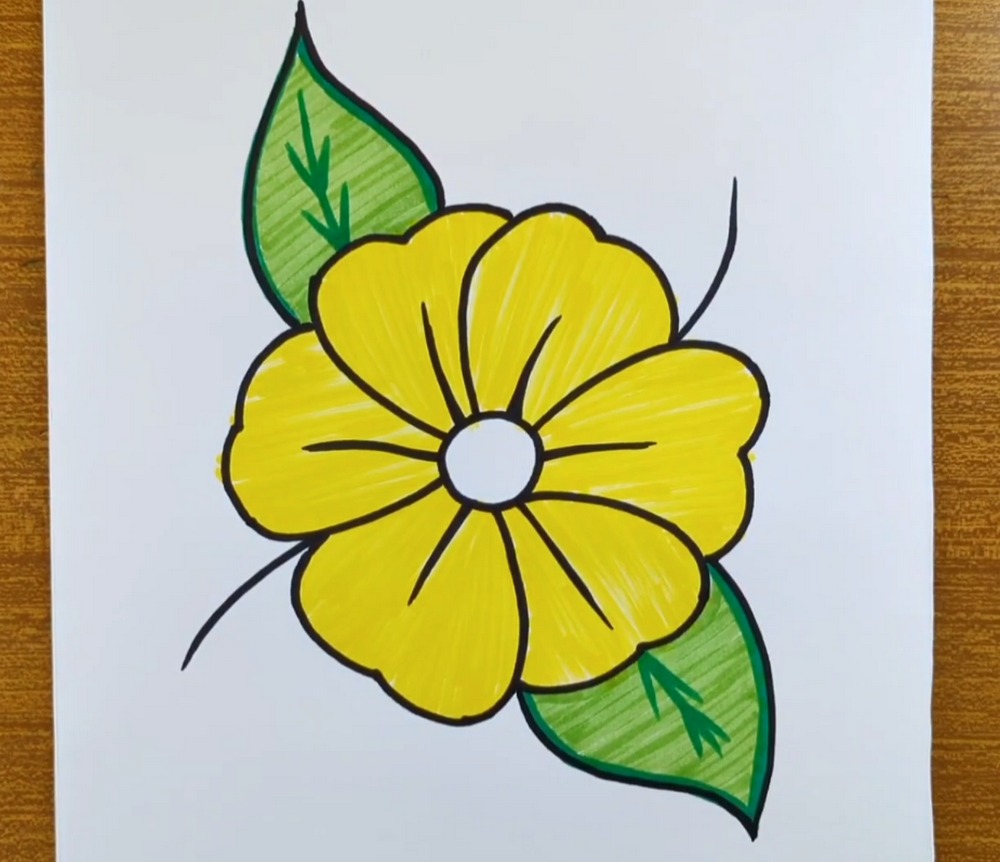
Lay a smooth yellow base across every petal. Work from the edges toward the center so marker or pencil overlap looks even. Keep strokes consistent and avoid pressing too hard at first. Leave the tiny center circle white for now. If your outlines are water-safe, you can layer freely; otherwise, color just inside the line, then gently meet the border. For cleanliness.
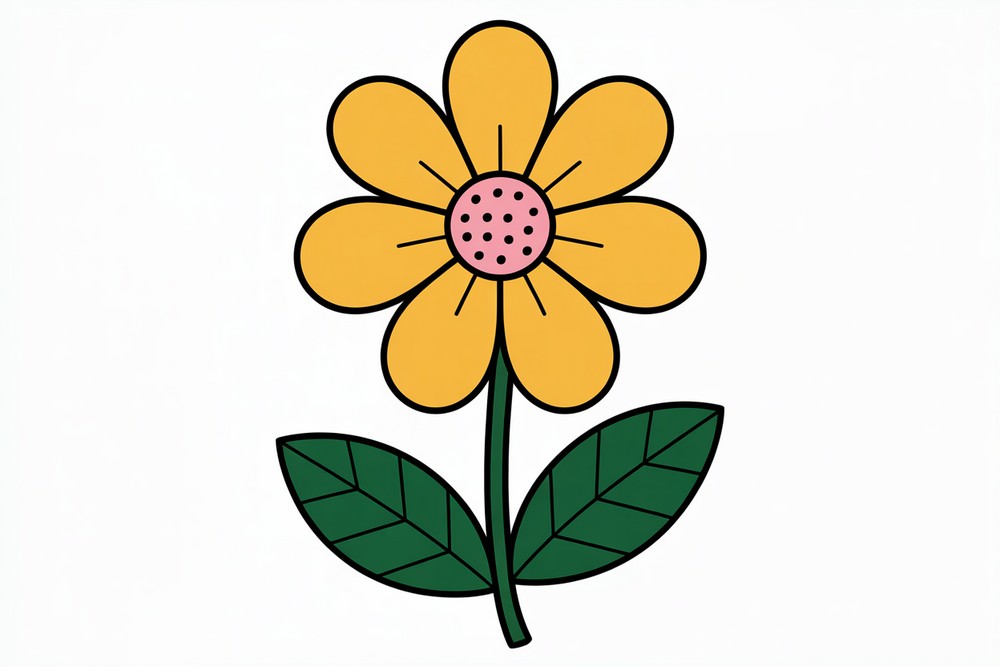
Warm Blush and Glow
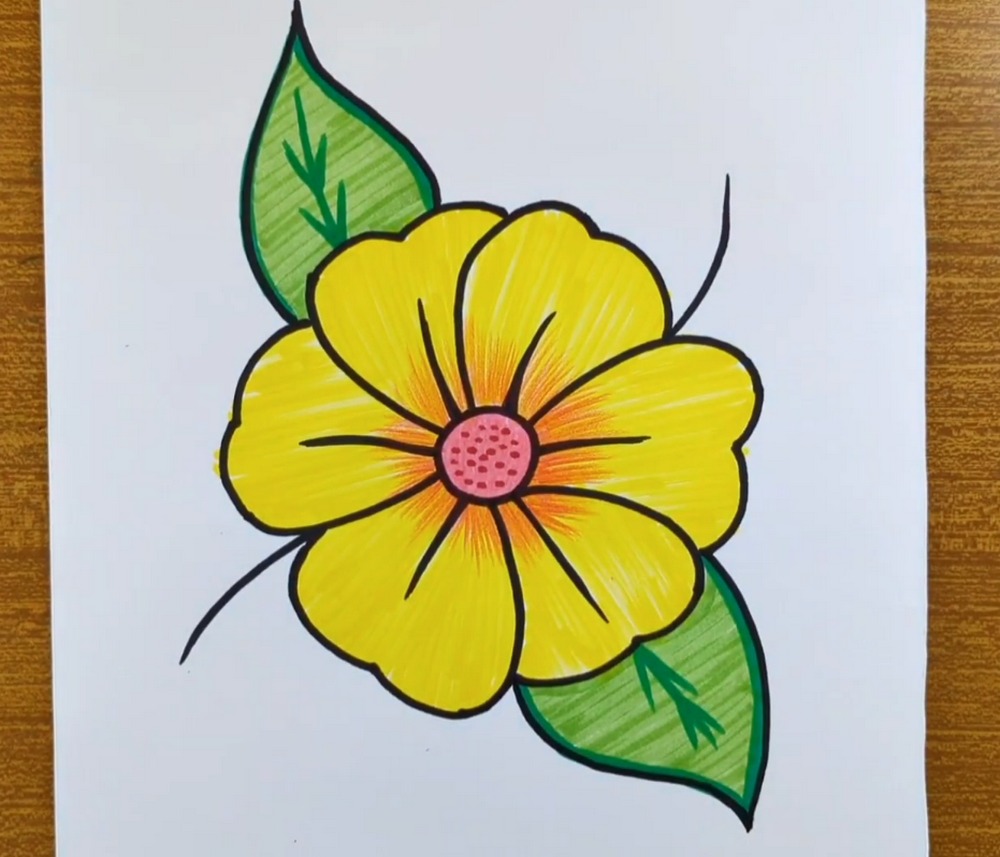
Deepen the petals near the center with a soft warm blush. Blend a touch of orange or pink where each petal meets the circle, feathering outward about one third. This gradient makes the bloom glow. Lightly darken the very rim of the center circle for pop, or tap a tiny orange dot inside. Keep the outer petal edges bright for sparkle. Extra.
Outline, Clean, and Finish
Finish with crisp outlines. Reinforce the main petal edges and leaf contours using a steady pen line of even weight. Erase any leftover pencil guides. Add a couple tiny white highlights on the petals or leaves if you used opaque gel pen. Check balance: thicken any weak edges, then sign your name. Your easy flower is ready to frame or share. Proudly.
Conclusion
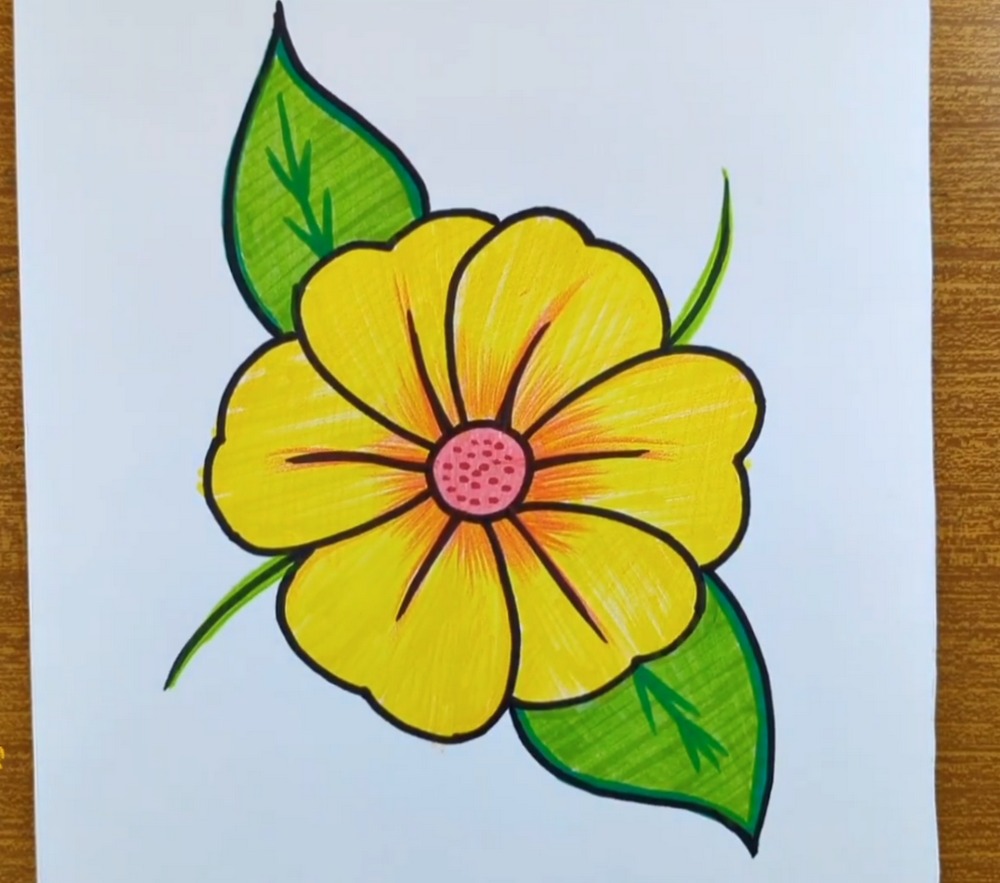
This flower is a small project with big payoff: simple shapes, satisfying color, and a cheerful result. Repeat the steps to build a garden of different sizes and angles. Swap yellow for pink, red, or lavender, change leaf placement, or add a stem. Most of all, keep the curves loose and the layers light. That’s how flowers feel alive. Naturally.
A Bonus Tip
Use a slightly thicker outline on the front edges and thinner lines on overlaps to create instant depth.
FAQs
Q: How long will this take?
A: Most beginners finish in 25–40 minutes, including coloring.
Q: What paper size works best?
A: A4 (8.3×11.7 in) is comfortable; use 160–200 gsm to handle markers.
Q: My petals look stiff. What helps?
A: Add a small dip near the tip and let sizes vary slightly.
Q: Should I shade before or after outlining?
A: Outline first if your ink is dry and waterproof; otherwise color, then carefully re-ink.
Q: Markers or colored pencils?
A: Either works. Markers give smooth fills; pencils offer gentle gradients and control.
Q: How do I fix proportions?
A: Compare each petal width to the center; lightly redraw one curve at a time.