Easy Colorful House Drawing
Want a simple, cheerful scene to practice lines, shapes, and coloring? This easy house drawing is perfect for beginners and kids, yet relaxing for adults. We’ll build the house using straight edges, add a curved path, tuck in bushes and trees, then finish with mountains, sun, and bright colors. The lines are clean, the shapes are friendly, and the steps are bite-size. Use a pencil first, then trace with a fineliner when you’re happy. Keep your strokes light and steady, and don’t worry about tiny wobbles—those add charm. By the end, you’ll have a colorful cottage in a green landscape that looks great on a card or classroom wall. Gather your paper, ruler, and markers, and follow the seven images below. Take your time and enjoy the relaxed, step-by-step pace.
Supplies for This Drawing
- A4 (8.3×11.7 in) smooth drawing paper, 120–160 gsm
- HB pencil plus 2H (light layout) and 2B (soft shading)
- Fineliner, 0.4–0.6 mm, waterproof black
- Ruler, 15–30 cm (6–12 in)
- Compass or small coin for the round window
- Erasers: kneaded and plastic
- Alcohol markers or colored pencils: reds, greens, yellow, blue, gray, brown, tan
- Sharpener and scrap paper for tests
Prepare the Materials
- Clear your workspace and set good side lighting.
- Tape paper edges for a clean border.
- Sharpen pencils; test pressure on scrap.
- Arrange ruler, compass/coin, and fineliner within reach.
- Place the reference images where you can glance quickly.
- Keep tissues or scrap nearby to blot markers.
Special Features of This Drawing
- Simple geometric house built from rectangles and triangles
- Overlapping trees and mountains for easy depth
- Curving path that leads the eye to the doorway
- Round window adds contrast to straight edges
- Clean marker shading along edges suggests form
- Bright, limited palette for instant charm
Tutor’s Suggestions
- Sketch lightly with 2H; commit with the fineliner last.
- Pull the ruler toward you to keep roof lines crisp.
- Turn the paper while inking long strokes.
- Build marker values with multiple passes, not pressure.
- Leave slim highlights at edges to keep surfaces lively.
- Compare left/right spacing to keep symmetry believable.
- Take short breaks to prevent wobbly lines.
Uses
- Classroom practice for shapes, line control, and color
- Quick warm-up for sketchbooks or portfolios
- Handmade greeting card or postcard
- Kids’ room wall print or coloring page
- Social post or simple poster design
- Relaxing weekend art activity
Level of Difficulty
Beginner-friendly — clear shapes, guided lines, and forgiving coloring.
Block In the House
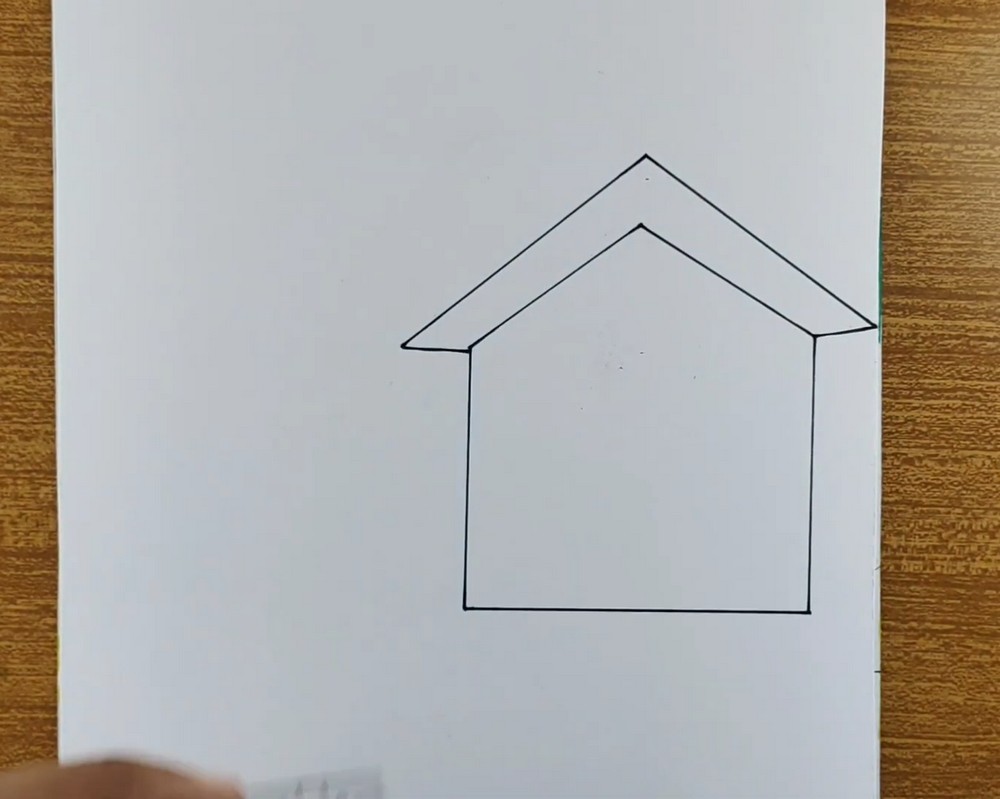
Use a ruler to draw a tall rectangle for the house body, leaving space above. Add two short eaves that stick out left and right. From each eave, draw slanted lines meeting at a peak to form the roof, then a parallel inner roof line for thickness. Keep everything light if penciling; we’ll ink later. Check verticals stay straight. Use gentle pressure.
Door and Round Window
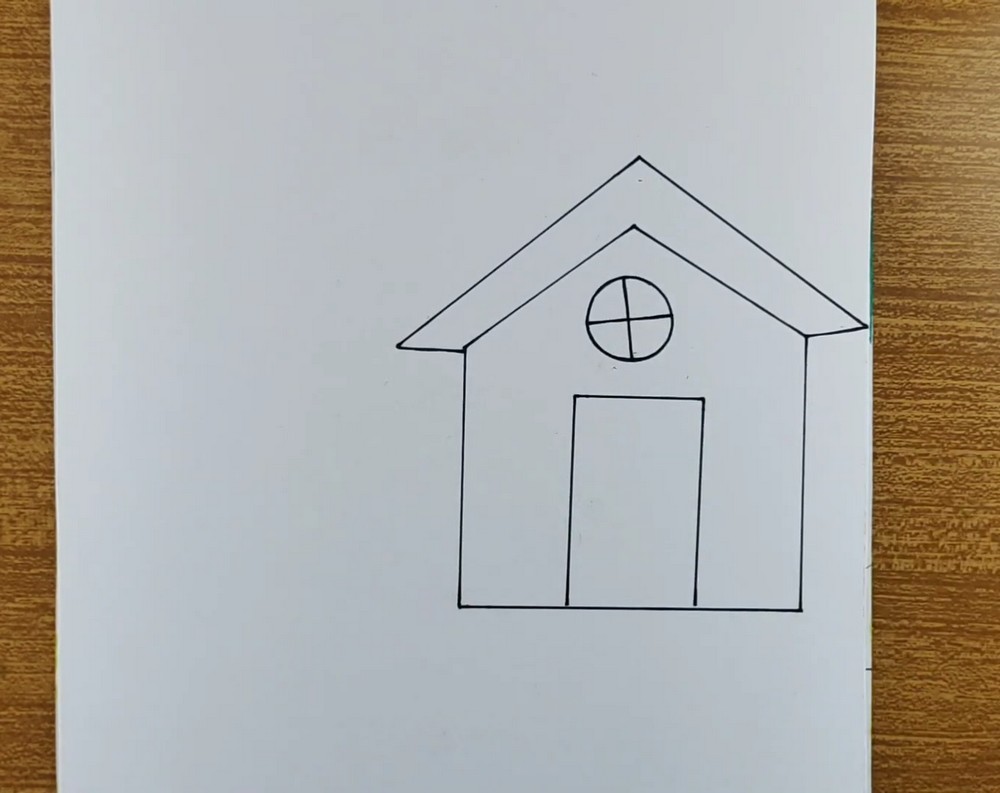
Inside the roof triangle, center a small circle for a round window. Divide it with a vertical and a horizontal line to suggest panes. On the wall, sketch a tall doorway as a rounded-corner rectangle; keep its bottom a little above the ground line. Leave space around edges for trim later. Ink the main lines carefully, lifting the pen at corners cleanly.
Path, Bushes, and Ground
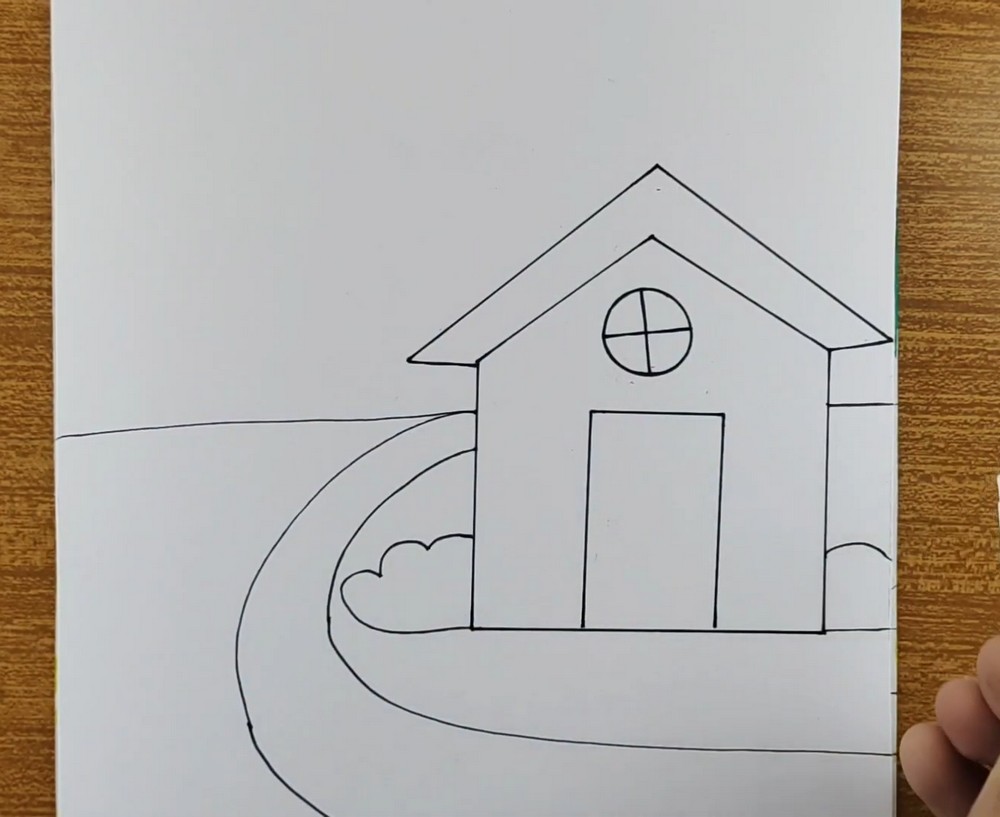
Lightly add a gently rising horizon behind the house. Starting near the left edge, draw a broad S-curve that loops toward the door, then sweeps down off the page; echo it with a parallel line to make a path. Place rounded cloud-like bushes beside the wall. Ground the house with a straight baseline. Add two short siding bands on the right wall.
Add Two Pine Trees
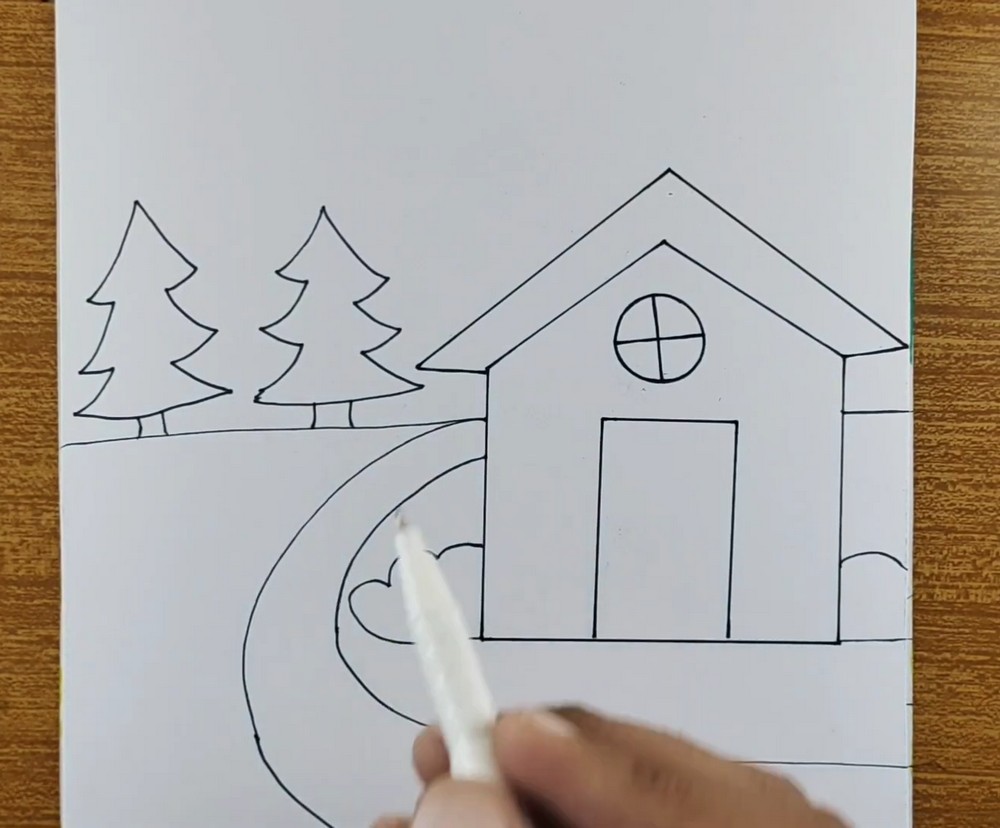
On the left, draw two simple pine trees. Stack three wide zigzag layers for each crown, making the top layer smallest. Add slim trunks that meet the ground line. Keep the tree edges slightly wavy so they feel natural. Adjust spacing so the left tree sits lower and the right overlaps the horizon a touch for depth and rhythm in the scene.
Shape the Mountains
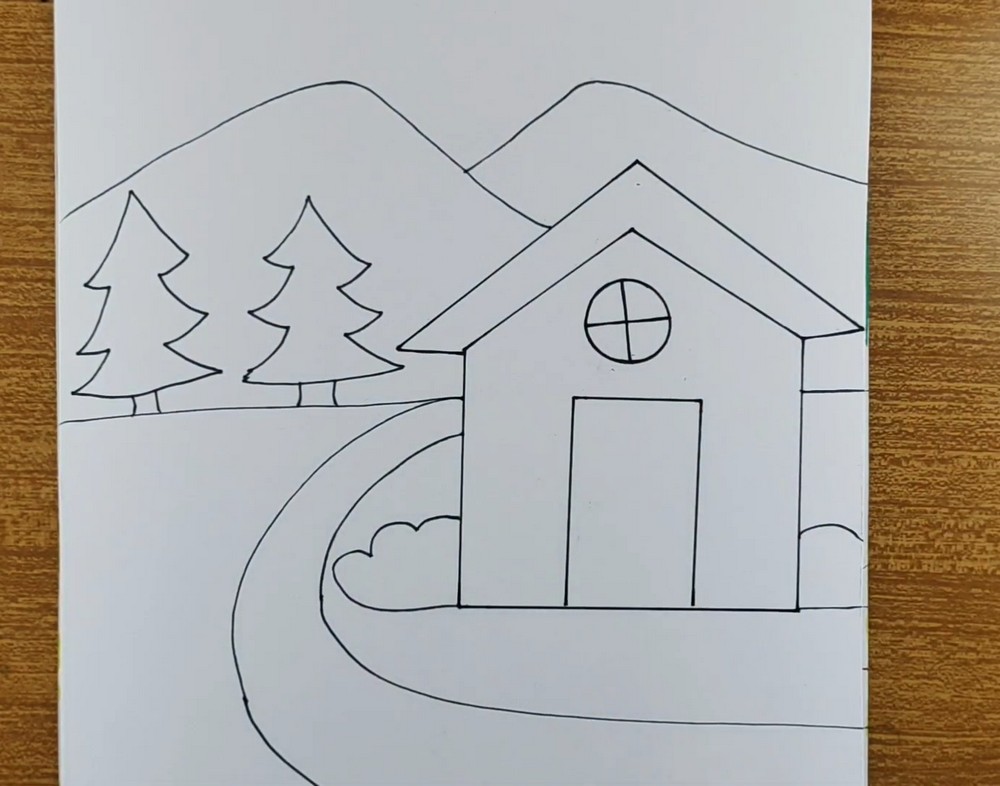
Sketch two rounded mountains that rise behind everything. Let the nearer peak overlap the farther one for layering. Keep their contours smooth, with a shallow dip where they meet. Make sure the left mountain begins behind the trees and the right slides behind the roof. These big shapes frame the house and guide the path inward toward the doorway for visual focus.
Sun, Birds, First Colors
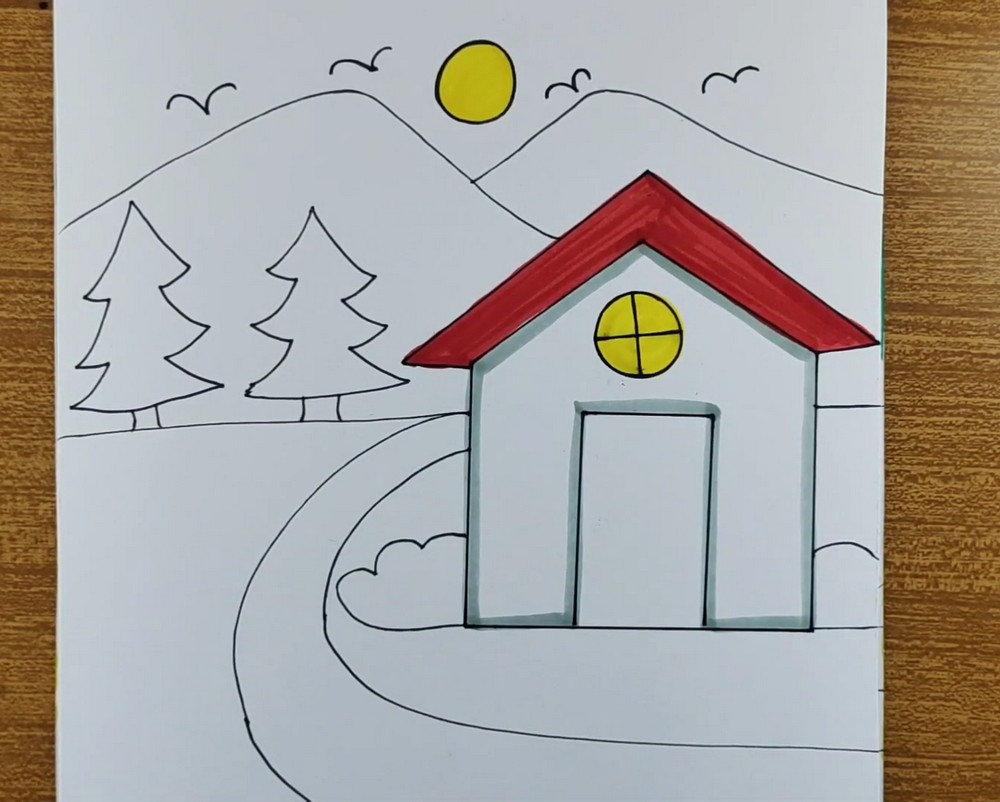
Add a bright sun above the mountains and a few distant bird shapes as shallow V’s. Begin coloring: fill the roof red, the round window yellow, and lightly shade the house edges gray to show form. Leave the door uncolored for now. Keep strokes even, moving in one direction. If using markers, work from light to dark to avoid bleeding and streaks.
Finish Coloring the Scene
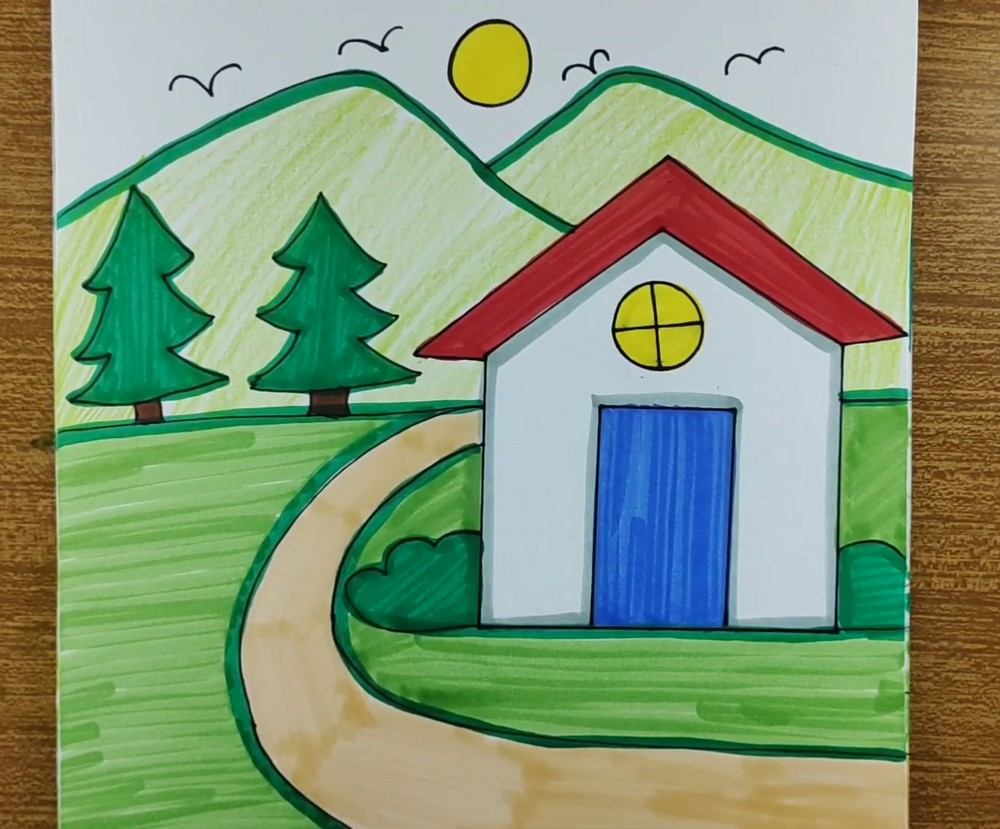
Finish the scene with color. Lay pale green across fields and mountains, add darker green along edges for volume, and outline slopes for clarity. Color the trees deep green with brown trunks. Fill the door bold blue so it pops. Shade the path tan with a slightly darker center. Reinforce key outlines, then step back and check balance: light, contrast, and harmony.
Conclusion
Small shapes, steady lines, and friendly colors turn this house into a relaxing drawing session. You practiced planning with guides, building clean edges, and creating depth using overlaps, shading, and a winding path. Keep your template handy and redraw it with different windows, fences, or skies. Recolor it each season to see how changing palettes can transform the mood beautifully.
A Bonus Tip
Outline shaded edges with a thin gray marker first; placing color against that soft edge makes the house look instantly three-dimensional.
FAQs
Q: How long will this take?
A: Most beginners finish in 30–45 minutes, including inking and coloring.
Q: What paper size works best?
A: A4/Letter is ideal. Heavier paper (120–160 gsm) prevents marker bleed.
Q: My roof lines wobble. Fixes?
A: Use a ruler, slow down, and pull the pen toward you. Redraw lightly in pencil first.
Q: Should I shade before or after coloring?
A: Add gentle gray edges first, then color. Deepen shadows last.
Q: Can I use colored pencils instead of markers?
A: Yes. Layer lightly, blend with a colorless blender or tissue, and keep strokes uniform.
Q: How do I keep proportions tidy?
A: Mark a centerline and measure door width with the ruler before inking.