Easy Boat and Island Drawing
Want a simple seaside scene that looks finished fast? This easy boat and island drawing walks you through clean shapes, tidy lines, and quick color. First you’ll sketch the hull, cabin, and mast, then add gentle waves and a palm-topped island for context. The steps use basic curves and rectangles, so beginners stay confident. We’ll ink smartly, shade lightly, and layer bright markers or pencils. You’ll learn to keep hull planks parallel, tilt the cabin slightly, and place the shoreline to suggest distance. By the end, you’ll have a cheerful boat bobbing near a sunny island, with playful clouds and raindrops for motion. Grab a sharpened HB, a fineliner, and a few browns, greens, and blues. Clear your space, tape the page, and let’s draw. It’s relaxing and surprisingly quick.
Supplies for This Drawing
- HB pencil, plus 2B for shading
- Fineliner/black marker (0.3–0.5 mm)
- Erasers: kneaded and plastic block
- A4 (8.3×11.7 in) paper, 160–200 gsm
- Ruler and small compass (optional)
- Alcohol markers or colored pencils: light/dark brown, orange, tan, two greens, blue
- Pencil sharpener and paper tape
Prepare the Materials
- Clear desk and set bright side lighting.
- Tape paper edges to a board for clean borders.
- Sharpen pencils; test markers on scrap.
- Place reference images nearby.
- Keep tissues/Q-tips for gentle color blending.
Special Features of This Drawing
- Simple curved hull made from friendly shapes
- Repeating plank lines for wooden texture
- Tall mast and rope creating a nice diagonal
- Palm fronds with “bitten” edges for character
- Distant horizon for depth and calm spacing
- Limited, warm-cool color contrast
- Playful clouds and rain adding motion
Tutor’s Suggestions
- Sketch lightly; commit with ink only when shapes feel right.
- Keep verticals truly vertical; rotate the page to help.
- Build wood shading slowly along edges and under planks.
- Vary wave spacing to avoid a pattern look.
- Use the kneaded eraser to lift, not rub.
- Rest your hand to avoid smudging wet ink.
- Compare angles: mast, rope, cabin roof.
Uses
- Classroom practice on shapes and textures
- Warm-up for an art portfolio page
- Cute greeting card or postcard scene
- Coloring page for kids’ activity time
- Quick wall print for a summer vibe
- Relaxing sketchbook study with markers
- Social post to share progress
Level of Difficulty
Beginner-friendly — mostly basic curves and rectangles with gentle coloring.
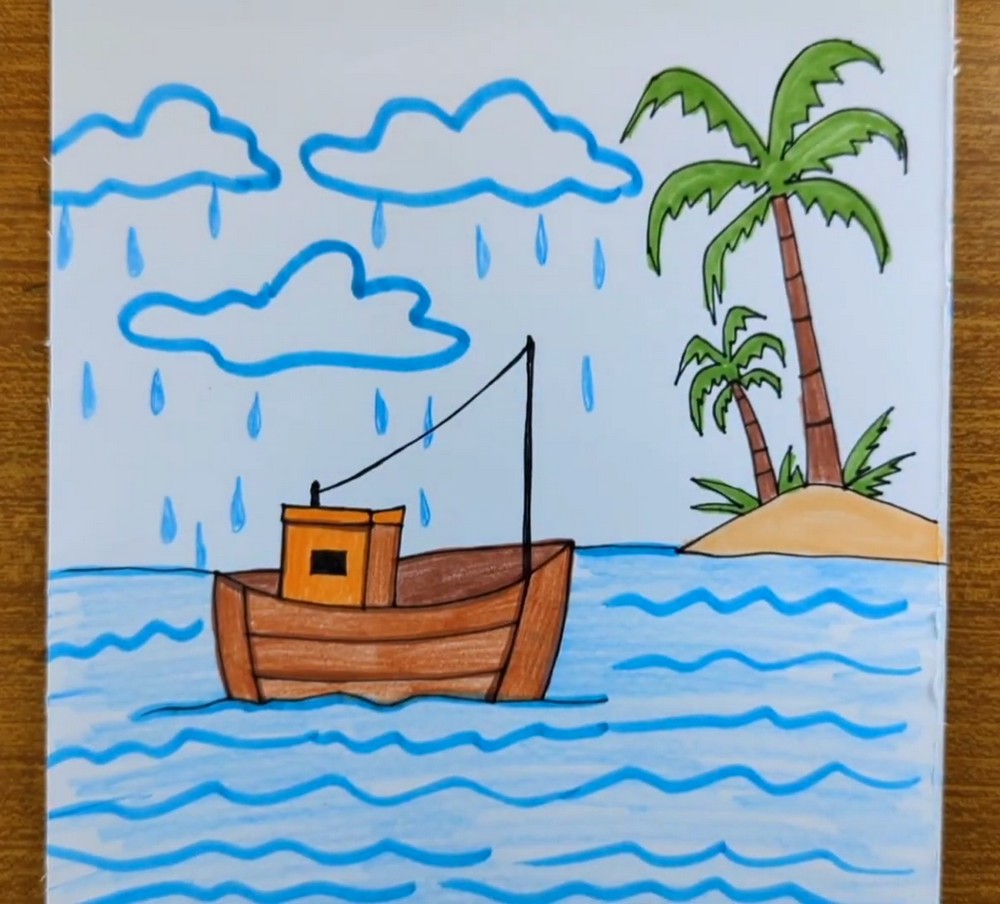
Hull, Cabin, and Mast

Lightly mark center. Draw a curved hull like a shallow smile. Add two slanted sides for bow and stern. Sketch a small rectangular cabin near the left, with a thin roof line and tiny chimney dot. Raise a tall mast on the right side of the boat. Connect cabin top to mast with a gentle rope curve. Keep lines simple and clean.
Planks and Waterline

Strengthen the hull outline, then add two long, slightly curved plank lines inside the boat to show wooden boards. Keep them parallel to the hull’s bottom curve. Under the boat, sketch a wavy waterline that dips and rises softly. This line should pass behind the hull ends. Check verticals on the mast and cabin so they stay straight and steady and balanced.
Island and Palms

On the right, sketch a small island mound with two palm trees. Draw tall trunks using two slightly curved lines each, thicker at the base. Add horizontal bands on the trunks. Build fronds with big curved triangles, then nibble small bites along the edges for a leafy look. Keep the island separate from the boat so the scene feels spacious and breezy.
Horizon and Leaf Color
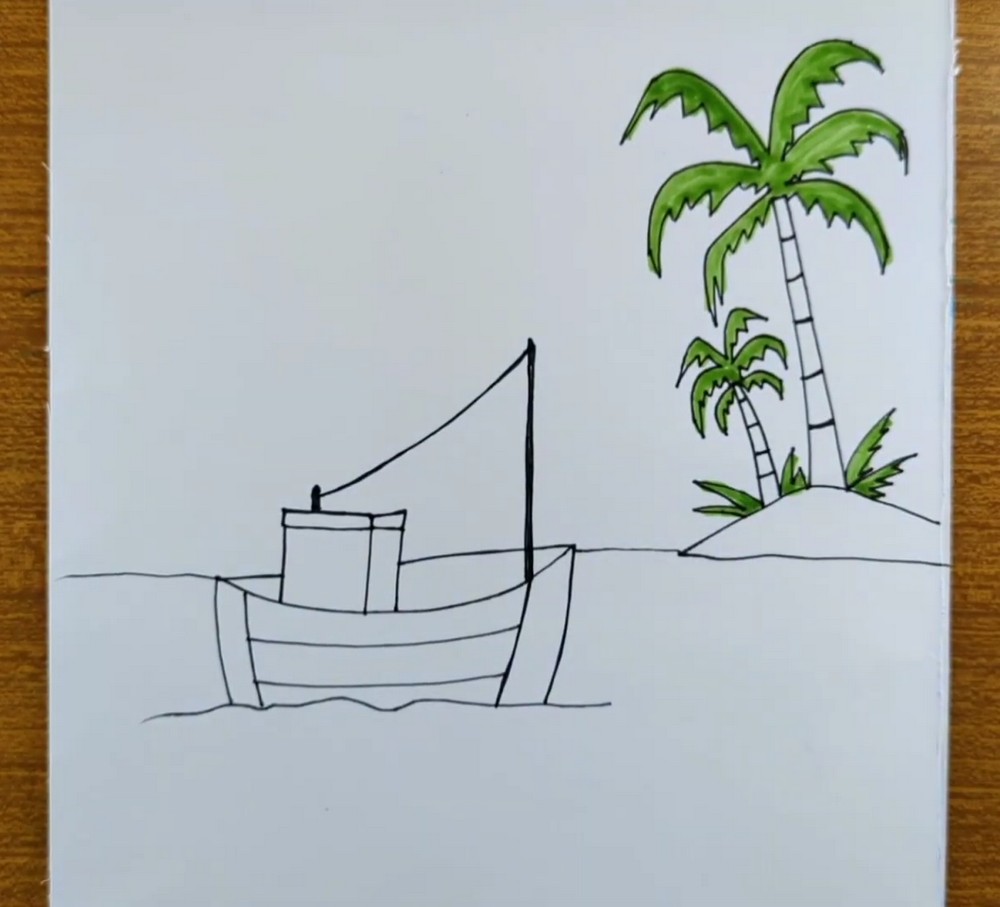
Add a distant horizon line that sits behind the boat and touches the island’s base. With a light green, block in palm fronds, leaving slim highlights along edges. Drop a few small grass shapes at the island’s foot. Keep strokes following the leaf curves. Don’t color the boat yet; we’ll shade wood later for depth and warmth. Keep everything crisp and tidy.
Wood and Sand Base
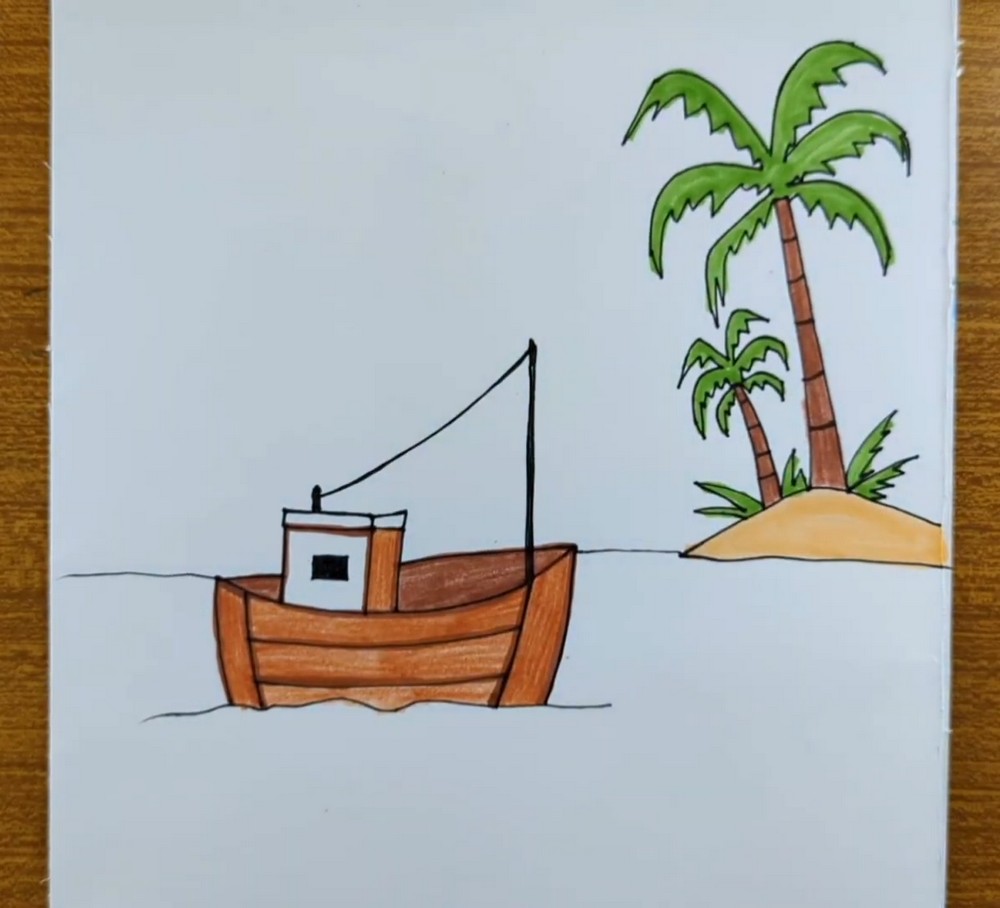
Color the hull using two browns: a lighter base over the planks, then a darker brown along edges and under the plank lines for shading. Fill the cabin walls with a pale cream. Give the island a warm sandy tan, slightly darker at the base for weight. Keep the mast dark. Leave the sea white for now; waves come next. Very soon.
Cabin Pop and Cleanup
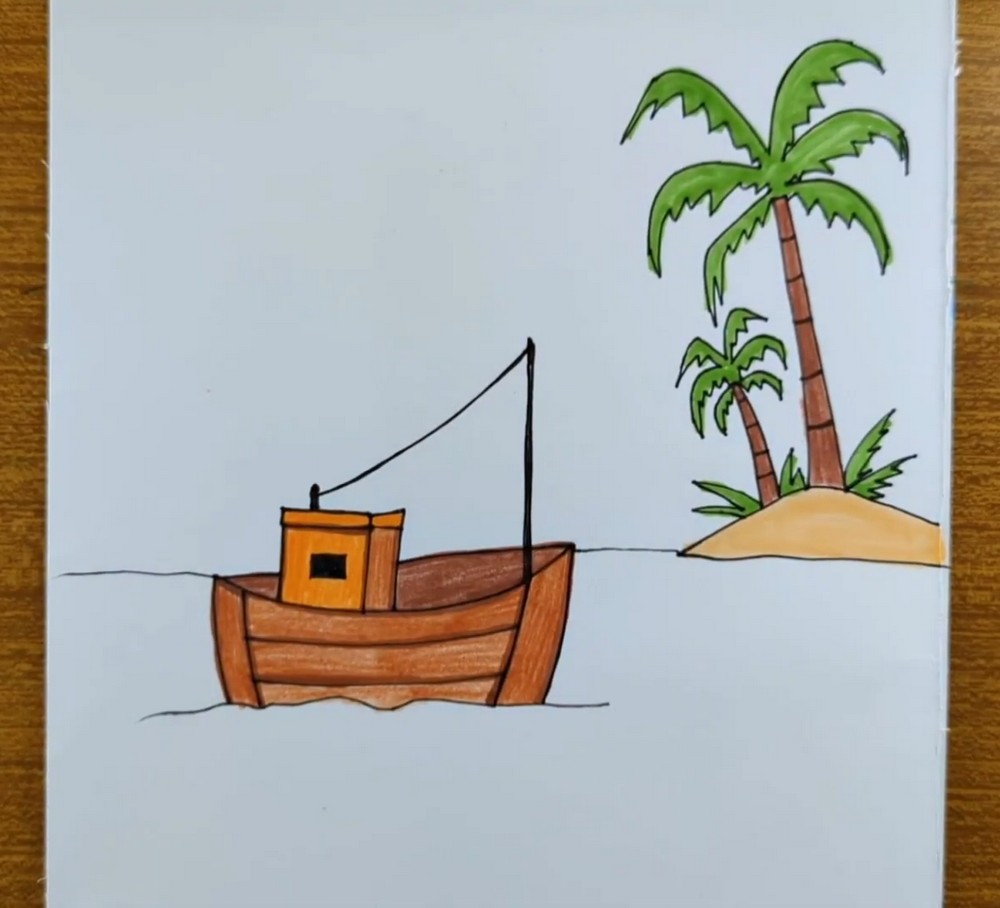
Deepen contrast: darken the mast and rope with the fineliner. Color the cabin a bright orange or yellow-orange so it pops against the brown wood. Add a small dark square window. Reinforce the hull’s outer line and the cabin roof trim. Smooth any uneven edges with careful, slow strokes. The drawing should now feel solid and ready for water and sky details.
Waves, Clouds, and Rain
Conclusion
Small scenes like this are perfect for practicing confident lines, gentle curves, and simple color layering. Notice how a few details—the rope, planks, and palm bands—instantly suggest story. Keep your colors limited so the shapes read clearly. If anything feels off, lighten with a kneaded eraser, redraw softly, and re-ink. Save your sketch to revisit with sunsets or stars later.
A Bonus Tip
Slightly overlap blue wave lines in front of the hull bottom; that tiny overlap makes the boat look like it’s truly sitting in water.
FAQs
Q: How long will this take?
A: Most beginners finish in 30–45 minutes, including coloring.
Q: What paper size works best?
A: A4 (8.3×11.7 in) is perfect; heavier paper prevents marker bleed.
Q: My hull looks uneven—help?
A: Redraw the bottom as one smooth curve first, then attach the sides.
Q: Should I shade before or after inking?
A: Ink first, let it dry, then shade so edges stay clean.
Q: Markers or pencils?
A: Either works. Markers give flat, bright color; pencils blend softly and are easier to correct.
Q: How do I color the wood nicely?
A: Lay a light brown base, then add darker strokes along edges and beneath plank lines, following the curve.