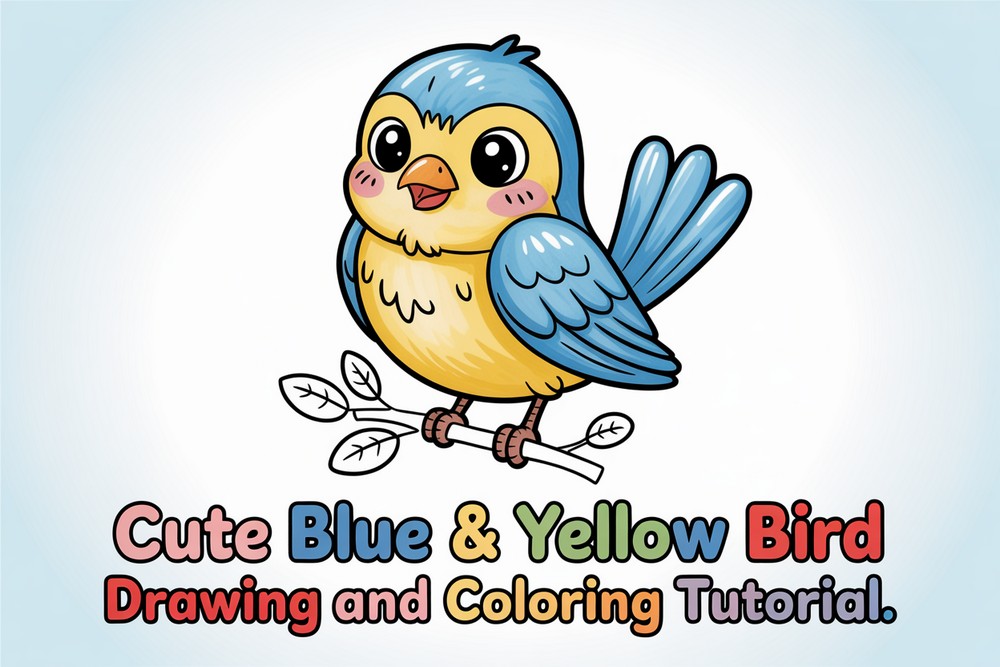
Cute Blue & Yellow Bird Drawing and Coloring Tutorial
Draw a cute blue and yellow bird perched on a branch with simple shapes and bold colors. This step-by-step guide is beginner-friendly and great for kids, classrooms, or a relaxing sketch break. We’ll start with the beak, build the head and wings, then place our bird on a branch and add leaves. Finally, we’ll color it using markers or pencils. Each image shows the next small move, so you can follow without guessing. Keep your lines light at first, then darken once it looks right. Use whatever paper you have; A4 or Letter works perfectly. Ready? Clear a space, sharpen a pencil, and let’s draw. Plan for gentle curves and round forms, since they make the bird friendly. If you like, outline with a fine liner after penciling for clean edges.
Supplies for This Drawing
- HB and 2B pencils
- Fineliner pens: 0.3 mm and 0.5 mm
- Erasers: kneaded and vinyl block
- A4 (8.3×11.7 in) or Letter 80–160 gsm paper
- Alcohol markers or colored pencils: yellow, blue, orange, brown, green, gray
- Sharpener
- Scrap paper as an underlay
- Optional: compass or circular object for the head
Prepare the Materials
- Clear and wipe your workspace.
- Place good light at your left/right to avoid shadows.
- Tape paper edges if you want a neat border.
- Sharpen pencils and test pens on scrap.
- Keep reference images visible.
- Put a second sheet under your page for marker bleed.
Special Features of This Drawing
- Friendly proportions: big head, small body.
- Bold two-color scheme with simple shading.
- Clear face mask shapes that read well from afar.
- Round wings that frame the body.
- Perched pose adds context and story.
- Leaves and wood texture for contrast.
Tutor’s Suggestions
- Sketch lightly; commit to ink only after checking symmetry.
- Use long, smooth strokes for curves—draw from the shoulder.
- Keep a kneaded eraser to lift graphite without scuffing paper.
- Build color in layers to avoid streaks.
- Leave tiny highlights in eyes and on cheeks.
- Compare left and right wing distances from the belly centerline.
- Take short breaks; fresh eyes catch wobbles.
Uses
- Classroom drawing practice or kids’ craft.
- Cute wall print for a bedroom or playroom.
- Greeting card or postcard artwork.
- Social post or sticker design.
- Warm-up sketch for your portfolio.
- Coloring page for younger artists.
Level of Difficulty
Beginner-friendly — basic shapes, clear outlines, and forgiving color blocks.
Beak Diamond
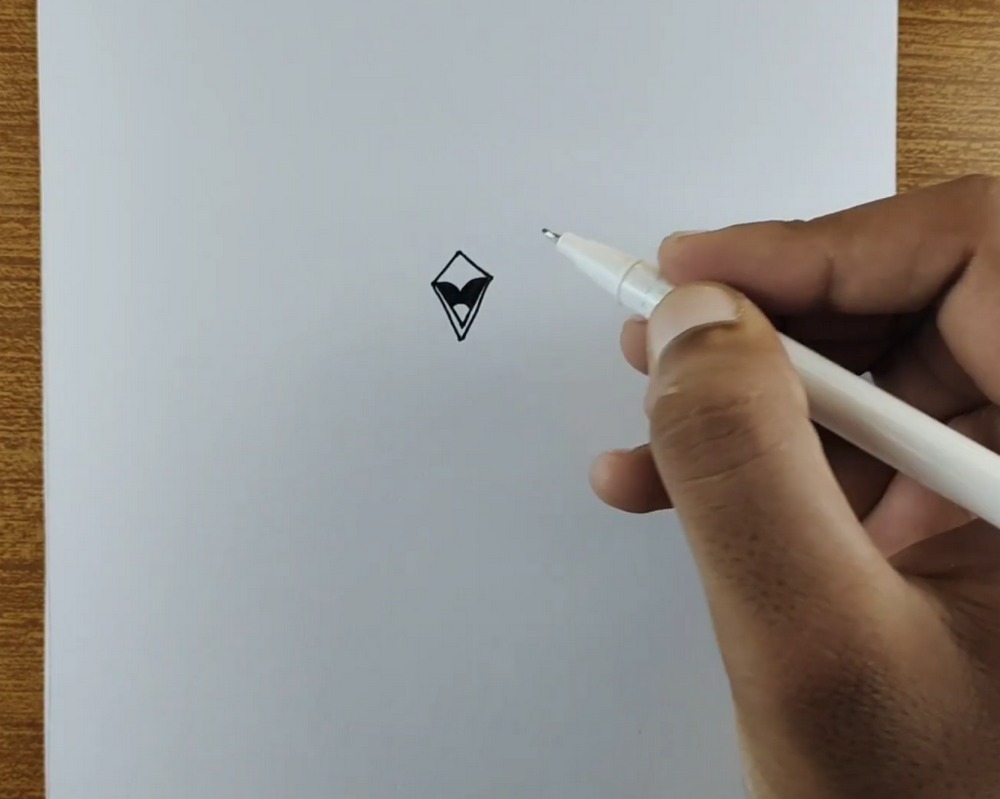
Start in the center with a small diamond for the beak. Split it horizontally with a curved smile shape, then shade the upper triangle. Add a tiny oval under the smile to suggest the tongue. Keep lines confident but light so corrections are easy. Leave room around it; the whole head will grow from this point. Center your page to keep symmetry.
Headband and Feathers
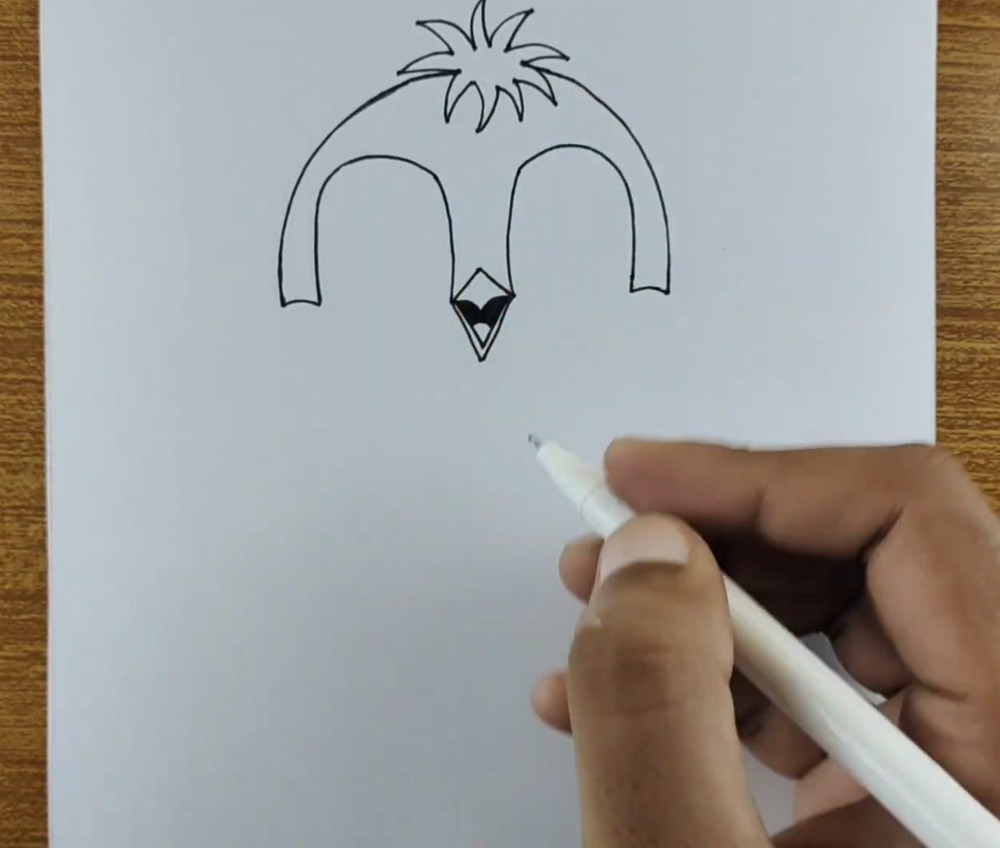
From the top of the beak, draw two long arches that curve outward and down, stopping level on both sides. These create the pale face mask. At the top center, add spiky tufts like soft feathers, pointing upward. Keep both arches symmetrical, leaving a gap above the beak. Use smooth wrist motion for even curves. Don’t press hard; lines will guide later.
Round Head and Eyes

Lightly sketch a circle around everything to form the head. Join the side arches to the circle, keeping their ends slightly flattened. Draw two almond eyes on each side, nested arcs inside for eyelids. Add a small highlight circle in each pupil and shade carefully. Place a tiny neck notch under the beak for chin fluff. Erase guides outside the head shape.
Chest and Wings
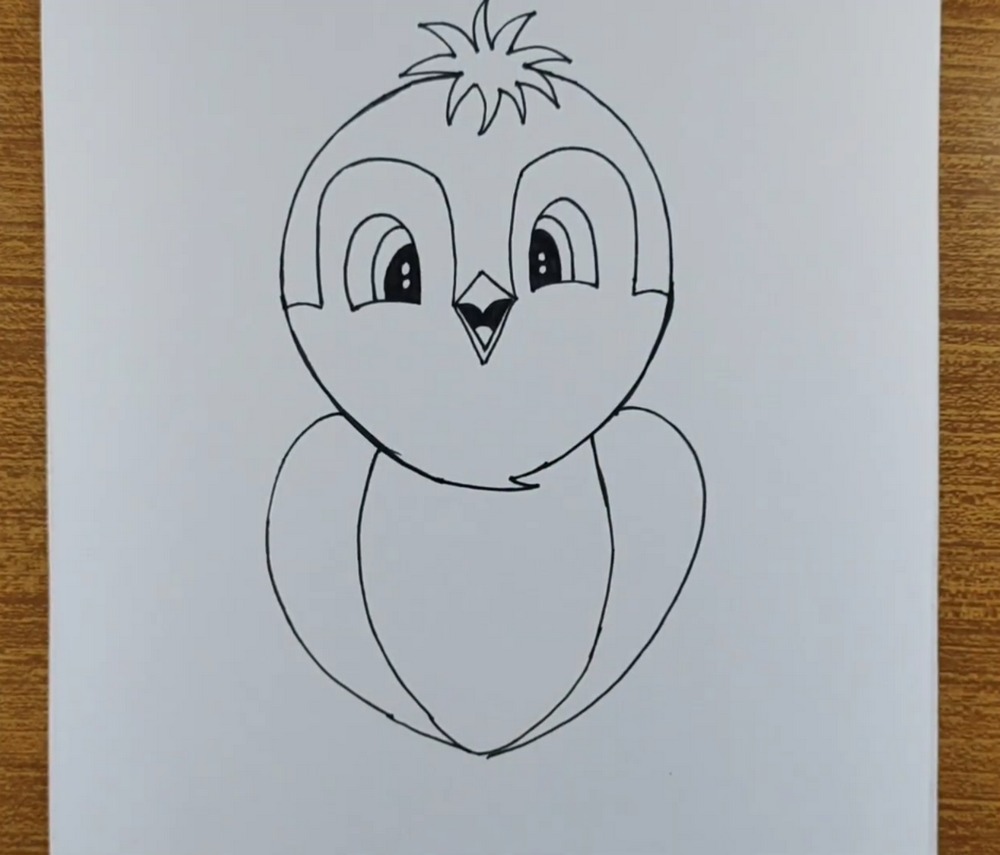
Under the head, sketch a big egg shape for the body, pointed slightly at the bottom. Add two rounded wings on the sides, overlapping the body line. Inside the chest, draw a long teardrop for the lighter belly. Keep all contours smooth and friendly. This simple geometry makes the pose cute and balanced. Leave space below for branch and tail later details.
Perch Line
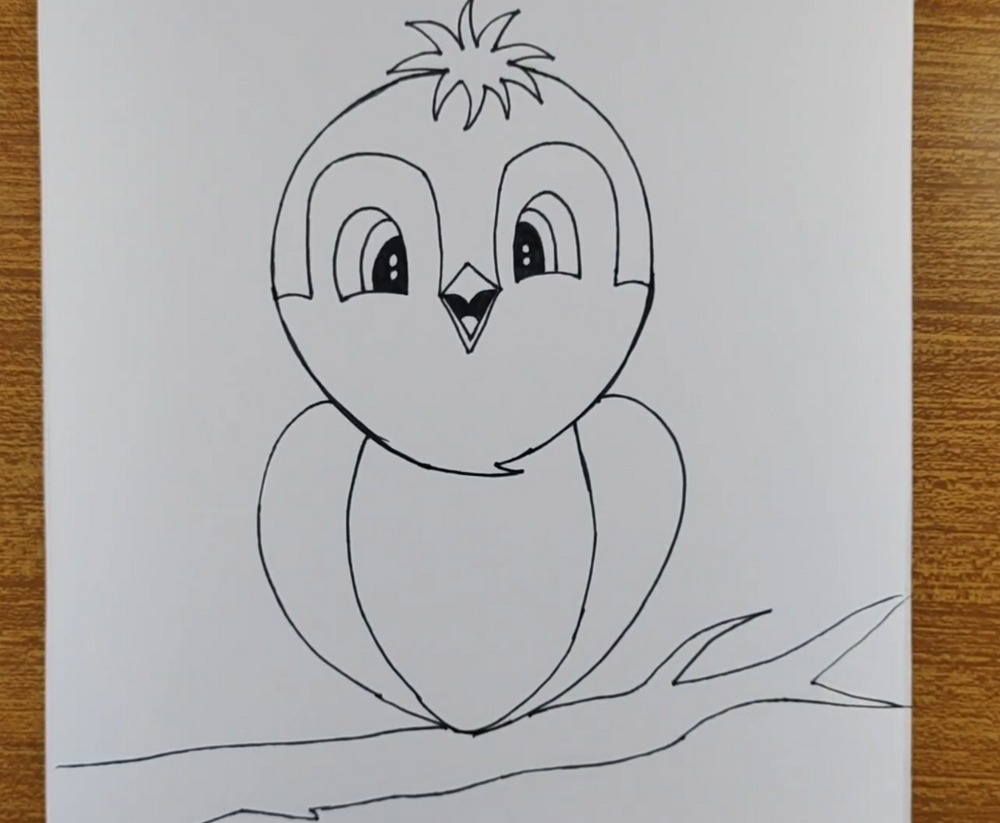
Add the branch. Draw a sweeping horizontal line under the body, letting the belly’s point touch the branch. Extend the line left and right with a gentle wobble so it feels wooden. Keep the bird centered over it. This line sets the perch height and composition, so check spacing before inking heavier outlines. Light erasing keeps construction tidy and flexible for adjustments.
Tail and Foot Wrap
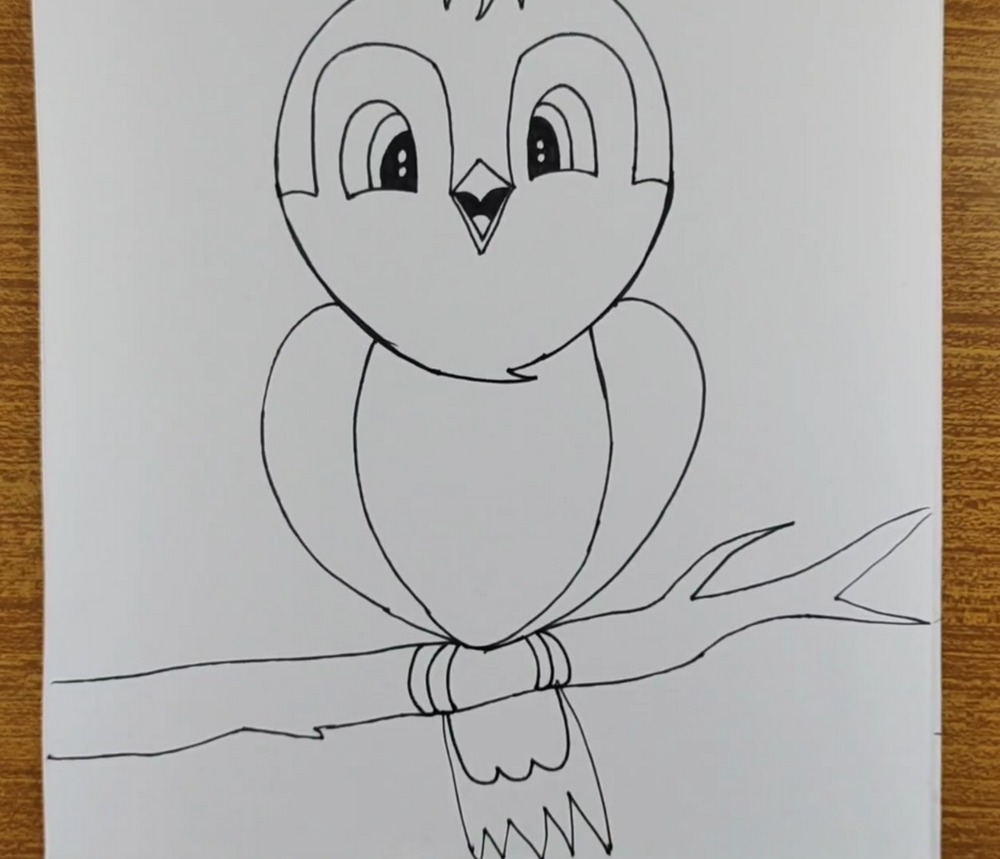
Give the bird a tail and little foot wrap. Under the belly point, add a banded cylinder hugging the branch. Drop a short tail below it, ending with three soft points. Make sure the tail aligns with the body centerline. These touches anchor the character to the perch and add appealing, simple shapes. Refine overlaps where tail meets branch neatly and clean.
Leaves on Branch
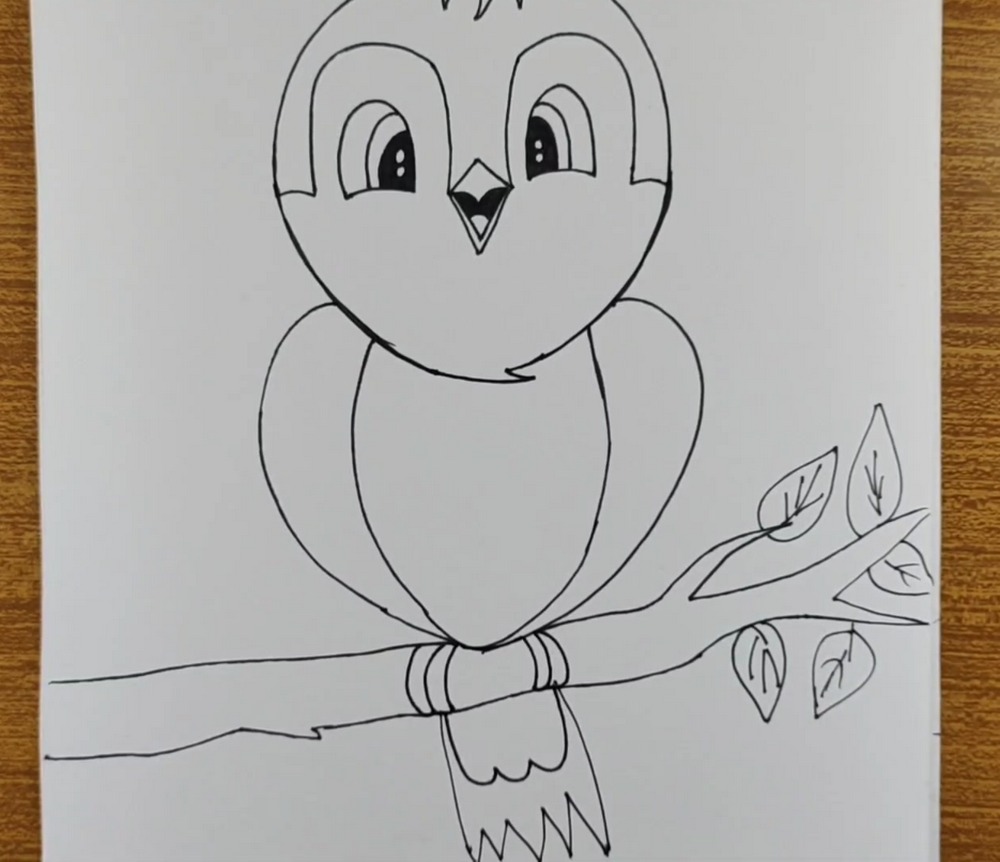
Grow the branch with a right-side twig and five leaves. Use tapered lines for the twig, then draw simple almond leaves, a midrib, and few short veins. Vary angles so the group feels natural. Keep them smaller than the bird to preserve focus. Pause to tidy any wobbly wing curves before moving on. Consistent leaf spacing keeps rhythms calm and visually pleasing.
Fill Yellow Areas
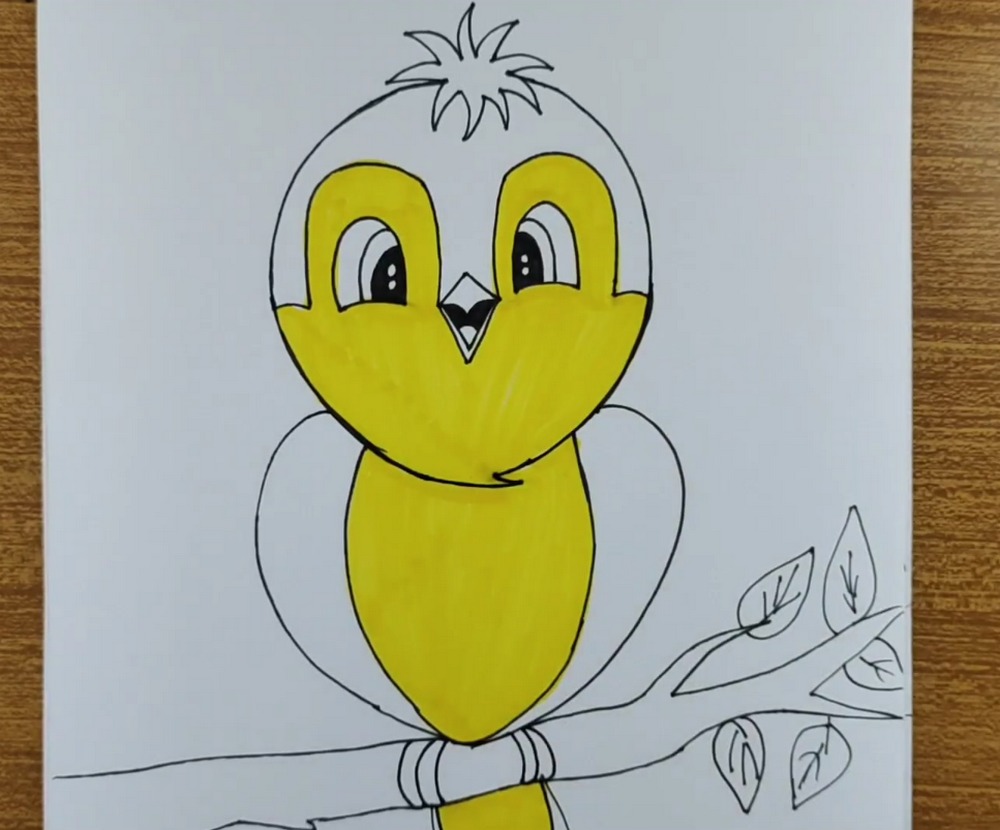
Begin coloring with the yellow areas: cheeks, lower face, belly, and front of tail. Use light, even strokes, overlapping slightly to avoid streaks. Work around the eyes and beak carefully. Leave narrow white highlights on the cheeks for shine. If using markers, place scrap paper beneath to prevent bleed-through onto your table. Colored pencils work too; build layers gradually for rich color.
Add Blue Feathers
Add blue to the head top, back, and both wings. Keep edges crisp where blue meets yellow, leaving the inner face and belly untouched. Darken near outer edges for soft shading and roundness. Fill the rest of the tail blue. Let each area dry slightly before touching adjacent zones to avoid smudges or accidental lifts. Re-ink lines after color if needed later.
Color Branch and Finishing Touches
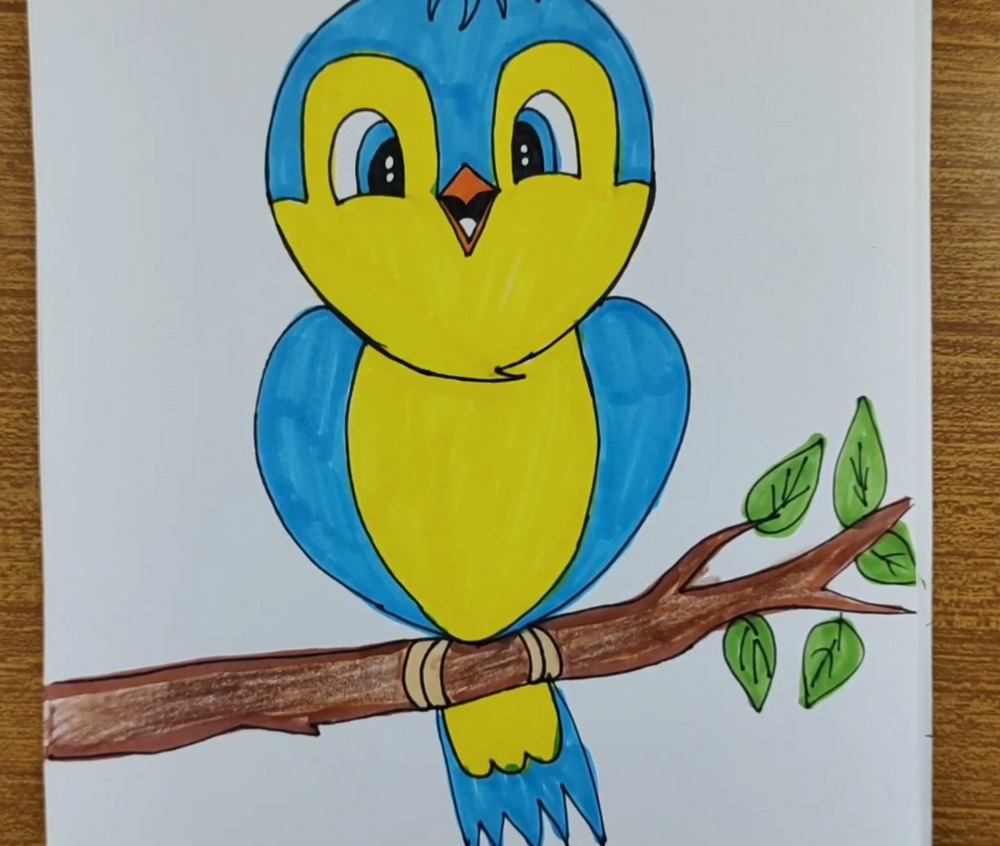
Finish by coloring the beak orange, the branch brown, bands tan, and leaves green. Add tiny darker streaks on the branch for wood texture. Deepen pupils and eyelids with a fine liner. Clean any stray marks with a kneaded eraser. Stand back, check balance, and add minimal highlights to keep the bird looking glossy and joyful. Sign your drawing neatly and date.
Conclusion
Small steps and smooth curves turn this simple sketch into a cheerful bird. Keep contrasts clear: bright yellow against cool blue, dark eyes against light face. The branch and leaves frame the character without stealing attention. Tweak wing size or leaf angles to match your style. Most of all, enjoy the process and celebrate your finished drawing with confident lines.
A Bonus Tip
Outline last with a slightly thicker fineliner on the outer silhouette and a thinner one for inner details—instant depth without extra shading.
FAQs
Q: How long will this take?
A: Most beginners finish in 30–45 minutes, including coloring.
Q: What paper size works best?
A: A4 or Letter is perfect; heavier 160 gsm resists marker bleed.
Q: My eyes look uneven—help?
A: Lightly mirror-measure: check equal spacing from the beak and eyelids’ heights.
Q: Should I shade before or after outlines?
A: Ink after you’re happy with the pencil, then color; re-ink lightly if needed.
Q: Can I use only colored pencils?
A: Yes—build layers gently and burnish highlights last.
Q: How do I color the branch believably?
A: Add a few darker streaks and vary pressure to suggest wood grain.


