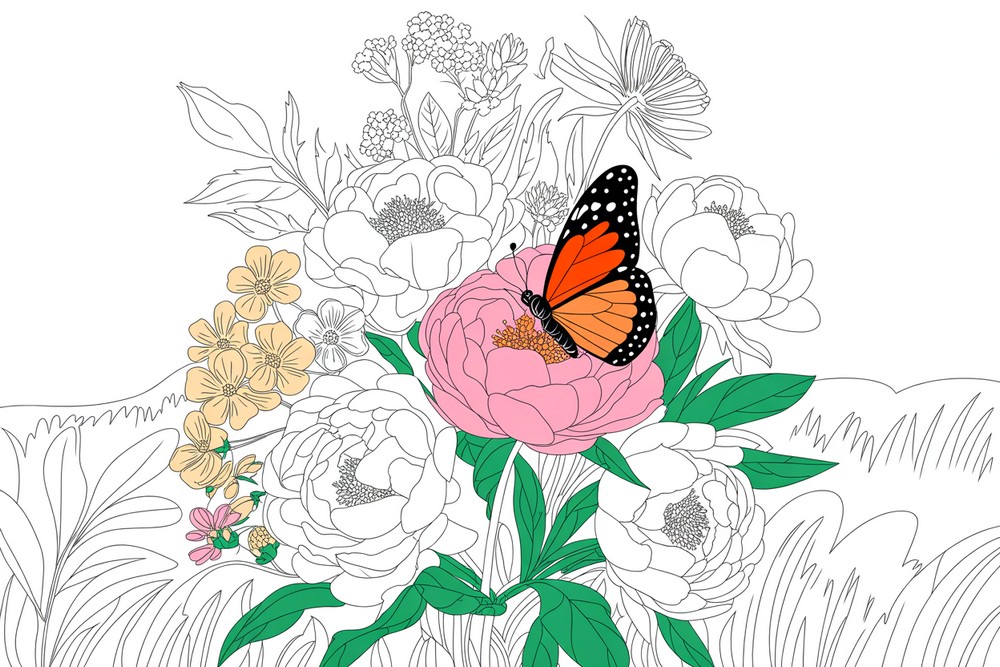
Painting a Beautiful Vibrant Flower Bouquet in a Vase
Ready to paint a lush bouquet that pops off the canvas? This step-by-step acrylic tutorial shows you how to build vibrant flowers, fresh greenery, and a glossy vase over a calm background. We’ll block shapes, map stems, layer petals from soft to crisp, and finish with a monarch butterfly for sparkle. The images walk through each stage clearly, so match your colors or improvise freely. Keep strokes loose early, tighten edges later, and group lights against darks for depth. You’ll practice scumbling, glazing, and directional brushwork, then place bright highlights last. Beginners can follow comfortably; intermediate painters can push detail wherever they like. Gather your paints, prime your panel, and let’s create a cheerful piece perfect for gifting or framing. Set aside drying pauses and breathe between layers for control.
Supplies for This Drawing
- Acrylic paints: titanium white, quinacridone rose, naphthol red, lemon yellow, yellow ochre, ultramarine blue, phthalo green, burnt umber, Payne’s gray
- Pre-primed panel or canvas: A4 (8.3×11.7 in) or 9×12 in, 280–380 gsm
- Brushes: 1″ flat, ½″ filbert, small round, liner
- Palette, water bucket, paper towels, spray bottle, palette knife
- Masking tape, graphite pencil
- Satin or gloss varnish (optional)
Prepare the Materials
- Tape the panel edges; set bright, even lighting.
- Arrange paints light-to-dark on the palette.
- Keep one clean, damp brush for blending only.
- Pre-mix a mid-gray, two pinks, leaf green, and vase neutral.
- Place references beside the easel.
- Test opacity and glazing strength on scrap.
Special Features of This Drawing
- Neutral ground that makes colors glow.
- Big-to-small workflow for easy composition.
- Lost-and-found petal edges for realism.
- Diagonal bouquet movement creating energy.
- Transparent glazes enriching pinks and greens.
- Reflective vase with simple value shapes.
- Monarch butterfly as a vivid focal point.
Tutor’s Suggestions
- Stop blending early—overworking dulls saturation.
- Keep petal strokes directional; pull from base outward.
- Reserve the brightest white for last highlights.
- Design leaf shadows as connected shapes, not stripes.
- Squint often to judge values and simplify.
- Alternate soft and crisp edges around focal areas.
- Step back between layers to check rhythm.
Uses
- Mother’s Day or birthday gift art.
- Home décor centerpiece above a desk.
- Greeting card or print run.
- Color-mixing practice for warms vs. cools.
- Weekend paint-and-sip project.
- Portfolio study of florals and insects.
Level of Difficulty
Intermediate — relies on value control, clean edges, and layered glazing.
Neutral Ground
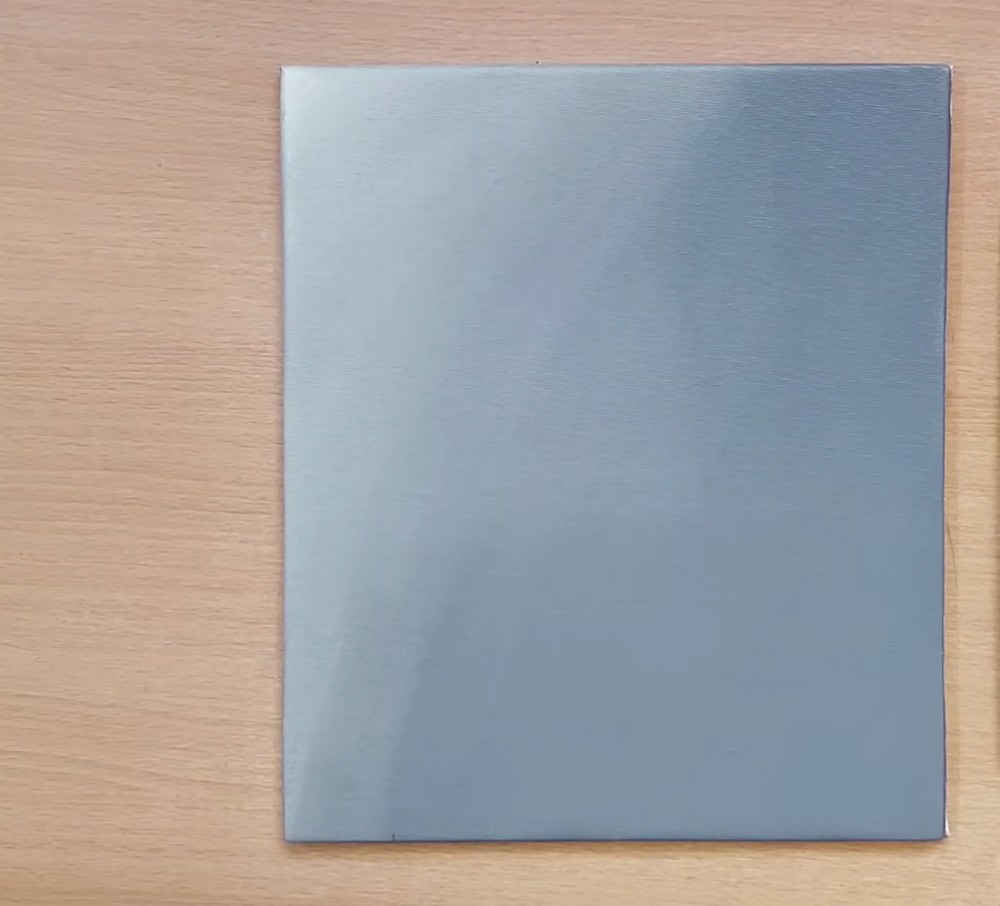
Tone the surface a soft, cool gray to make pinks sing. Roll or brush thin, even coverage, letting slight value shifts show. Keep edges clean. This neutral ground speeds later highlights and controls glare. Allow to dry fully. Lightly mark a loose bouquet placement, leaving room at the bottom center for a rounded vase rim. Soften edges with a barely damp brush.
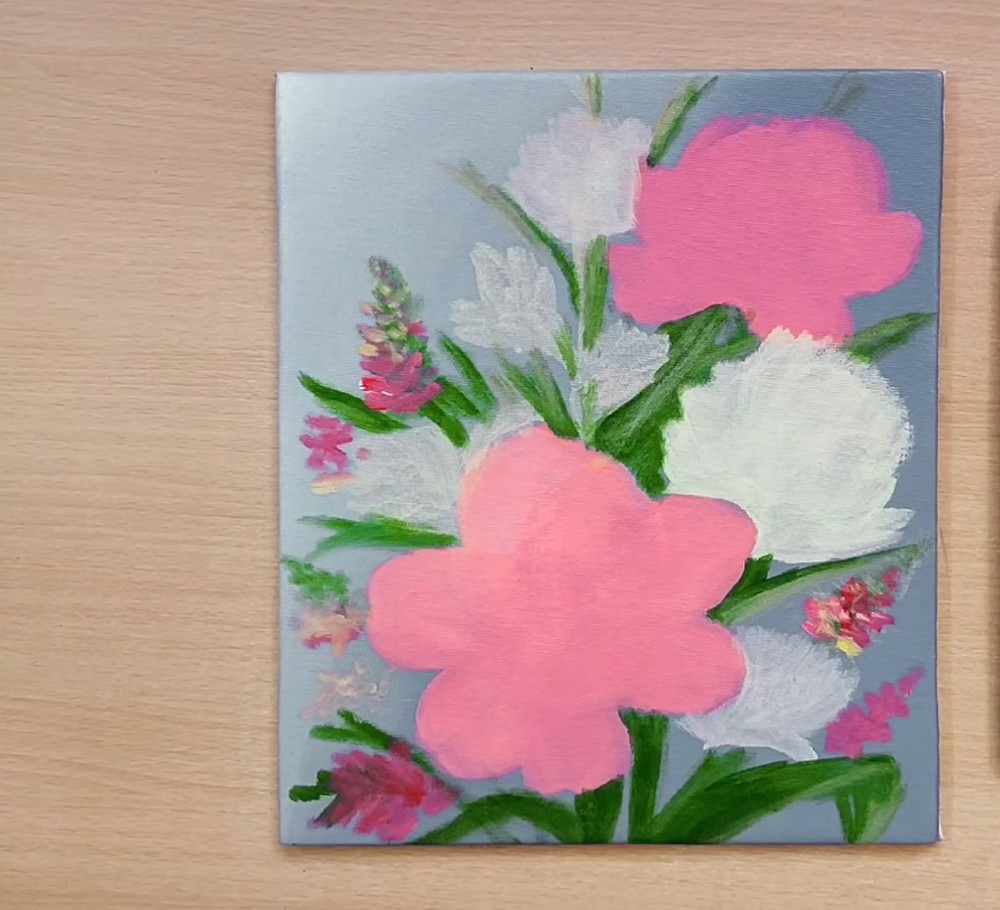
Big Blossom Blocks
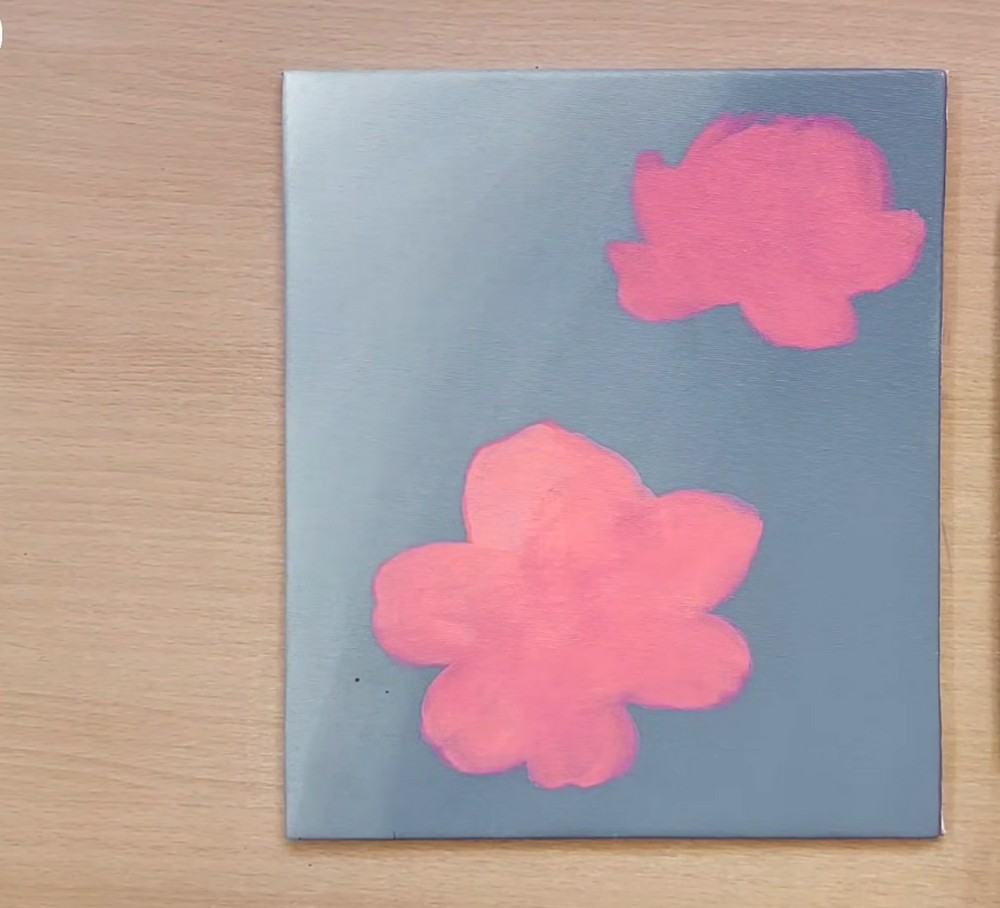
Block two main peonies using medium pinks. Paint big, simple five-petal silhouettes with rounded lobes; vary sizes. Keep shapes soft and slightly transparent so later layers glow. Don’t outline. Think cloud masses. Leave gaps between forms for future leaves and supporting flowers. Aim for asymmetry, positioning one higher right, one lower left, to start diagonal movement across your bouquet. It feels balanced.
Ghost Flowers & Leaves
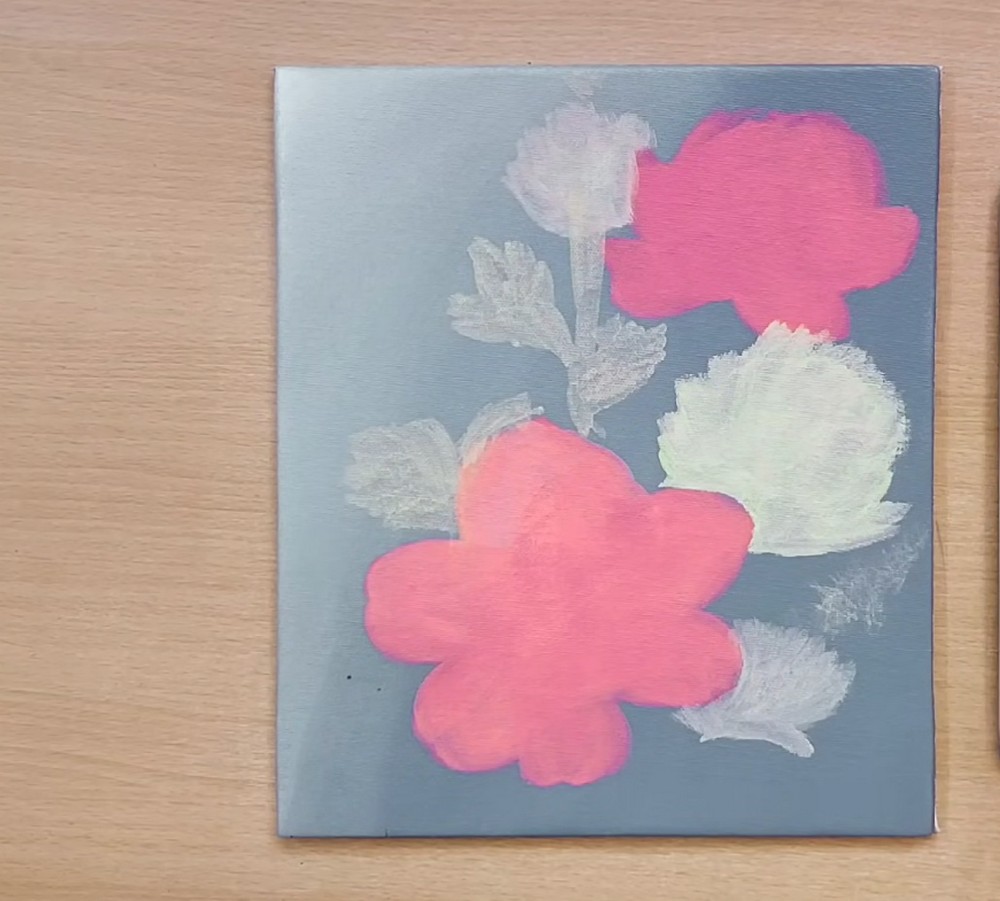
Add light gray underpaintings for additional blooms and leafy fillers. Use thinned white with a touch of background color to sketch circular blossom mounds, small buds, and soft leaf clusters. Keep strokes fuzzy; these are placeholders. Preserve overlaps in depth order. Let a few shapes peek behind pinks, and stage one near the base to anchor the future vase mouth for realism.
Stems and Accents
Introduce stems and lively accents. Pull rich green stems from base upward, weaving through gaps. Drop small spikes of warm pink and crimson flowers for variety. Deepen one leaf mass to design a shadow shape. Keep brushwork directional and confident. Recheck composition; create triangles between major blooms. Leave breathing space near edges so the arrangement feels airy rather than crowded and graceful.
Shape Petals & Vase
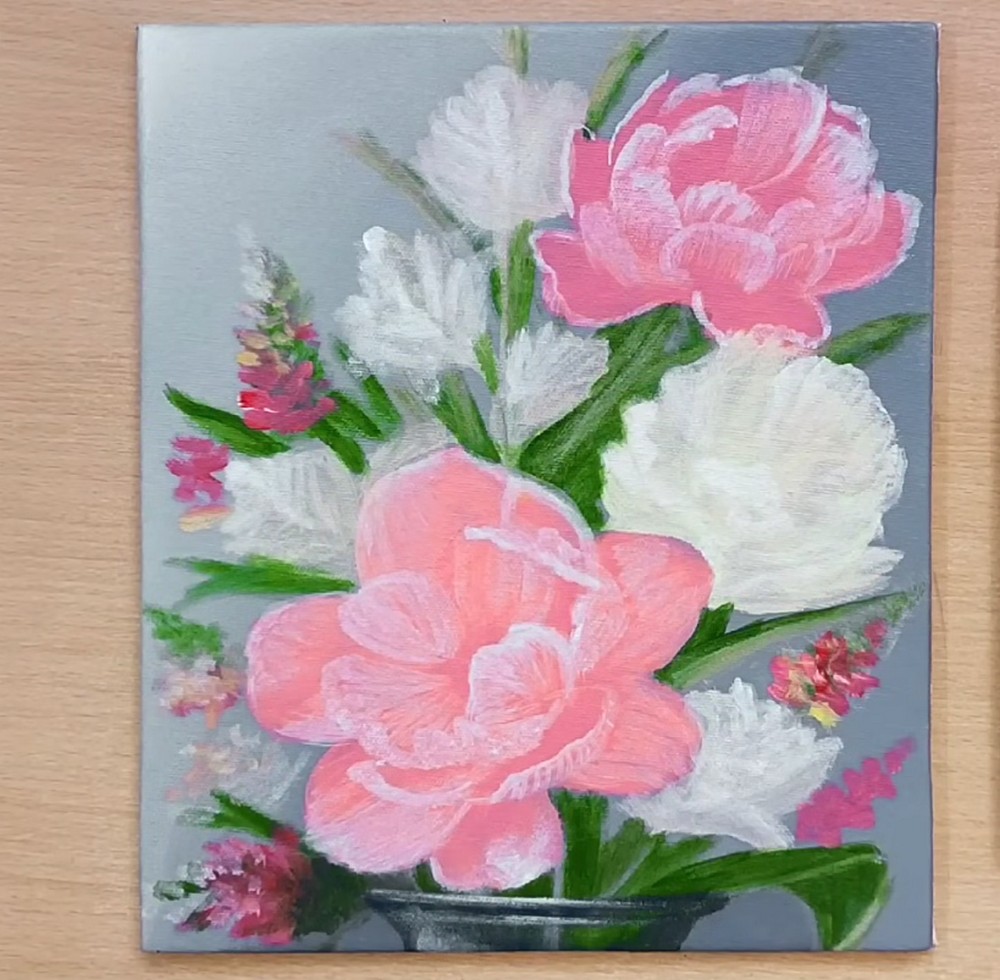
Model petal forms on the main peonies. With a filbert, layer lighter pinks and soft whites along curled edges, leaving darker centers. Use short, scooping strokes that follow petal direction. Add a hint of reflected light at undersides. Sketch the vase lip and body in muted greens and grays, then suggest translucency by softening inside edges slightly. Add subtle cast shadow beneath.
Butterfly & Centers
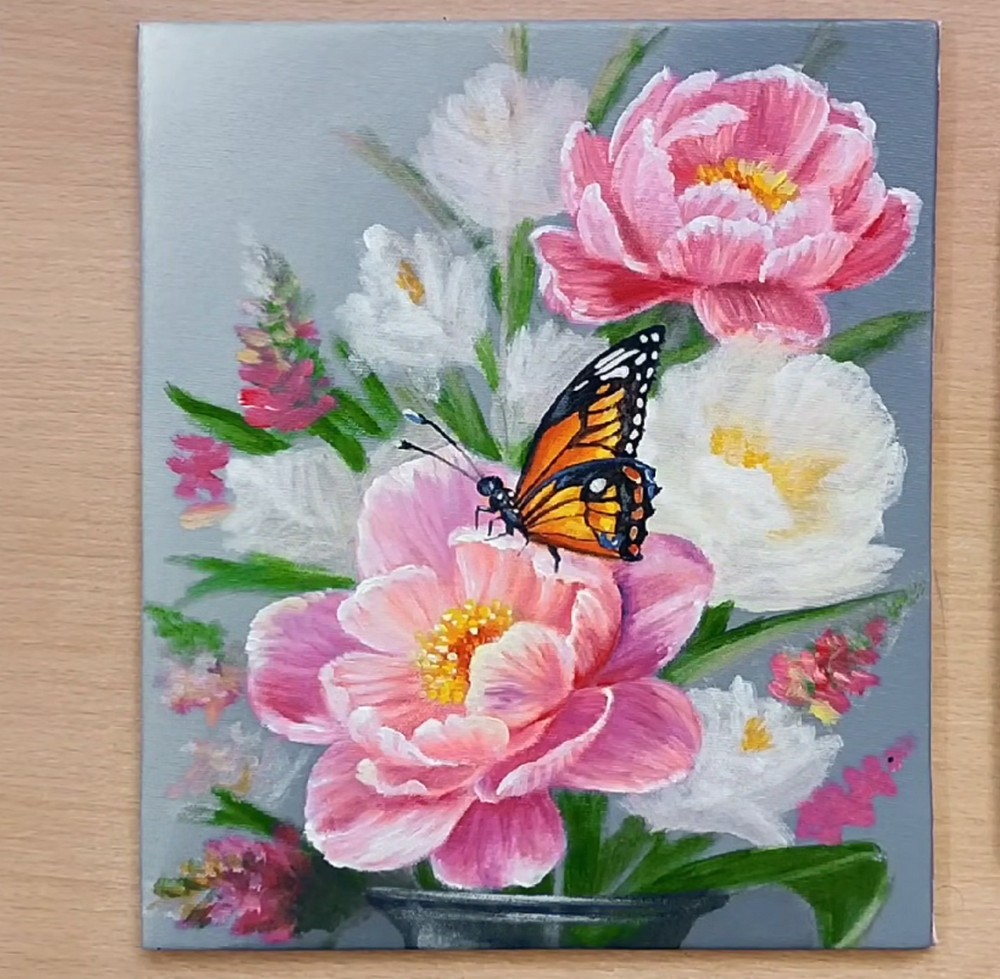
Paint the butterfly resting on the front peony. Block wings with orange and yellow, deepen outer borders with black, and dot small whites along edges. Add a dark body, antennae, and tiny legs touching petals. Sharpen the peony’s center with golden stamens and brighter highlights. Strengthen leaf shadows and soften background blooms to push the butterfly forward confidently, as focal interest today.
Polishing Pass
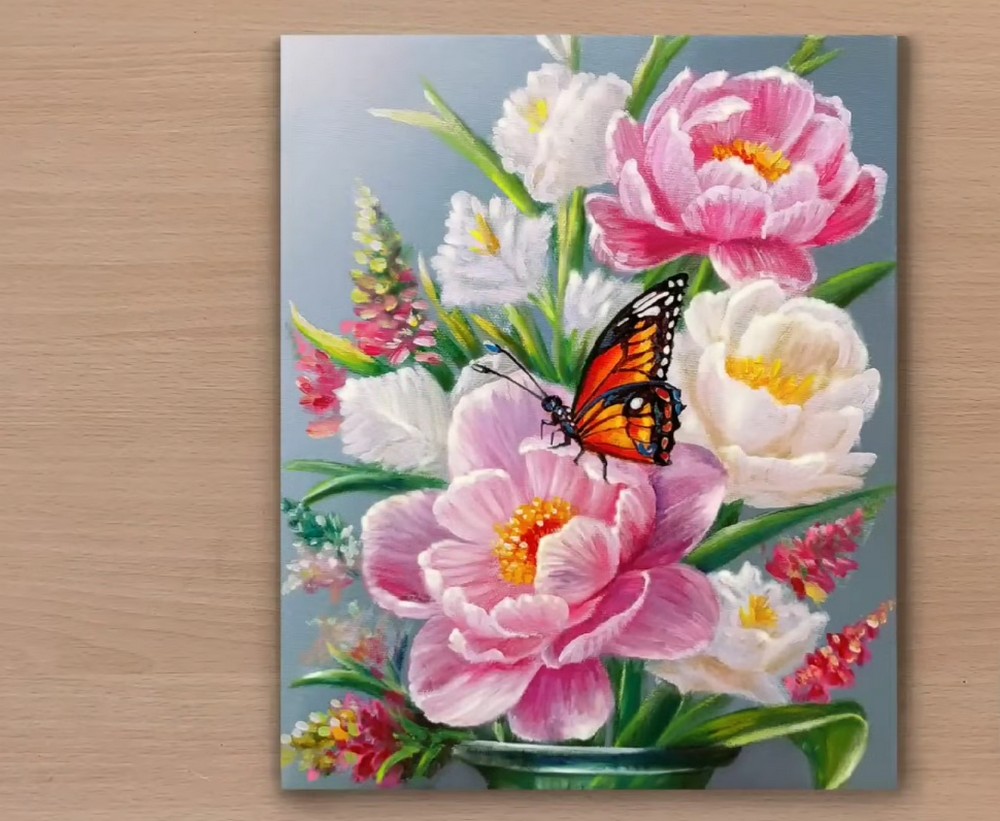
Finish with clean accents. Pop crisp white petal edges facing the light, glaze subtle pinks into half-tones, and deepen cool shadows between overlapping petals. Brighten a few leaf tips with yellow-green. Refine vase reflections with a dark base ellipse and a slim highlight curve. Final check: vary texture, keep centers lively, and leave delicate lost edges for atmosphere. Sign and varnish later.
Concluion
You built a bouquet from bold blocks to luminous details, balancing big peonies, airy fillers, and a crisp butterfly over a calm gray. Keep returning to contrasts—soft against sharp, warm against cool, light against dark—to maintain depth. Repeat this process with new color schemes, different insects, or taller vases, and your compositions will keep growing richer with every painting session.
A Bonus Tip
When petals look chalky, glaze a whisper of transparent warm pink over mid-tones to revive richness without losing form.
FAQs
Q: How long will this painting take?
A: About 2–3 hours with drying pauses; add time for varnishing later.
Q: Can I use student-grade paints?
A: Yes—just add an extra layer for coverage and use glazing medium instead of water.
Q: My petals look flat. What fixes this?
A: Push value contrast: darker centers, lighter curled edges, and a tiny reflected light underneath.
Q: How do I keep the butterfly crisp?
A: Soften background near it first, then paint wings with firm, single strokes and clear highlights.
Q: Any varnish advice?
A: Let the painting cure 24–72 hours, then apply a thin, even satin or gloss coat in one direction.