
Draw Easy Cute Ice-cream
Nothing says summer like a cute ice-cream drawing. This friendly tutorial walks you through each line, from the first curved box to the final rosy scoops. The steps match the photos, so you can follow along without guessing. We’ll keep shapes simple, focusing on smooth outlines, a wavy cream band, and an easy kawaii face. You’ll ink cleanly, then add soft color with pencils or markers. No experience needed—just a relaxed hand and a few minutes.
Use light guidelines, go slow, and enjoy the little drips! You’ll also learn a quick way to shade the wooden stick and layer pinks on the ice-cream so it looks soft and sweet. Each step builds gently on the last, making this perfect for kids, beginners, or anyone who wants a cheerful sketch break. Grab paper, a pencil, an eraser, and a black pen. Ready to draw a tasty, smiling treat? We’ll tilt the pop slightly for charm, add a wavy melt line, then finish with shiny eyes and blush. Pick any flavor colors you love. They’re all delicious.
Supplies for This Drawing
- HB pencil for sketching; 2B pencil for darkening
- Black fineliner or brush pen (0.5–0.8 mm)
- Kneaded eraser and vinyl eraser
- Sharpener
- A4 (8.3×11.7 in) smooth paper, 160–200 gsm
- Colored pencils: light brown, light pink, medium pink
- Optional: alcohol markers in matching colors, white gel pen
- Scrap paper for tests
Prepare the Materials
- Clear your workspace and set good lighting.
- Tape your paper edges if you want clean borders.
- Sharpen pencils; test the pen on scrap.
- Place the step photos where you can see them.
- Make a faint centerline to help alignment.
- Keep tissues or a blending stump handy.
Special Features of This Drawing
- Simple rounded rectangle base with a cute tilt
- Wavy melt band that adds movement and contrast
- Two teardrop drips for lively, summery energy
- Kawaii face with one winking eye and lashes
- Clean, bold inking for a sticker-like look
- Gentle shading on the wooden stick for volume
Tutor’s Suggestions
- Sketch lightly; erase only after the structure feels right.
- Pull long curves from your shoulder for smoother lines.
- Let ink dry before coloring to avoid smears.
- Layer color softly; build values in two or three passes.
- Keep a slim white highlight on glossy areas.
- Compare distances: eye to smile, smile to melt band.
- Take short breaks; fresh eyes spot wobbles fast.
Level of Difficulty
Beginner-friendly — simple shapes, clear inking, and limited colors.
Uses
- Classroom warm-up or kids’ activity
- Summer party invite or greeting card
- Coloring page for younger artists
- Notebook sticker or small wall print
- Social post or icon
- Sketchbook relaxation page
1. Build the Body

Start with the ice-cream body. Sketch a tall, rounded U shape in the middle of the page, leaving space above for the curved top and below for the stick. Keep the sides slightly slanted, like a soft rectangle with rounded corners. Use a light HB pencil first; when you’re happy, trace the outline with a bold black pen for clean edges. Aim for smooth, confident lines. This simple container shape sets the proportions for everything else. Keep angles gentle, playful.
2. Cap and Stick

Close the top with a single curved line to form a popsicle cap. Try to match the side thickness so the outline feels even. Then draw the stick: a narrow rounded rectangle centered under the body, overlapping slightly into the bottom edge. Keep it shorter than the ice-cream for cute proportions. Trace everything in pen once you’re satisfied, keeping strokes steady and smooth. This completes the basic silhouette and gives you a clear target area for details and color later.
3. Melt Line and Drips

Add a melting band. Inside the popsicle, draw a wavy horizontal line across the lower third to suggest a creamy flavor layer. Let the right edge extend past the outline and taper into two teardrop drips, one larger, one smaller, spaced slightly apart. Keep the wave gentle, with rounded peaks and valleys. Make sure the line reconnects to the side cleanly. These drips create movement and hint at summer heat, making the drawing lively before any face or color. Details.
4. Kawaii Face

Give it personality with a kawaii face. On the left, draw a big round eye with a smaller highlight circle; fill the rest black. Add simple lashes on the upper lid. On the right, draw a curved line for a playful wink. Sketch a soft smile centered between them, and place two small oval blush marks beneath. Keep features slightly above the melt band so they don’t overlap. Ink neatly, keeping curves smooth and friendly for maximum charm. And cute.
5. Color the Stick

Start coloring with the stick. Use a light brown pencil to lay an even base, keeping strokes vertical to mimic wood grain. Deepen one side with a second pass to suggest a soft shadow, and leave a narrow highlight on the opposite edge. If you have two browns, layer the darker into the shadow zone for depth. Keep edges crisp against the outline. This quick tonal shift makes the stick look rounded and supports the tilted, three-dimensional feel. And solid.
6. Pink Accents

Add pink accents. Fill the cheek ovals with bright pink, and color the two drips on the right the same shade so everything matches. Keep the color inside the outlines, but let texture show—gentle pencil grain looks charming here. If you’re using markers, make quick, even passes to avoid streaks. You can darken the edges slightly to suggest thickness. Leave the face highlights white. These small pops of color preview the final flavor and keep the drawing lively. And fun.
7. Flavor and Finish
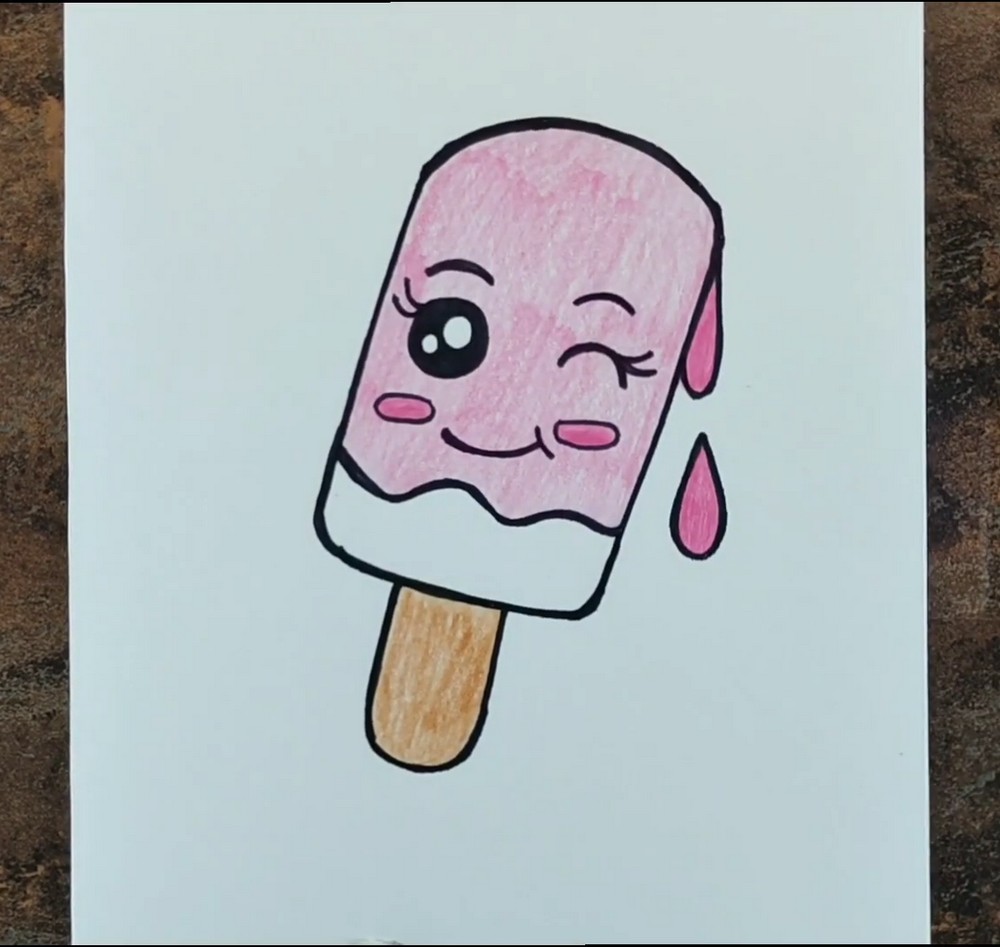
Finish the ice-cream. Color the top section a soft strawberry pink, keeping layers light and even. Build slightly darker areas near the right edge and along the curved top to hint at roundness. Leave the lower melt band white for contrast. If you like extra shine, gently lift a thin highlight with a kneaded eraser. Go over the outer outline with your pen to crisp everything. Step back—your cheerful, melting popsicle is complete and ready for a happy summer display.
Final Thoughts
Drawing a cute ice-cream is a small, happy project you can finish in one sitting. The tilted shape, melt line, and friendly face keep it playful, while simple shading adds depth. Feel free to switch flavors and colors anytime. Try sprinkles or stripes next. Share it with a friend or tape it near your desk for sunny vibes. Most of all, enjoy the process and the practice—it adds up, one sweet sketch at a time.
A Bonus Tip
Outline the drips slightly thicker than interior lines—this pushes them forward and sells the gooey melt.
FAQs
Q: How long will this take?
A: Most beginners finish in 25–40 minutes, including coloring.
Q: What paper size works best?
A: A4 (8.3×11.7 in) gives comfortable space, but any smooth sheet is fine.
Q: My outline looks uneven—how can I fix it?
A: Gently reshape with a kneaded eraser, redraw lightly, then re-ink in one steady pass.
Q: Should I shade before or after inking?
A: Ink first, let it dry, then shade and color to keep edges crisp.
Q: Can I use markers instead of pencils?
A: Yes—lay light layers, then add a slightly darker edge. Avoid repeated scrubbing to prevent streaks.
Q: How do I change flavors?
A: Swap the top color—peach, mint, or mango work—while keeping the melt band white for contrast.


