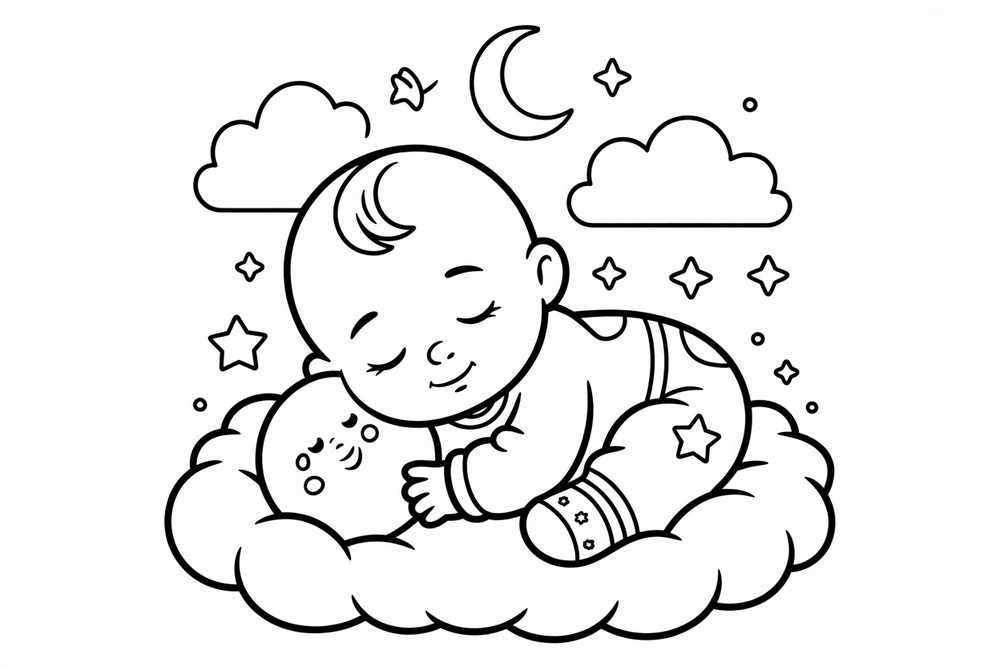
How to Draw a Cute Baby Sleeping on the Clouds
This tutorial shows you how to draw a cute baby napping on fluffy clouds. We’ll start with a simple hat curve, build soft cloud puffs, then shape the baby’s rounded face and tiny limbs. You’ll ink clean lines and shade gently for that dreamy nighttime look. No fancy tools needed—just a pencil, eraser, and fineliner. Whether you’re sketching with kids or practicing shapes and shading, this project is relaxing and rewarding. Follow each picture in order, keep your strokes light, and let the forms evolve gradually. We’ll add a crescent moon and stars, strengthen edges, and blend values for plush depth. By the end, you’ll have a cozy illustration perfect for cards, nursery art, or calm practice. Take your time, breathe, and enjoy drawing a peaceful moment. Start when ready.
Supplies for This Drawing
- HB pencil for sketching
- 2B pencil for shading
- Fineliner (0.3–0.5 mm) for inking
- Kneaded eraser + vinyl eraser
- Blending stump or soft tissue
- Sharpener
- Ruler (for margin alignment, optional)
- A4 (8.3×11.7 in) 180–200 gsm drawing paper
- Optional: light pink/peach colored pencil for blush
Prepare the Materials
- Clear and light your workspace.
- Tape paper edges for a clean border.
- Sharpen pencils; test pressure on scrap.
- Place reference images to the left.
- Keep erasers and stump within reach.
- Keep a tissue under your drawing hand.
Special Features of This Drawing
- Soft, pillowy cloud forms built from varied C-shapes
- Gentle baby proportions: big cheeks, small limbs
- Simple, iconic moon and stars for framing
- Clean line weight that supports plush shading
- Subtle blush accents to suggest warmth
- Limited values for calm, dreamy mood
Tutor’s Suggestions
- Sketch lightly first; commit to ink last.
- Control pressure: three values—light, mid, shadow.
- Round corners and avoid sharp angles on clouds.
- Overlap forms to show depth and softness.
- Blend in small circles; keep highlights clean.
- Step back often to check silhouette.
- Erase by tapping, not rubbing hard.
Uses
- Classroom warm-up on shapes and shading
- Nursery or baby shower card illustration
- Gentle wall print for children’s rooms
- Social post or coloring page
- Portfolio study in cute proportions
- Relaxing evening sketch practice
Level of Difficulty
Beginner-friendly — simple shapes, controlled lines, and soft shading.
Hat curve and first cloud
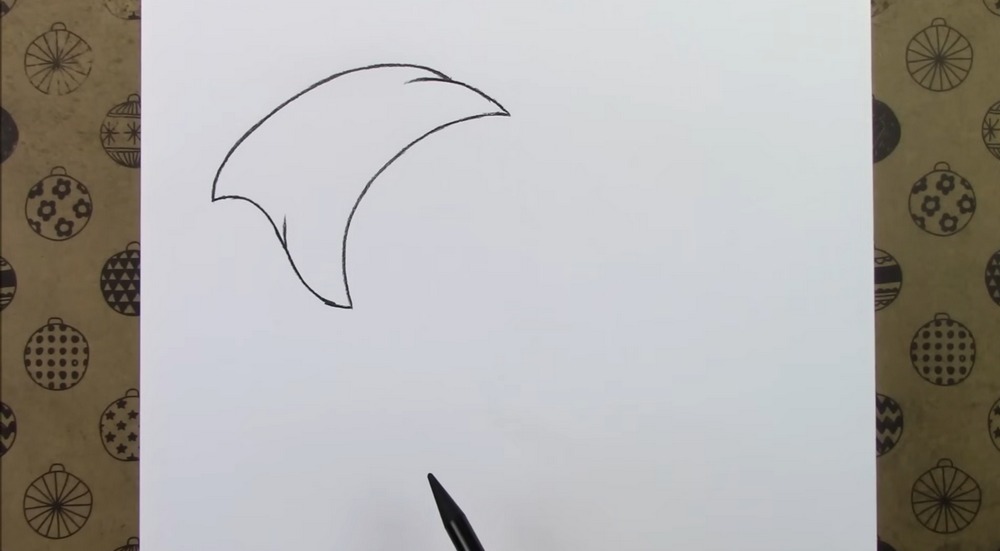
A large, curved triangle shapes the sleeping cap. Draw a long arc for the top edge, a shorter inner arc for the fold, and a soft point at the right. Under the left edge, sketch a rounded puff of cloud, then carve a gentle inward notch so the hat overlaps. Keep lines light, smooth, and slightly tapered. Avoid sharp corners for softness.
Build the cloud cluster
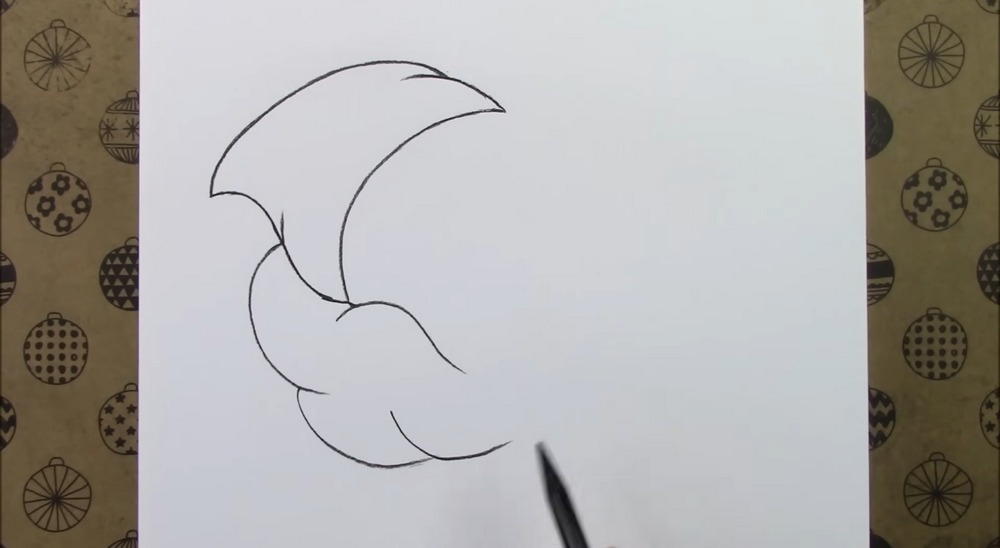
Add two more rounded cloud puffs below the first, nesting each curve into the next like overlapping cushions. Use broad C-shapes and vary their sizes so the cluster feels fluffy. Mark a tiny crease line where puffs meet. Keep the hat untouched, sitting above. Check balance: the cloud mass should feel stable and slightly wider than the hat. Erase stray guides lightly.
Place the face shape
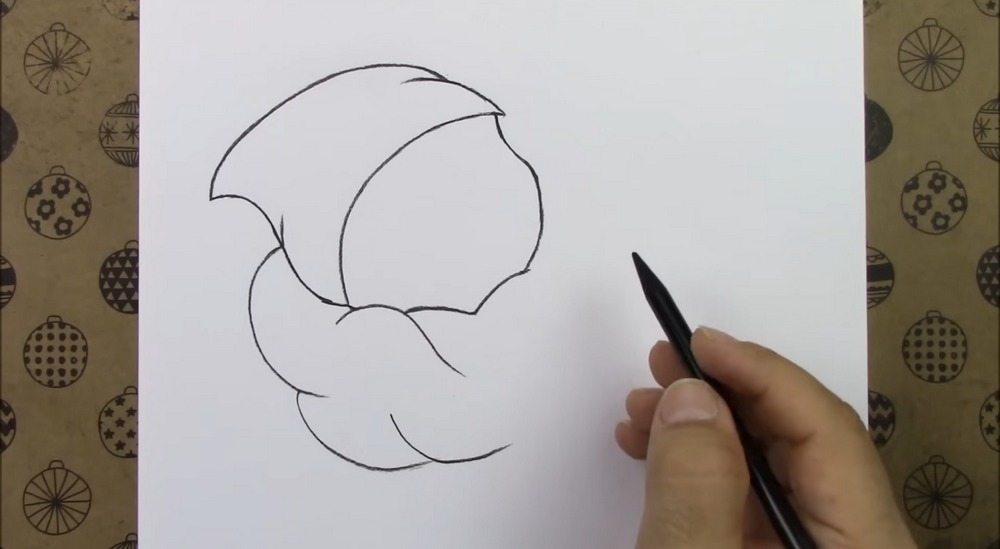
Inside the opening above the cloud, sketch a rounded cheek and jawline to suggest the baby’s face, curving inward to a small chin. Extend a short line to show the hat’s overlap. Add another cloud puff beneath the face to cradle it. Lightly indicate a center curve on the hat to guide later shading and volume. Keep proportions small, sweet, gentle, looking.
Add sleepy features
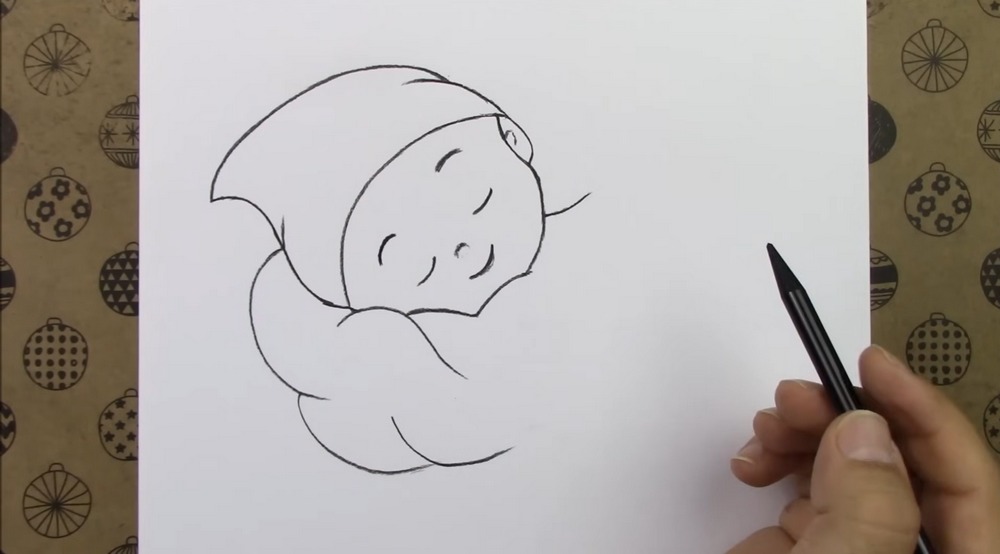
Draw sleepy features: two closed eyes as soft curved lines, slightly angled for a relaxed expression. Place a tiny curved nose between them, then a smiling mouth shaped like a shallow S. Add a small ear and a short hair tuft under the cap edge. Keep lines thin, even, and spaced; the face should feel centered within the hat opening and calm.
Arm and first leg
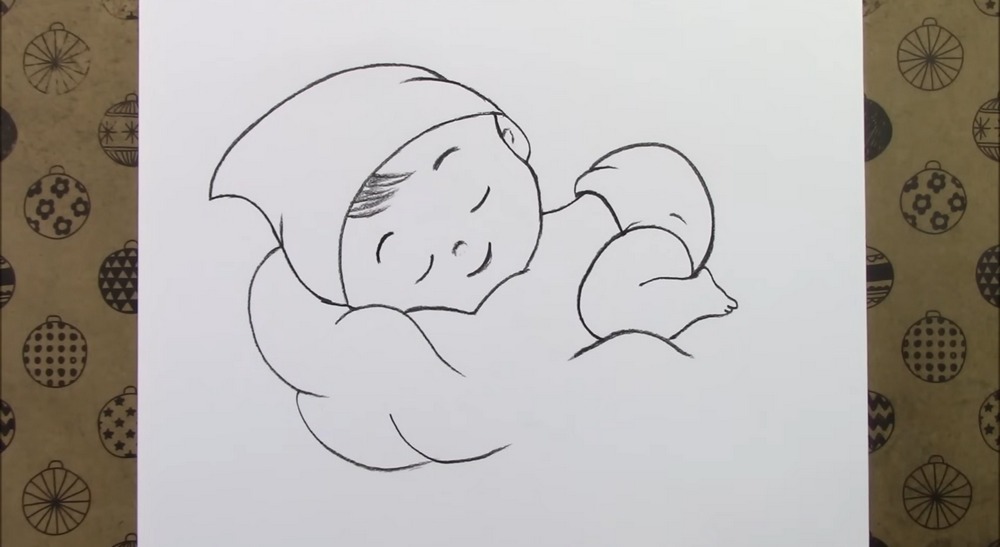
From the right side of the face, curve a forearm resting along the cloud like a cushion. Behind it, sketch a bent upper leg shaped like a bean, then a rounded calf and tiny foot with simple toes. Use overlapping lines to show layers. Add a short sleeve line and diaper crease to separate forms cleanly and readably. Keep overlaps soft, subtle.
Complete the pose
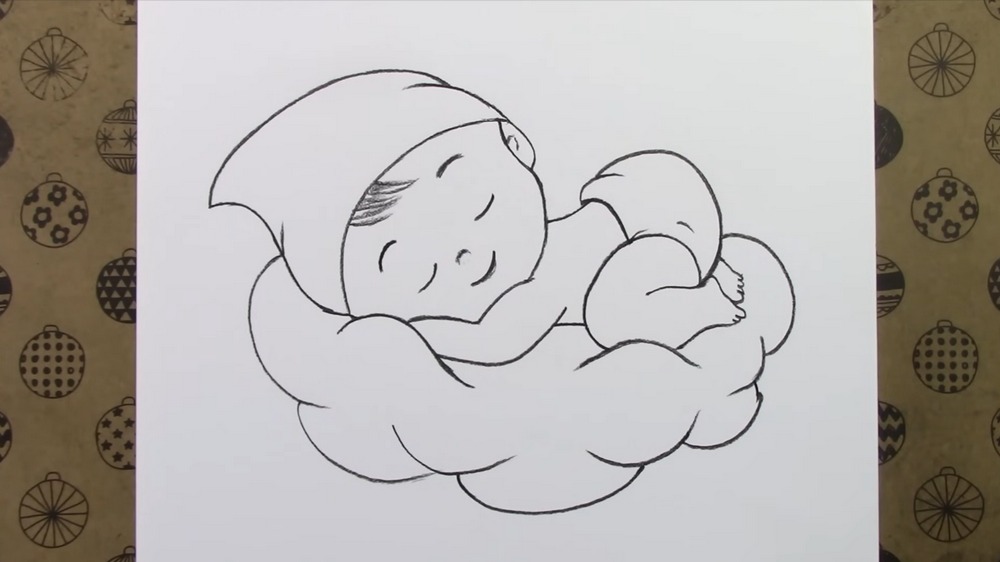
Complete the pose: draw the second leg tucked behind, showing a rounded thigh emerging from the diaper and disappearing into the cloud. Define the remaining cloud puffs around the baby, keeping their rhythm smooth and pillowy. Refine contours on the arm, foot, and belly. Simplify details; the charm comes from gentle volumes and clean curves, not tiny wrinkles or texture at all.
Moon and stars
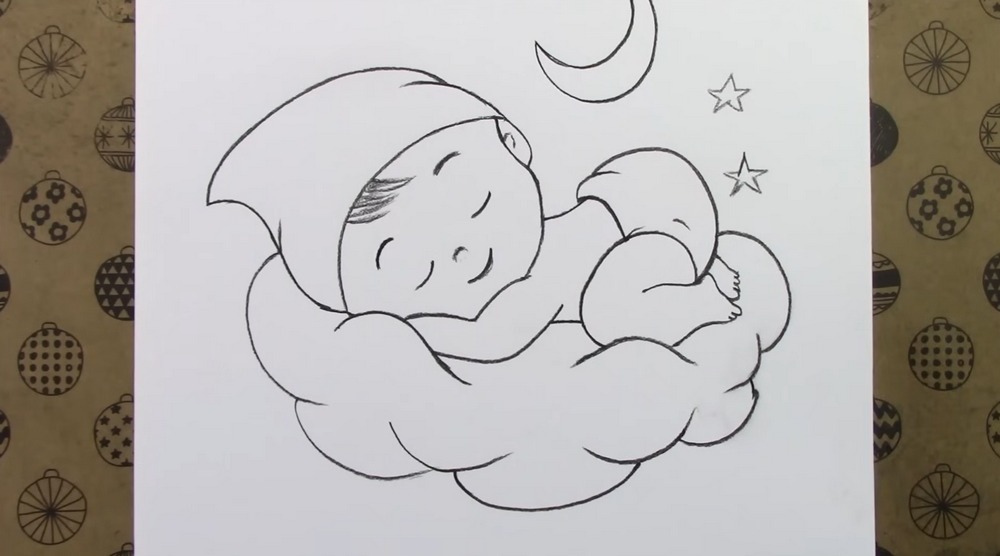
Add a small crescent moon above the baby to the right, keeping its curve echoing the hat and cheeks. Place two simple stars nearby, offset for balance. These background shapes frame the figure without clutter. Check spacing so nothing touches the head. If needed, widen the cloud base slightly to support the composition and keep the silhouette pleasing. Light touches work best.
First shading pass
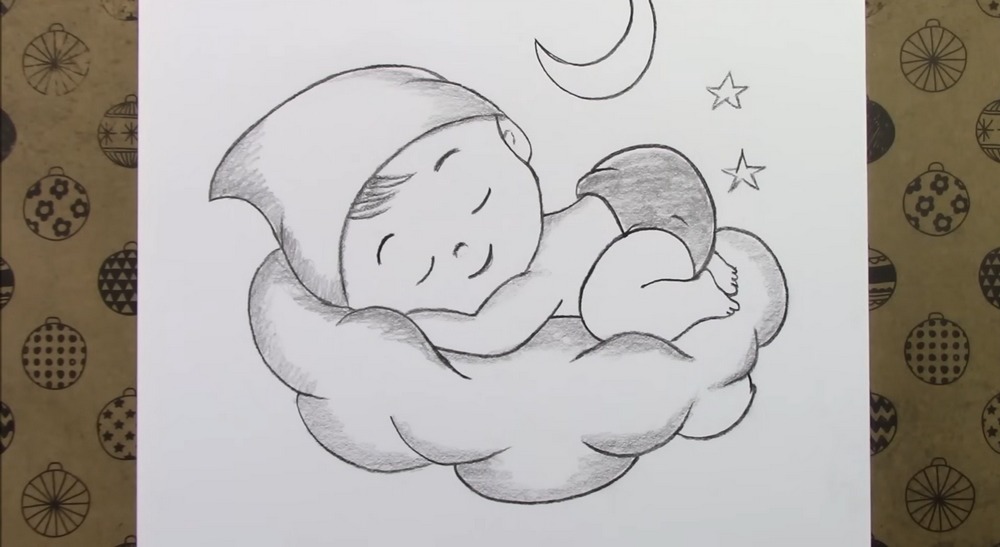
Begin shading with a very light pencil layer. Feather soft tones along the underside of the hat fold, beneath the cheeks, and where limbs meet the cloud. Leave the top planes brighter. Shade the moon’s inner curve gently. Use tiny circular strokes for clouds so they stay plush. Keep everything pale; this pass only maps light and shadow. Avoid dark lines now.
Deepen and blend
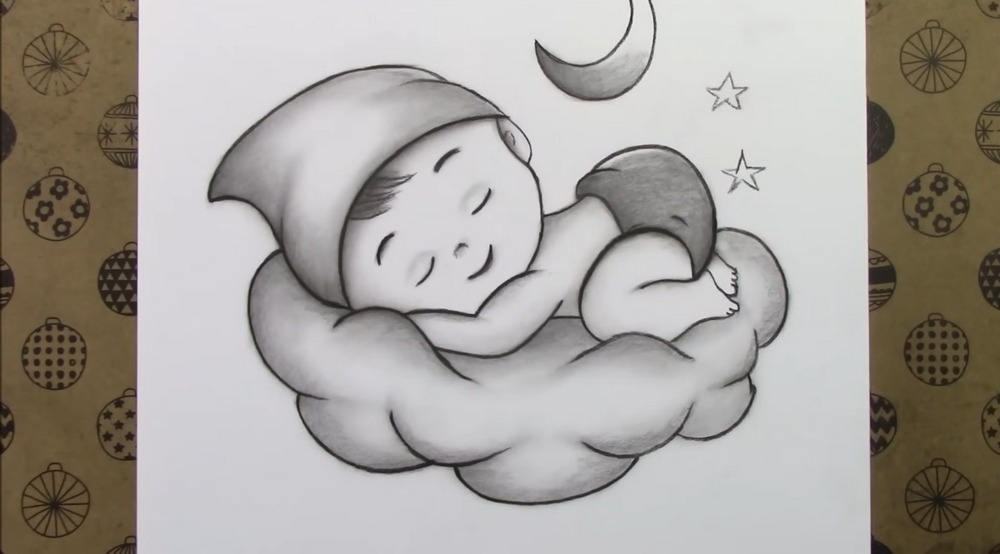
Deepen core shadows inside cloud overlaps, under the chin, inside the sleeve fold, and at the diaper edges. Strengthen line weight only where forms turn away or tuck under. Lightly blend shaded areas with tissue or a stump to keep textures soft. Re-state the moon and star edges so they stay crisp against the sky shapes. Soften everything toward the highlights gently.
Final accents
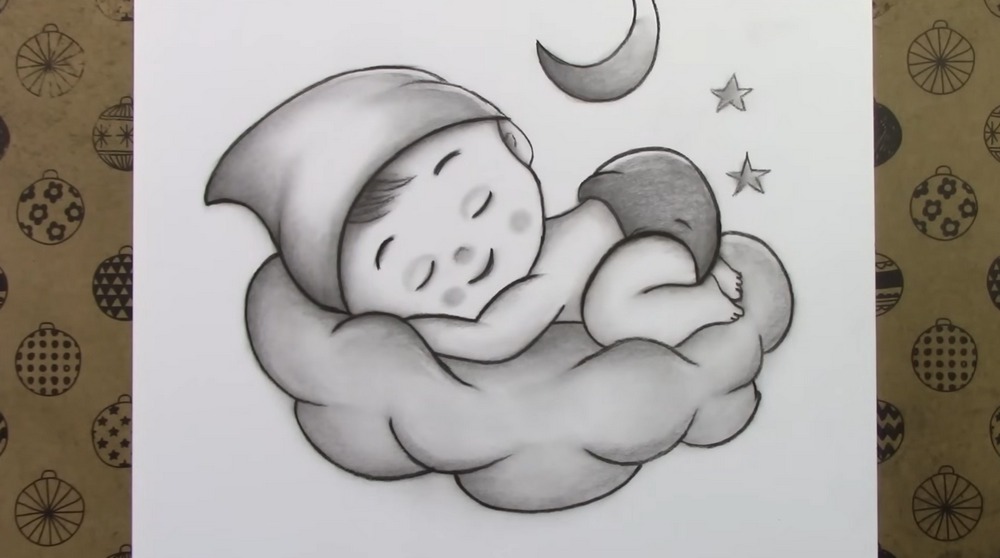
Finish with details: add tiny blush ovals on the cheeks, a hint on the knees, and a soft highlight along the cap fold. Darken the closed lashes slightly. Clean the drawing with a kneaded eraser, lifting smudges from top planes. Strengthen the outer contour of the cloud cluster just enough to frame the sleeping baby. Keep edges calm, sweet, simple and balanced.
Conclusion
You just built a gentle scene with simple shapes, patient layering, and clean edges. The soft cloud rhythms, small face, and quiet moon create calm focus. Use the same approach to pose other sleeping characters on pillows or blankets. Return to light lines whenever things feel heavy, and keep practicing pressure control until plush forms appear effortlessly on your page.
A Bonus Tip
Angle closed eyelids slightly downward toward the nose—this tiny tilt makes the expression look peacefully asleep.
FAQs
Q: How long will this take?
A: Most beginners finish in 30–60 minutes, depending on shading time.
Q: What paper size works best?
A: A4 (8.3×11.7 in) is perfect; thicker paper (180–200 gsm) blends better.
Q: My clouds look stiff—why?
A: Vary puff sizes, overlap edges, and avoid straight lines or sharp corners.
Q: The face feels off. How can I fix proportions?
A: Keep features small and centered; reduce nose size and lower the mouth slightly.
Q: Should I shade before or after inking?
A: Ink first for crisp edges, let it dry, then shade lightly to keep values clean.
Q: Can I use markers instead of pencil?
A: Yes, but start with pale markers; reserve pencil for soft cloud texture and blush.