
Baby And Mother Drawing
In this lesson you’ll draw a tender mother holding her sleeping baby, using smooth, simple lines and gentle shading. We’ll start with flowing curves to map the hair and head direction, then outline the profile: forehead, nose, lips, and chin. Next we’ll place a relaxed eyelid and eyebrow, and shape the hair strands. After that, sketch the baby’s rounded head, tiny hand, and soft arm across the shoulder. Finally, deepen shadows, soften edges, and brighten highlights for a calm, loving mood. Work lightly first, building forms slowly so mistakes erase cleanly. Keep long strokes for hair, short touches for skin, and blend only where textures should feel smooth. With patience and a steady hand, this drawing comes together beautifully on a single sheet. You’ll finish with crisp, elegant outlines. Throughout.
Supplies for This Drawing
- HB and 2B graphite pencils (optional 4B for deep accents)
- Kneaded eraser and vinyl eraser
- Blending stump or soft tissue
- A4 (8.3×11.7 in) smooth drawing paper, 180–200 gsm
- Fineliner 0.3–0.5 mm (optional for clean outlines)
- Sharpener with point saver
- Ruler (for light borders) and small compass (optional hair arc guide)
Prepare the Materials
- Clear, even lighting from one side.
- Tape paper edges to a board.
- Sharpen pencils to fine points.
- Test strokes and pressure on scrap.
- Place reference at eye level.
- Keep tissue and erasers within reach.
Special Features of This Drawing
- Flowing hair built from long directional strokes
- Soft, closed eyelid conveying tenderness
- Gentle profile with minimal, elegant lines
- Rounded baby forms emphasizing comfort and sleep
- Subtle value shifts replacing heavy outlines
- Highlight control for lips and hair arcs
Tutor’s Suggestions
- Start light; darken only after proportions feel right.
- Use long strokes for hair, short taps for skin.
- Compare landmarks: eyelid to nose tip, chin to baby’s brow.
- Build shading gradually; avoid polished shine.
- Clean edges with a vinyl eraser shielded by paper.
- Take brief breaks to reset your eye.
- Squint to judge overall value balance.
Uses
- Classroom practice on portrait simplification
- Portfolio warm-up focused on flowing lines
- Gift drawing for new parents
- Greeting card or framed wall print
- Gentle coloring page for soft pencils
- Social post showcasing tender linework
Level of Difficulty
Beginner-friendly — simple shapes, clear landmarks, and forgiving soft shading.
Flowing Hair Guide

Lightly draw a long S-curve across the upper page to set hair flow. From the left side, add two downward tapering curves for the hanging lock. Keep ends pointed and lines smooth. These are guides, so use a sharp HB and very gentle pressure. Leave the right side open for the face profile that will nestle beneath the sweeping strand. Later refined.
Top Hair Band

Build the top hair band: sketch a long almond-shaped ribbon curving from left to right above your first strand. Add a slim inner line to suggest overlap and thickness. Keep both ends tapered. Maintain even spacing so the band reads as one plane. These flowing shapes frame the face direction and establish volume before features. Erase strays to keep edges clean now.
Profile and Nose
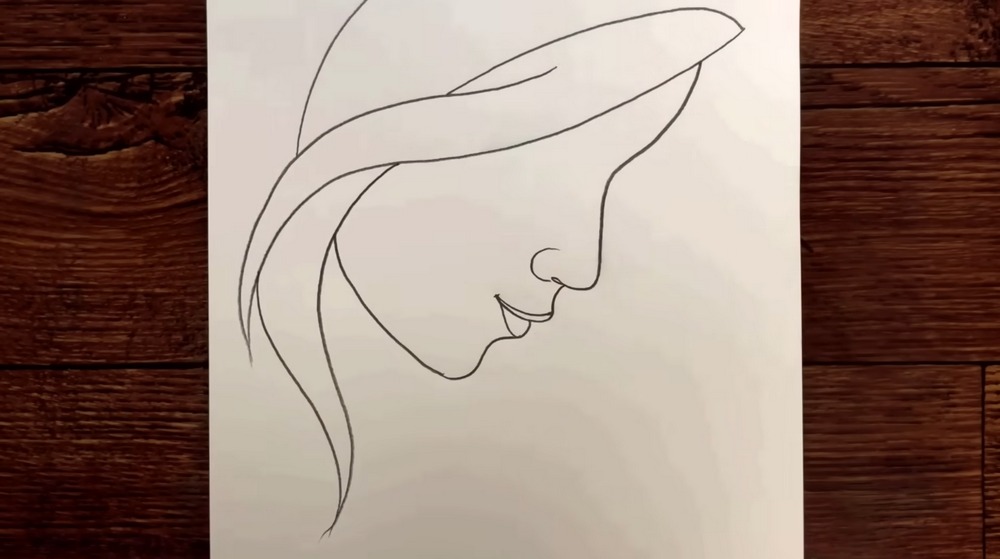
Lightly sketch the facial contour under the hair: forehead into the bridge, a soft nose tip, then a gentle dip to the upper lip. Shape the mouth with a small smile and a rounded lower lip meeting the chin. Add a tiny nostril curve. Keep lines elegant and continuous, avoiding scribbles. Everything should feel calm, balanced, and youthful. Erase construction marks sparingly.
Eyelid and Brow
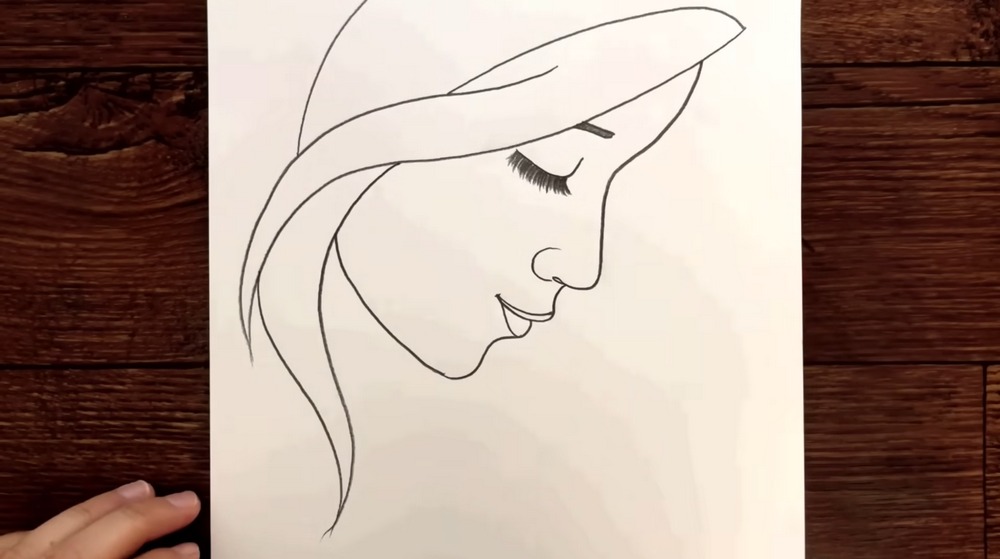
Place the eye closed: draw a soft downward curve for the upper lid, thicker near the lashes. Add short, tapering lashes sweeping outward. Above it, shape a simple eyebrow following the same angle, leaving a slim gap for the brow bone. Refine the nose line and philtrum. Ensure the eyelid sits midway between forehead curve and nose bridge for harmony. Check angles.
Shade Hair Volumes
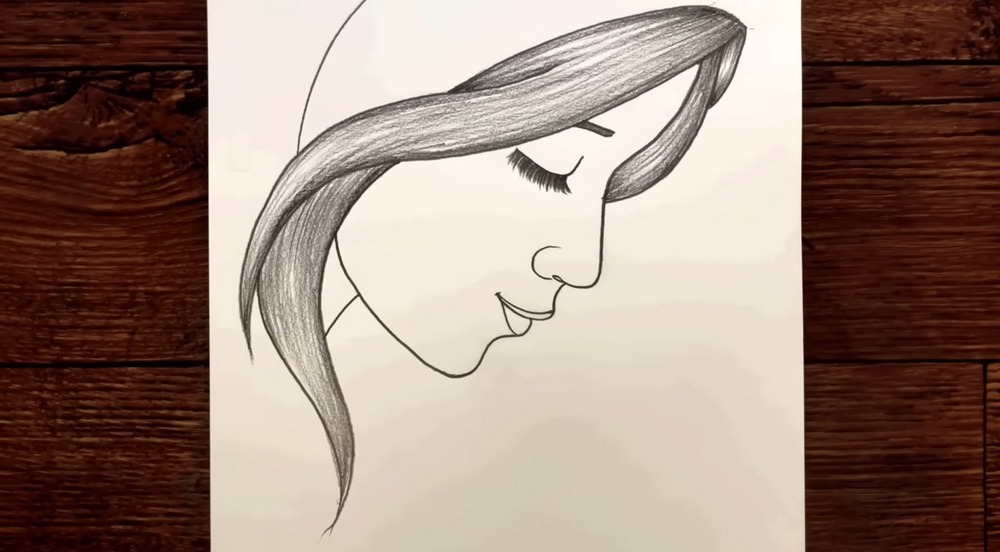
Begin shading the hair. Using a 2B pencil, fill the large strands with long strokes following the curl. Press slightly more near roots and undersides, leaving thin highlights along the arcs. Feather ends to points. Blend lightly with tissue if desired, but keep visible direction lines so the hair feels lively and dimensional across the headband. Deepen overlaps to suggest layered thickness.
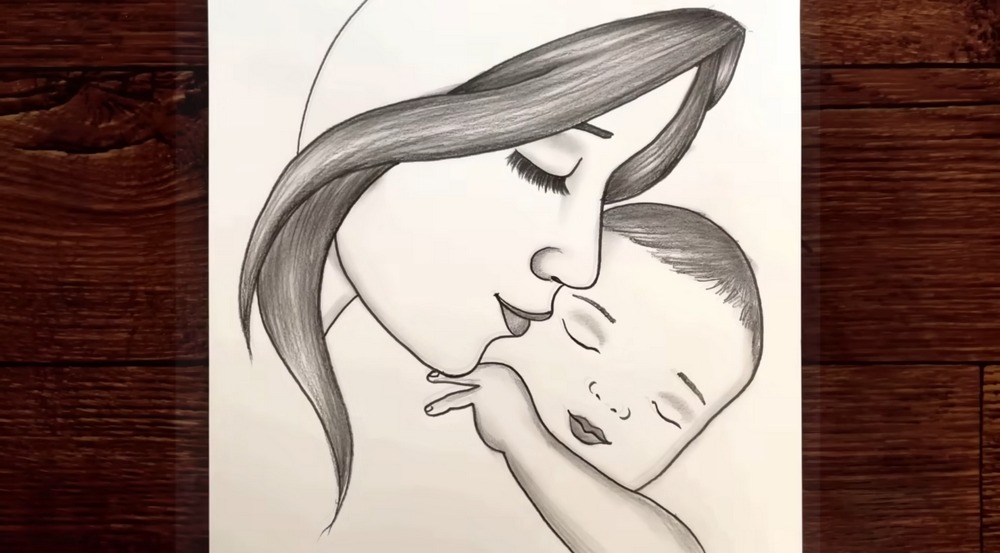
Baby Silhouette

Block in the baby. Sketch a large round cranium tucked beneath the mother’s cheek. From the lower right, arc a soft forearm across her shoulder, ending near the collar. Add a tiny wrist and simple mitten-like hand resting upward. Keep edges smooth and generous to feel plush. Avoid details yet; focus on gentle proportions and cuddled placement. Leave breathing room between outlines.
Baby Features

Add baby features. Draw a small closed eye with a gentle arc and tiny lashes. Place a short nose dash and a relaxed mouth, slightly upturned, centered between nose and chin. Indicate baby hair with short directional strokes along the scalp edge. Keep everything light and sweet. Avoid hard corners; roundness communicates softness and sleep. Shade under the chin for separation subtle.
Lips and Cheek Softness

Refine the mother’s lips and cheek. Thicken the upper lip’s shadow slightly, keep the lower lip lighter with a soft highlight band. Add a gentle cheek shade that fades toward the ear and hairline. Re-shape the chin and jaw with minimal strokes. Everything should feel smooth and nurturing, with values leading the eye toward the baby. Keep edges soft, never harsh lines.
Forearm and Fingers
Develop the baby’s forearm and hand. Use overlapping ovals to place the palm and fingers, then merge them into soft, connected shapes. Shade under the wrist and between fingers to suggest form without hard outlines. Add a faint crease where the arm rests across the mother’s shoulder. Check alignment so fingers point toward the face, reinforcing the hug. Keep proportions small, tender.
Final Clean-Up

Finish with clean edges and balanced values. Reinforce key contours—hair part, eyelid, lips, chin, baby profile—using a sharp 2B, then soften interior tones with a tissue. Lift highlights on hair arcs and lips using a kneaded eraser. Quiet any sketch noise. Stand back, squint, and adjust contrasts so the mother’s gaze and baby’s face glow gently. Sign discreetly beneath the shoulder area.
Conclusion
A tender drawing relies on restraint. Let curves breathe, keep values soft, and reserve darkest tones for tiny accents. If something feels stiff, lighten with an eraser, redraw slowly, and re-blend. Most of all, protect the highlights that suggest warmth and touch. Small, thoughtful adjustments transform simple lines into a loving, memorable portrait. Step back often and judge relationships together.
A Bonus Tip
When shading hair, leave thin, unshaded arcs that follow the curl. Those reserved highlights make the strands read glossy without heavy contrast.
FAQs
Q: How long will this take?
A: Most beginners finish in 45–75 minutes, depending on shading detail and blending.
Q: What paper size works best?
A: A4 (8.3×11.7 in) is perfect. Use 180–200 gsm smooth paper for clean lines and gentle blending.
Q: My proportions feel off—what now?
A: Lighten with a kneaded eraser, re-measure key distances (eye to nose, lip to chin), and redraw slowly.
Q: Should I ink the lines?
A: Optional. If you ink, keep lines thin and taper them; preserve soft graphite shading for volume.
Q: Pencil or markers for color?
A: Colored pencils suit this subject best. Build translucent layers, keeping skin tones very light and warm.


