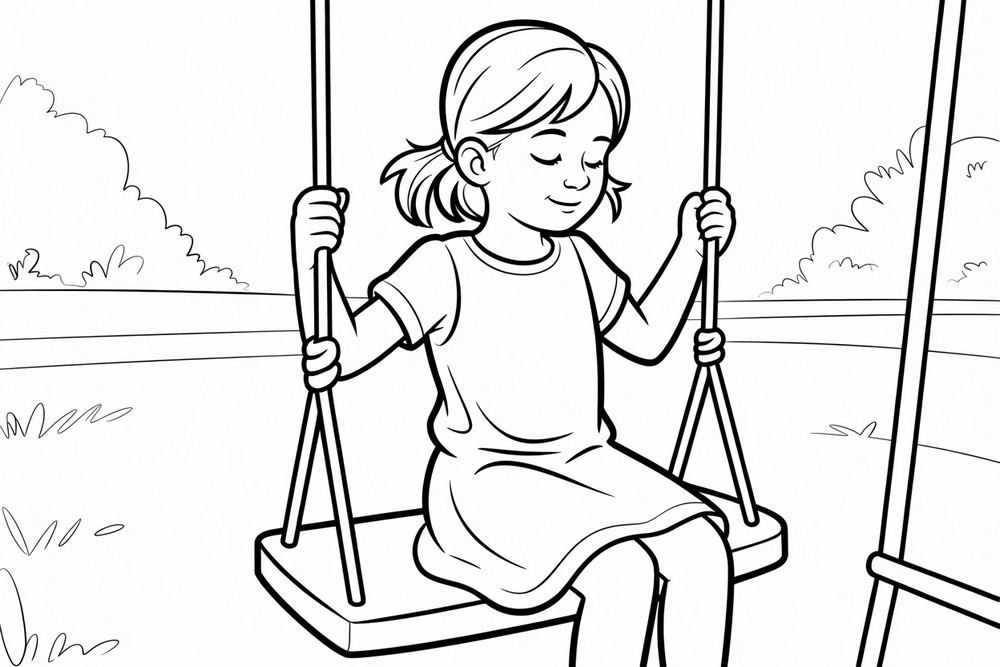
Girl Sitting on a Swing Easy Pencil Drawing
There’s something timeless about a swing under a big tree. In this easy pencil drawing, you’ll sketch a girl from behind, seated on a simple wooden swing. We’ll begin with one guiding line, block in the tree and branch, and build the figure using basic shapes. Next, we’ll add the swing ropes, long hair, and a two-layer dress. Gentle shading will bring bark texture, soft fabric folds, and depth to the scene. No complex anatomy, perspective, or special tools—just a pencil, paper, and patience. This project suits beginners, classroom demos, or anyone wanting a calm subject. Follow steps, keep your lines light at first, and work from large shapes to small details. By the end, you’ll have a peaceful sketch that feels breezy and nostalgic, perfect for gifting or framing.
Supplies for This Drawing
- HB, 2B, and 4B pencils
- Kneaded eraser and vinyl eraser
- A4 paper, 160–200 gsm (8.3×11.7 in)
- Ruler (for straight ropes)
- Blending stump or soft tissue
- Pencil sharpener (handheld)
- Optional: 0.3–0.5 mm black fineliner for crisp contours
Prepare the Materials
- Clear your desk and set comfortable lighting.
- Tape the paper edges for a clean border.
- Sharpen pencils; test strokes on scrap.
- Keep a kneaded eraser ready for gentle lifting.
- Place these reference images where you can glance easily.
Special Features of This Drawing
- Strong silhouette: back view keeps details simple.
- Graceful S-curves in tree, arms, and skirt.
- Two-layer dress perfect for soft shading practice.
- Textured bark contrasts smoothly blended fabric.
- Clear value hierarchy: light sky, mid tree, darker hair.
- Balanced composition with branch framing the subject.
Tutor’s Suggestions
- Sketch lightly; commit to darker lines last.
- Use the side of the pencil for broad tones.
- Build values slowly; avoid pressing hard early.
- Compare left and right rope spacing often.
- Keep hair strokes directional and layered.
- Erase with taps, not scrubs, to preserve paper.
- Step back frequently to check proportions.
Uses
- Classroom practice piece on shading and silhouettes.
- Calm warm-up for figure and fabric flow.
- Illustration for greeting cards or journals.
- Wall art for a child’s room or hallway.
- Portfolio study showing tonal control.
- Relaxing sketch to share with friends.
Level of Difficulty
Beginner-friendly — simple shapes, clear silhouette, and manageable shading.
Place the Trunk Guide
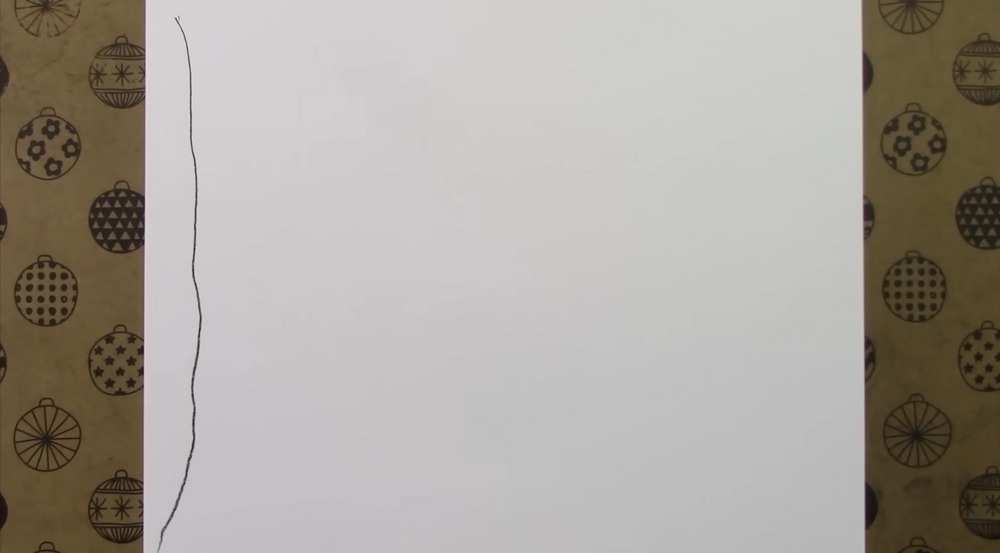
Tape your paper if you like clean edges. With an HB pencil, draw one long, slightly wavy vertical line along the left side. This is the outer edge of the tree trunk. Keep the stroke light and continuous, curving gently near the bottom. Leave plenty of open space to the right for the branch, swing, and figure. Mark top and bottom lightly.
Add Trunk and Branch

Sketch a second line inside the first to show the inner edge of the trunk, widening near the base. From the upper left, extend a long, tapering branch across the page toward the right. Keep its top and bottom edges slightly uneven for a natural look. Leave a soft gap under the branch’s belly for sky. Check overall proportions patiently. Before continuing.
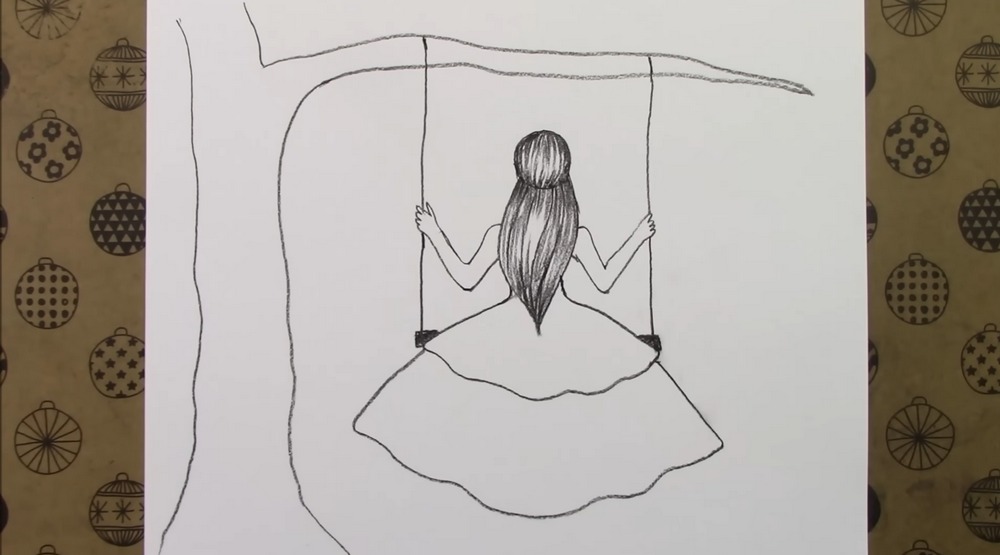
Block Head and Torso
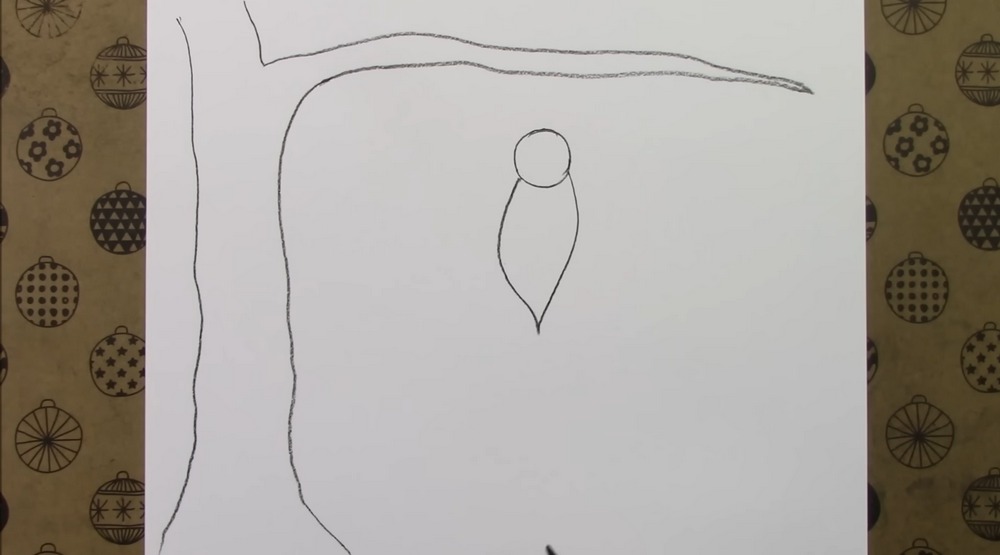
Lightly place a small circle below the branch for the head. Under it, draw a long teardrop pointing downward; this is the upper body and hair mass combined. Keep the forms centered between the trunk and page edge. Check that the head sits a short distance beneath the branch, leaving room for ropes. Erase stray lines, keeping construction gentle and clean. Now.
Arms and Layered Dress

Add two angled arms from the shoulders, bending slightly at the elbows so the hands will reach the ropes. Sketch a layered dress: first a bell shape for the upper skirt, then a larger bell underneath for the lower layer. Let the hems ripple with gentle curves. Keep the waist narrow and centered. Refine the torso tapering into the skirt’s top seam.
Swing Ropes and Seat
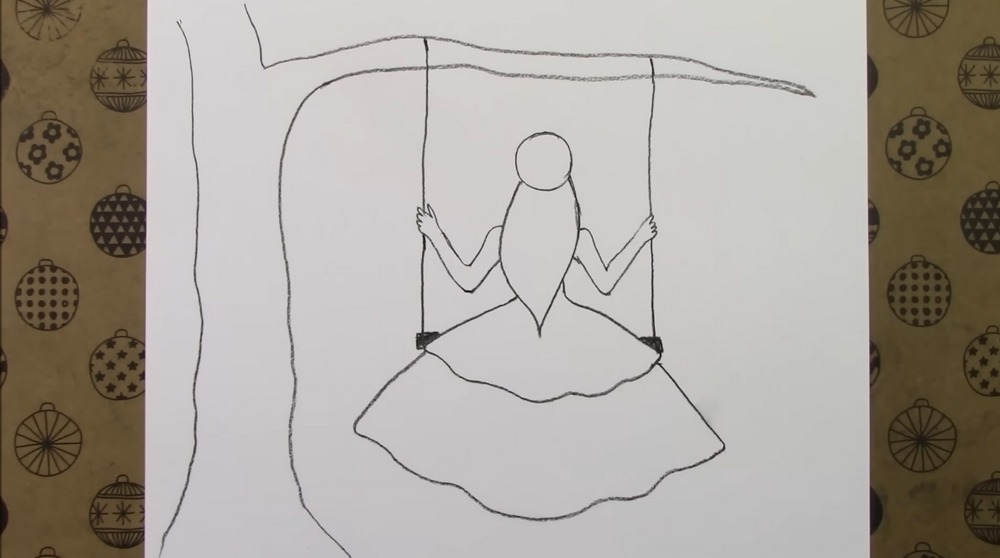
From the branch, drop two straight vertical lines for ropes, spacing them to flank the figure evenly. Draw a narrow rectangle for the swing seat, tucking its ends behind the skirt. Add small blocks where ropes meet seat for knots. Shape the hands into gentle C-curves gripping the ropes. Strengthen important contours lightly; keep everything symmetrical and balanced. Check spacing and angles.
Shape and Shade Hair
Develop the hair. Add a small rounded bun on top, then flow strands downward, converging to a soft point between shoulder blades. Use short, overlapping strokes following the hair’s direction, keeping highlights by leaving thin light gaps. Darken edges near the neck and under the bun. Suggest shoulders and upper back with gentle shading, keeping skin lighter than hair for contrast. Overall.
Shade the Tree

Shade the tree. Use the side of your pencil to block a mid tone across the trunk and branch. Deepen the core shadow along the branch’s underside and inside the trunk’s right edge. Lift specks with a kneaded eraser to suggest bark texture. Feather transitions with a tissue or stump, keeping the branch lighter on top where light hits. From the sky.
Dress, Shadows, Finish
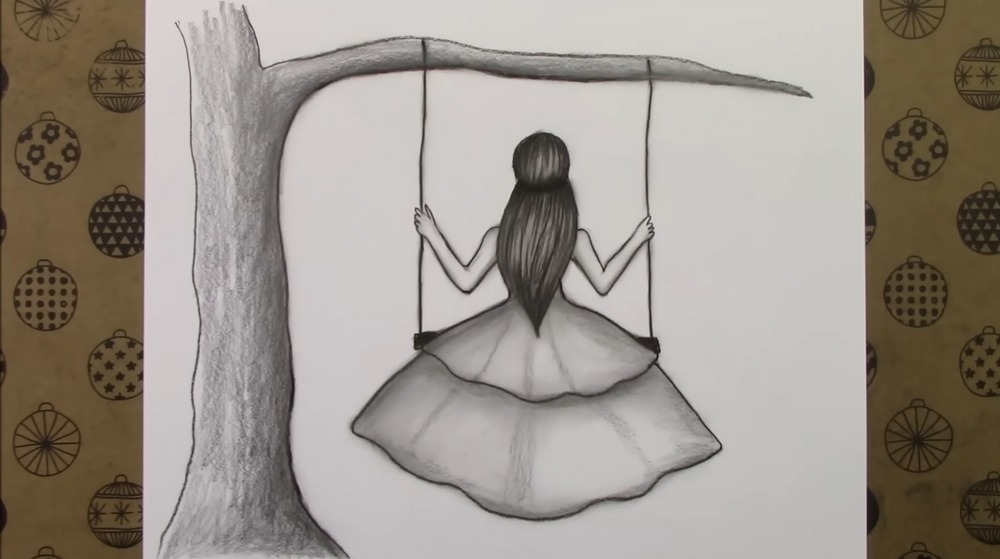
Finish with soft shading on the dress. Blend a light tone across each layer, then darken where fabric tucks under the waist and along hem folds. Add cast shadows beneath the seat and along the skirt’s bottom edge to anchor the figure. Strengthen rope edges slightly. Clean smudges, sharpen highlights with eraser, and refine any last contours neatly. Sign small in corner.
Conclusion
Drawings like this feel calm because the shapes stay simple and the shading does the storytelling. Keep your pencil light until you’re happy with placement, then slowly build values. If your tree leans or the skirt tilts, that’s okay—it adds character. Practice the hair strokes again tomorrow, and you’ll notice immediate improvement in rhythm, confidence, and flow. With each pass.
A Bonus Tip
Very lightly shade the whole dress first, then erase thin highlights before adding darker folds—your fabric will look luminous.
FAQs
Q: How long will this take?
A: Most beginners finish in 35–60 minutes, depending on shading time.
Q: What paper size works best?
A: A4 (8.3×11.7 in) is perfect; heavier paper (160–200 gsm) blends better.
Q: My proportions feel off. What should I check?
A: Ensure the head sits just below the branch, ropes are vertical, and the skirt is centered under the torso.
Q: In what order should I shade?
A: Tree first, then hair, then dress. Add cast shadows last to anchor everything.
Q: Can I ink it?
A: Yes—ink final contours lightly with a fineliner, then shade with pencils over or around the lines.
Q: How do I color it instead?
A: Replace graphite shading with light colored-pencil layers, keeping highlights clean and deepening shadows gradually.