
How to Decor Wall with Cardboard
Turn spare cardboard into a handsome round wall shelf that looks like stained wood. “Cardboard Wall Decor” is light, thrifty, and renter-friendly, yet surprisingly sturdy when layered. We’ll cut a wide circle base, add a raised rib down the center for strength, then make two slim shelves. Mask the edges for crisp planes, glue everything carefully, and finish with rich brown paint plus a touch of dry-brushed highlight. The finished piece hangs with a small hook or removable wall tape and suits tiny plants, keepsakes, or keys. Gather simple tools—ruler, compass, cutter, hot-glue gun, masking tape, and acrylics—and clear a safe cutting surface. Follow the photos and captions below and you’ll build a stylish accent that feels handcrafted, modern, and totally unique to your space. Work slowly and measure twice.
Supplies for This Drawing
- Corrugated cardboard sheets (double-wall if available)
- Compass or string and pencil
- Metal ruler and cutting mat
- Sharp utility knife or craft knife + spare blades
- Hot-glue gun with glue sticks
- Masking tape or paper tape
- Acrylic paints: dark brown, lighter brown/gold; optional clear sealer
- Flat and round brushes; rag for dry-brushing
- Sanding block or fine sandpaper
- Sawtooth hanger/wire or heavy-duty removable wall strips
Prepare the Materials
- Clear a sturdy, well-lit workspace.
- Place a cutting mat beneath the cardboard.
- Sharpen blades and warm the glue gun.
- Pre-cut strips for shelves and ribs.
- Tear small tape pieces for edges and corners.
- Keep paints, water, and rags within reach.
- Lay out hanging hardware and test fit.
Special Features of This Drawing
- Convincing faux-wood texture from corrugated ribs.
- Round silhouette softens modern walls.
- Dual staggered shelves create dynamic balance.
- Lightweight build; easy, renter-safe hanging.
- Dry-brush highlight adds realistic aged effect.
- Fully customizable size, stain tone, and shelf placement.
Tutor’s Suggestions
- Cut with several light passes, never force the knife.
- Keep glue beads even; press and hold until set.
- Tape exposed edges before painting for crisp results.
- Dry-brush sparingly—wipe most paint off the bristles first.
- Test shelf level with a small bubble level or ruler.
- Let paint cure before hanging.
- Display only lightweight, dry objects.
Uses
- Entryway perch for keys and sunglasses.
- Cozy accent for bedrooms or dorms.
- Photo-ready backdrop for small plants or keepsakes.
- Craft class or weekend family project.
- Giftable handmade decor for housewarmings.
- Stage prop or set dressing on a budget.
Level of Difficulty
Beginner-friendly — simple cuts, basic gluing, and forgiving paint effects.
Cut the Circle
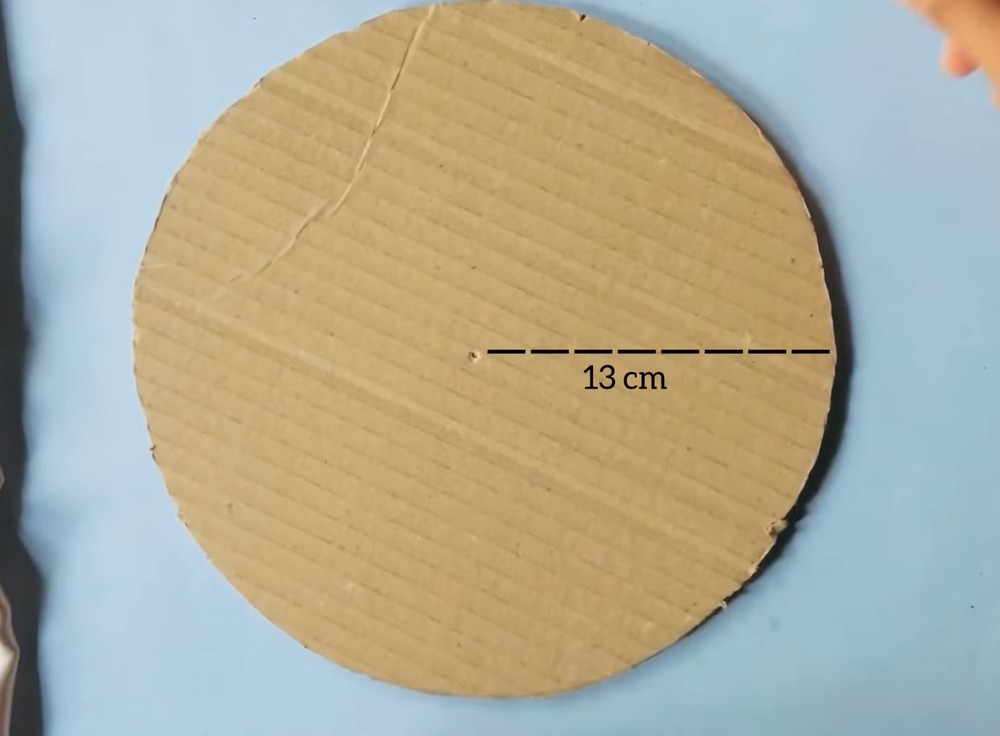
Trace a large circle on sturdy corrugated cardboard using a compass or a string-and-pencil. Aim for a diameter around 26 cm (10.2 in). Find the center and prick a guide hole. Lightly score the line first, then cut with several passes using a sharp utility knife. Sand or trim rough edges. Mark a 13 cm (5.1 in) radius reference across the face.
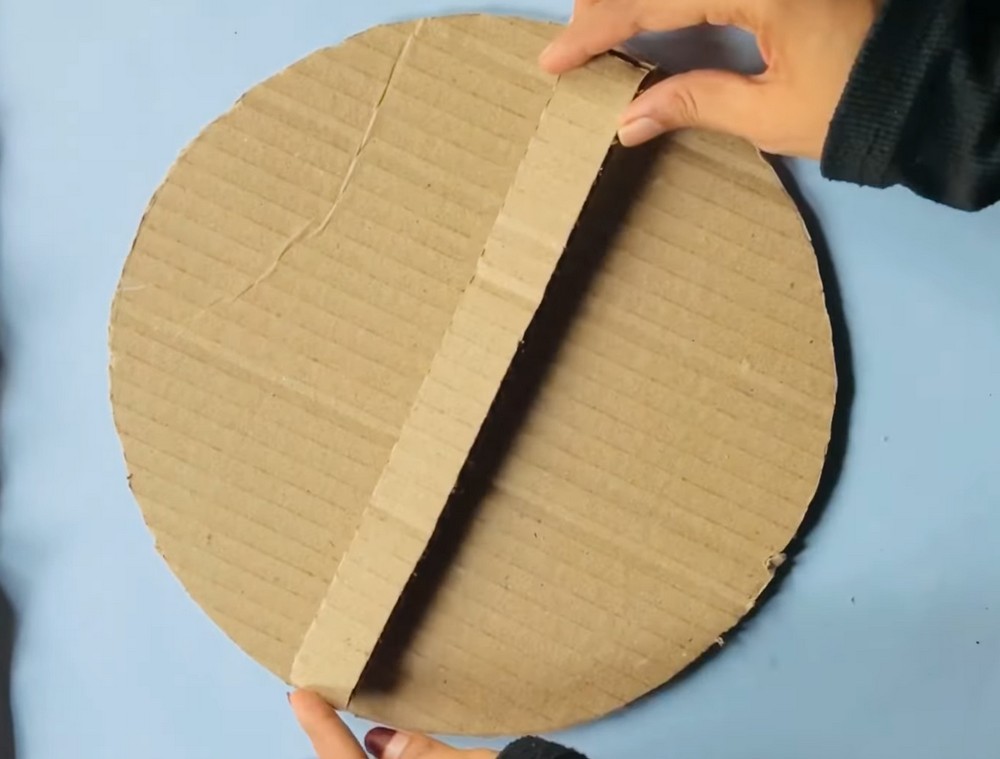
Glue the Ribbed Strip

Cut narrow cardboard strips the circle’s diameter and about 3–4 cm (1.2–1.6 in) wide. Bend them to follow the curve. Run a bead of hot glue along the strip’s flutes, then press it onto the circle following your guideline. Work slowly so glue sets evenly. Wipe stray strings while warm. This spine stiffens the base and creates raised texture for faux-wood slats.
Build the First Shelf
Add a second strip to become the first shelf. Cut a straight piece slightly longer than the circle’s width, around 28–30 cm (11–12 in). Double-layer it for strength, gluing two pieces together. Hot-glue this beam across the front at an angle, ends flush with the edge. Hold until firm. This creates a perch line and breaks the circle in a pleasing way.
Prepare the Second Shelf
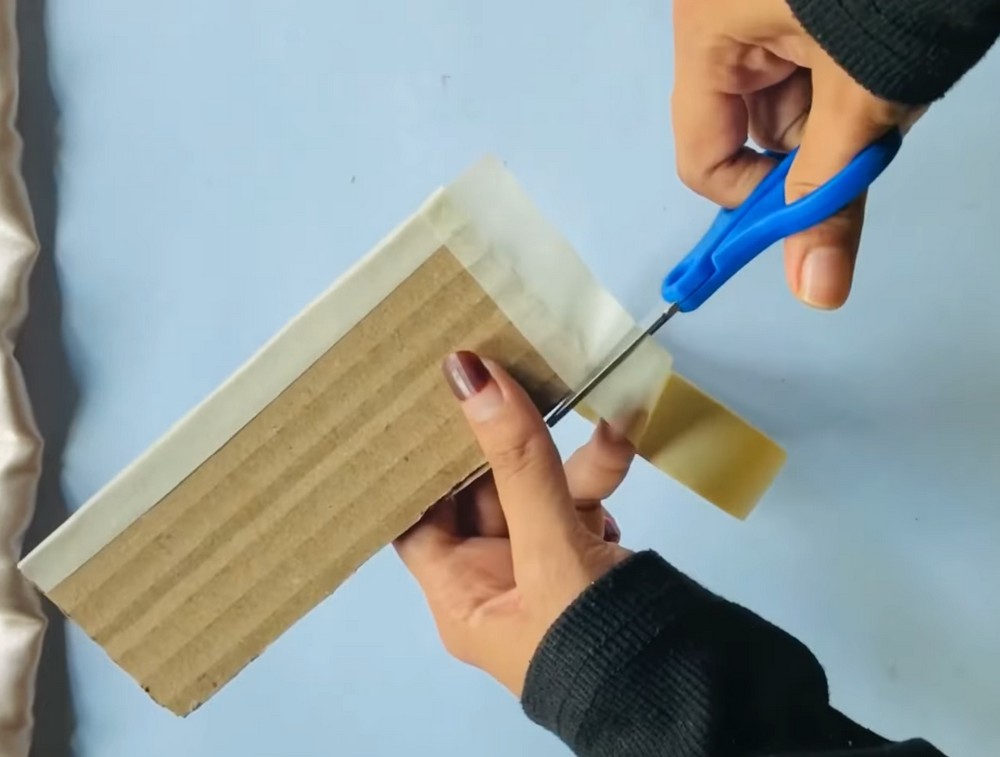
Make the second shelf the same way: laminate two strips, then trim to a shorter length for staggered balance. Seal all exposed corrugated edges with masking tape to create smooth faces and sharper corners. Wrap the front and sides neatly; snip notches to fold around corners. This step gives paint a clean surface, hides flutes, and strengthens the shelves without adding weight.
Paint the Faux Wood
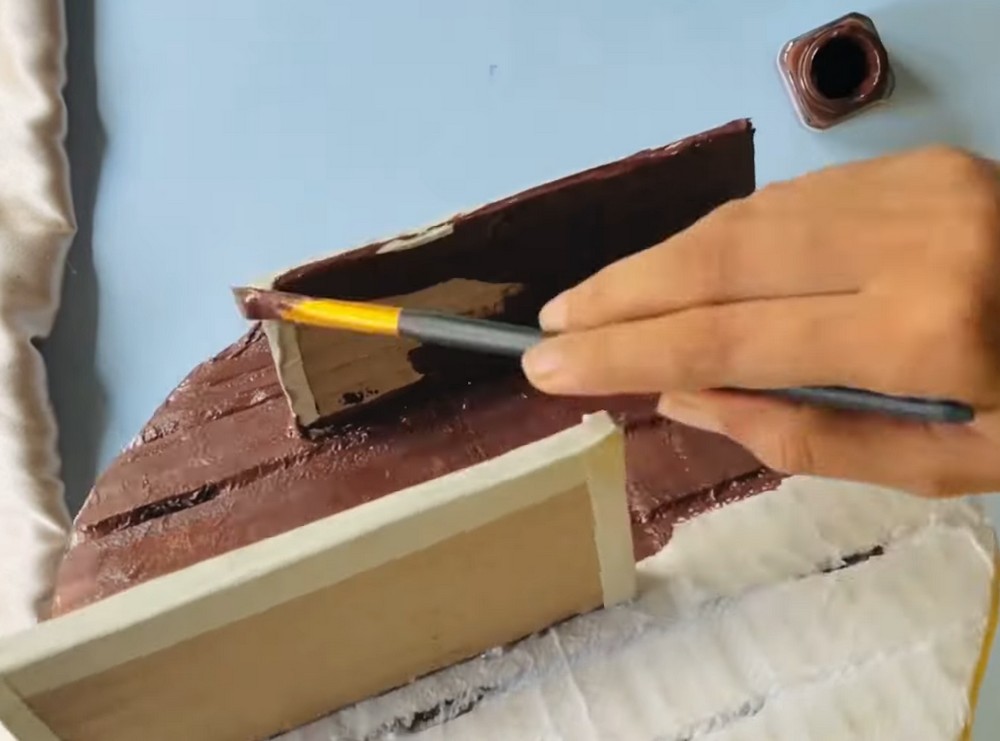
Prime if you like, then paint the circle and shelves with dark brown acrylic. Brush with the grain direction to mimic boards. While the layer is nearly dry, dry-brush a lighter brown or gold across raised areas to suggest highlights and worn edges. Let everything cure, then glue shelves onto the circle. Check that each perch is level before the adhesive sets.
Hang and Style
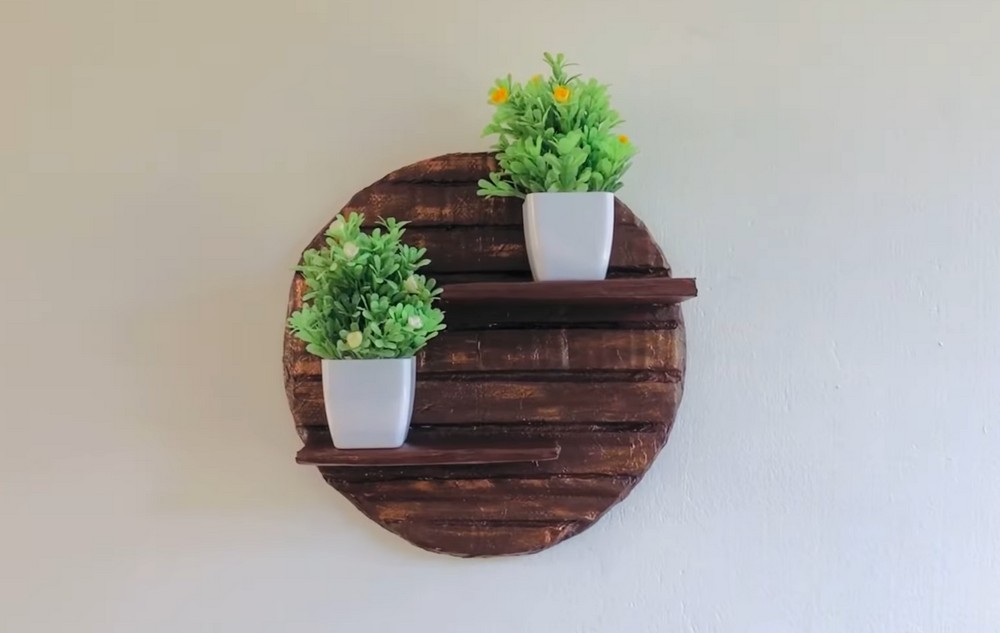
Attach a strong hanging method to the back: a sawtooth hanger, wire loop, or heavy-duty removable wall strips. Test on the floor first with lightweight items. Hang the piece, then place faux plants, tea-light holders, or keepsakes on the ledges. Avoid real water-filled pots. Step back and tweak alignment; the circular form and staggered shelves create balanced wall decor with faux-wood character.
Conclusion
This cardboard wall shelf proves simple materials can look surprisingly polished. The light weight makes hanging easy, while the faux-wood finish adds warmth without tools or lumber. Customize the circle size, shelf lengths, and stain tone to suit your room. Keep displayed objects lightweight and dust occasionally. Most of all, enjoy building quick decor that shows off your craft skills.
A Bonus Tip
Lightly score the shelf undersides and the circle where they meet; the textured surfaces grip hot glue better, creating a stronger bond.
FAQs
Q: How long does this project take?
A: About 60–90 minutes including paint drying, depending on your pace.
Q: What size cardboard works best?
A: Aim for 3–5 mm thick corrugated; double-wall adds strength without much weight.
Q: My circle edges look ragged—fixes?
A: Sand lightly, then wrap with masking tape for a clean rim before painting.
Q: How heavy can the shelves hold?
A: Keep items very light—small faux plants, photos, or trinkets. Avoid liquids.
Q: Paint order tips?
A: Dark base first, then minimal dry-brushing with a lighter tone. Seal if desired.
Q: Can I use markers instead of paint?
A: Yes—alcohol markers can tint the surface, but acrylics hide tape and texture better.


