
Easy and Quick Paper Wall Hanging Art
Want a cheerful wall piece you can make in under an hour? This paper fan hanging is quick, tidy, and uses supplies you probably already have. The big semicircle panel sets the stage, while three little fans swing below like festive tassels. White paper flowers add freshness and contrast, so the whole piece pops on any background. If you’re crafting with kids, the accordion folds are satisfying and forgiving. If you’re decorating a dorm or party, the project scales easily. Choose colors to match your room or celebration. We’ll use simple measurements, clear folds, and a bit of hot glue to lock everything together. Follow the photos step by step and you’ll have a lightweight, modern wall decoration ready to hang. No special tools or tricky templates needed for success.
Supplies for This Drawing
- Colored craft paper: pink for fans (120–160 gsm)
- White paper for flowers (120–160 gsm)
- Scrap cardboard for semicircle backing
- Ruler and pencil
- Scissors and craft knife (optional)
- Hot-glue gun and sticks (low-temp if crafting with kids)
- Black ribbon or cord for hanging and dangles
- Small pearls or buttons (optional centers)
- Paper clips or binder clips for holding pleats
Prepare the Materials
- Clear a flat workspace with good lighting.
- Tape paper corners to prevent sliding.
- Sharpen pencil and test light marks.
- Cut all rectangles and squares to size.
- Warm the glue gun and place a scrap mat under it.
- Keep ruler, scissors, and clips within reach.
- Place images or reference nearby.
Special Features of This Drawing
- Pleated fan shapes create bold, graphic texture.
- Mixed scales: one large semicircle with three small quarters.
- Simple paper flowers add soft contrast.
- Cardboard backing keeps the silhouette tidy.
- Ribbon dangles introduce movement and depth.
- Easy color swapping for seasonal themes.
Tutor’s Suggestions
- Keep pleats even—measure the first fold and match it.
- Press creases with a ruler edge for crisp lines.
- Use minimal hot glue; thin beads hold best.
- Clip pieces while glue sets to maintain alignment.
- Test flower sizes on scrap before final cutting.
- Space elements symmetrically for a calm look.
- Trim stray glue strings after everything cools.
Uses
- Bedroom or dorm wall accent
- Party backdrop or photo-booth decor
- Classroom craft or bulletin board feature
- Seasonal decoration—swap colors for holidays
- Gift for a friend or housewarming
- Nursery or playroom cheerful touch
Level of Difficulty
Beginner-friendly — straightforward folds, simple cutting, and basic gluing.
Cut the main Sheet
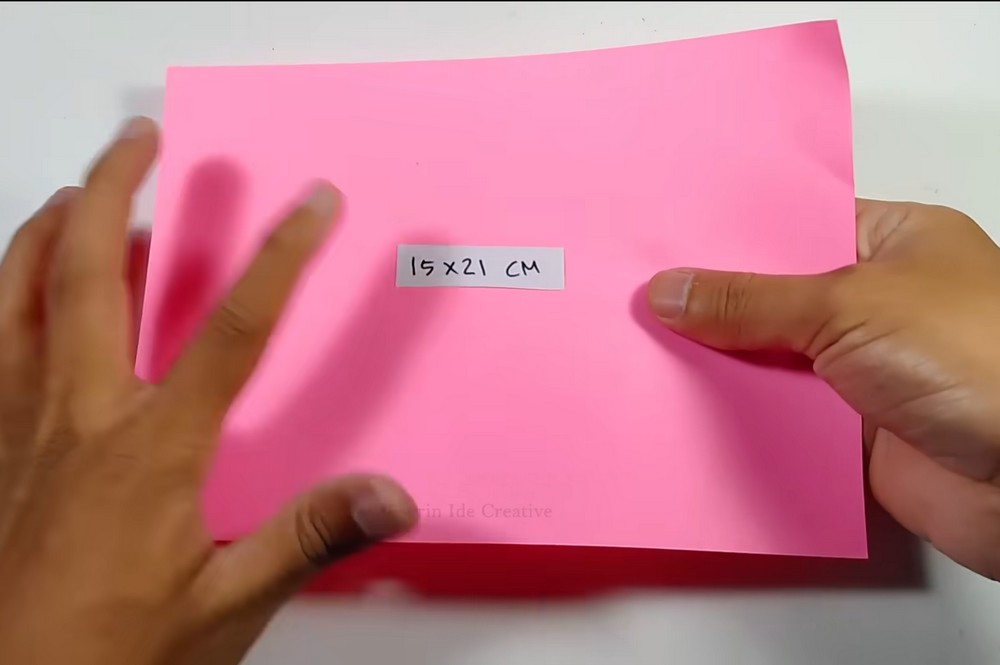
Cut pink craft paper to 15×21 cm (about 5.9×8.3 in). Keep edges straight using a ruler and pencil, then trim with scissors. This rectangle makes the big fan. Smooth the sheet on a table so it lies flat. Lightly crease the center lengthwise as a guide; don’t fold sharply. Gather two more identical sheets to match the example’s fullness, if you like.
Accordion Fold

Fold the rectangle into an accordion. Start a 1 cm (3/8 in) valley fold along the short edge, flip, and repeat to the end. Keep pleats equal by checking against your ruler. Press each crease firmly. Bring one side inward so the fan opens wide, then pinch the narrow base tightly to define the center point. Secure with a paperclip temporarily there.
Create Quarter Fans
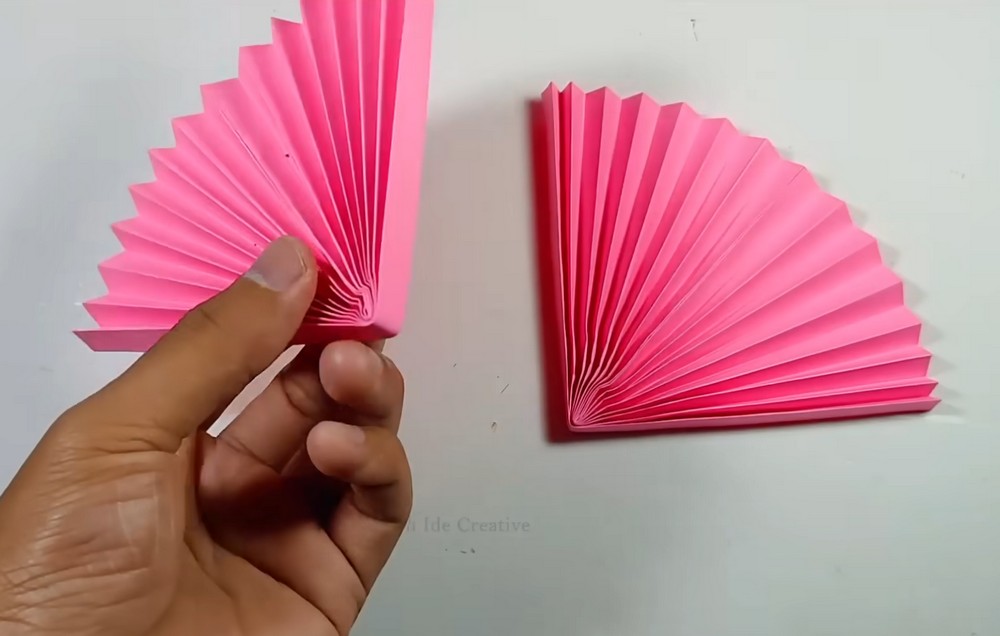
Make two quarters. Fold the pleated piece in half, then cut along the middle to separate it into two equal stacks. Keep the pleats aligned. Pinch and glue each cut corner so the pleats radiate outward, forming a tidy quarter-circle fan. Hold until set. These will become the bottom dangles under the large semicircle centerpiece. Make three more matching quarter fans later.
Trace a Semicircle Base

Measure a semicircle support from scrap cardboard. Trace a half-circle slightly smaller than the opened large fan. Cut cleanly. Place it on the fan’s back so the straight edge aligns with the pinched center. Check that the pleats peek evenly around the curve. This stiffener keeps the hanging stable and shape-true once everything is glued together. Trim if needed for perfect fit.
Glue the Backbone

Apply hot glue onto the cardboard semicircle. Use small squiggles rather than heavy pools to avoid bumps. Quickly press it to the back of the large fan, lining up the straight edges. Hold pressure until the bond sets. Add a thin bead along the rim if required. This creates a strong backbone ready for hanging. Attach a ribbon loop at top later.
Make Small Dangle Fans

Make smaller fans for the dangles. Cut rectangles measuring 7×14 cm (about 2.75×5.5 in). Accordion-fold each exactly as before, pinch the base, then bend into neat quarter-circle shapes. Glue their inner corners to hold. Prepare three identical pieces so the wall hanging looks balanced when assembled. Keep folds crisp for a clean, graphic look. Add slim ribbons for their suspensions before tying.
Cut the Big Flower

Cut a white 8×8 cm (3.15×3.15 in) square for flower petals. Lightly fold it twice to find the center. Draw a simple rounded petal shape reaching toward the edges. Carefully cut through all layers to create a six-petal blossom blank. Open it flat and smooth the creases gently so the petals curve rather than crease sharply. Color a bright circle center later.
Make Three Small Flowers

Repeat the flower process with three 5×5 cm (2×2 in) squares for smaller blossoms. Snip a short slit between two petals on each to overlap slightly, giving cupped shape. Glue a pink paper circle at each center. Bend petal tips upward with a pencil for dimension. These accent flowers will decorate the large fan and dangling pieces. Add tiny pearls if desired.
Assemble and Hang

Assemble everything. Glue the three small quarter fans beneath the big semicircle, leaving ribbon gaps for movement. Attach each with a short black ribbon tucked behind. Arrange the large and small flowers across the fans, spacing them evenly. Finish with a hanging ribbon at the top center. Press all joints firmly, then display on a clean wall. Step back and admire proudly.
Conclusion
Handmade decorations feel warm and personal, and this one is easy to customize. Change the paper color, swap flowers for stars, or add more dangles for a fuller look. The cardboard backing keeps everything crisp on the wall. Store it flat between books to reuse for parties or seasons. Simple folds, clean glue, lovely results every single time you craft.
A Bonus Tip
Lightly round fan corners with scissors for a softer, finished edge that looks polished on the wall.
FAQs
Q: How long will this take?
A: About 40–60 minutes, depending on cutting speed and glue setting time.
Q: What paper size works best?
A: Use the given sizes, or scale proportionally. A4 (8.3×11.7 in) sheets cut down neatly.
Q: My pleats drift. How can I fix them?
A: Measure the first fold, then use it as a spacer to check each new fold.
Q: Should I glue before adding ribbons?
A: Place ribbons first, then glue layers so they’re trapped securely between paper and backing.
Q: Can I replace hot glue?
A: Strong double-sided tape works, but hot glue gives a faster, sturdier bond for pleats and cardboard.
Q: How do I color the flower centers?
A: Use colored paper circles, paint, or markers—whichever you have.


