Pencil Drawing of Hand with Heart
Here’s a calm, step-by-step pencil tutorial for drawing a caring hand holding a floating heart. It’s perfect for cards, posters, and practice with gentle curves and soft shading. We’ll start with the simplest shapes, build a clean outline, and then add finger details, light, and shadow. The sequence uses nine pictures; follow each one in order and keep your lines light until the very end. You only need a couple of pencils, an eraser, and smooth drawing paper. If you enjoy blending, a tissue, cotton swab, or brush will help create that velvety look on the heart and palm.
Measure spaces loosely—this design is forgiving—and focus on flow: a sweeping wrist, relaxed fingers, and a rounded heart with a crisp point above the palm. Work slowly, rotate the paper when needed, and pause to compare curves. When the outline feels right, deepen edges and shade from soft to dark. Ready to draw something warm and meaningful? Set aside ten peaceful minutes, breathe, and enjoy turning simple lines into a kind, giftable little scene for someone.
Supplies for This Drawing
- HB pencil for layout
- 2B and 4B pencils for shading
- Kneaded eraser and vinyl eraser
- Blending tool: tissue, cotton swab, or soft brush
- A4 (8.3×11.7 in) smooth paper, 160–200 gsm
- Sharpener
- Ruler (optional, for center guideline)
Prepare the Materials
- Clear your desk and set good, even lighting.
- Tape paper to a board to prevent smudges.
- Sharpen pencils and keep scrap paper for tests.
- Place the reference images nearby.
- Warm up with a few curved strokes.
Special Features of This Drawing
- Flowing S-curve for a graceful wrist and forearm
- Soft, floating heart with crisp edges
- Gentle finger divisions using parallel arcs
- Gradual graphite gradients for plush volume
- Contrast between sharp outline and velvety shading
- Small nail and thumb ridge highlight for realism
Tutor’s Suggestions
- Start lightly; build values in layers.
- Keep edges varied: firm in shadows, soft in light.
- Blend with clean tools to avoid streaks.
- Lift highlights with a kneaded eraser, not pressure.
- Rotate the page to draw long curves smoothly.
- Step back often to compare proportions.
- Wash hands to reduce unintended smudging.
Uses
- Handmade greeting cards
- Mindful daily sketch practice
- Classroom value-scale exercise
- Social post or phone wallpaper
- Small framed gift print
- Coloring base for markers or colored pencils
Level of Difficulty
Beginner-friendly — simple shapes with approachable shading.
Outline the Heart
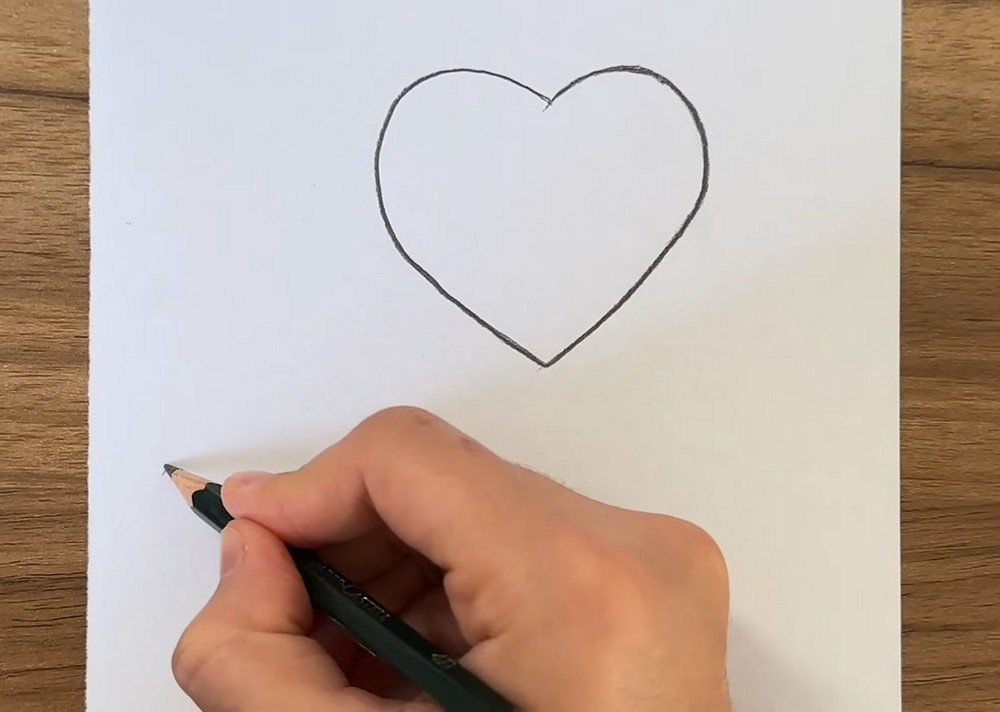
Lightly sketch a centered heart shape. Aim for two even curves meeting at the top dent and a clean, pointed bottom. Keep your wrist loose; draw the curves in two sweeps rather than scratching. If symmetry troubles you, fold the paper lightly to mark center, or use a faint vertical guideline. Darken the outline only when both sides feel balanced. Leave space below the point for the hand that will cradle it, about one palm’s height. Keep angles gentle throughout.
Sweep the Palm Line
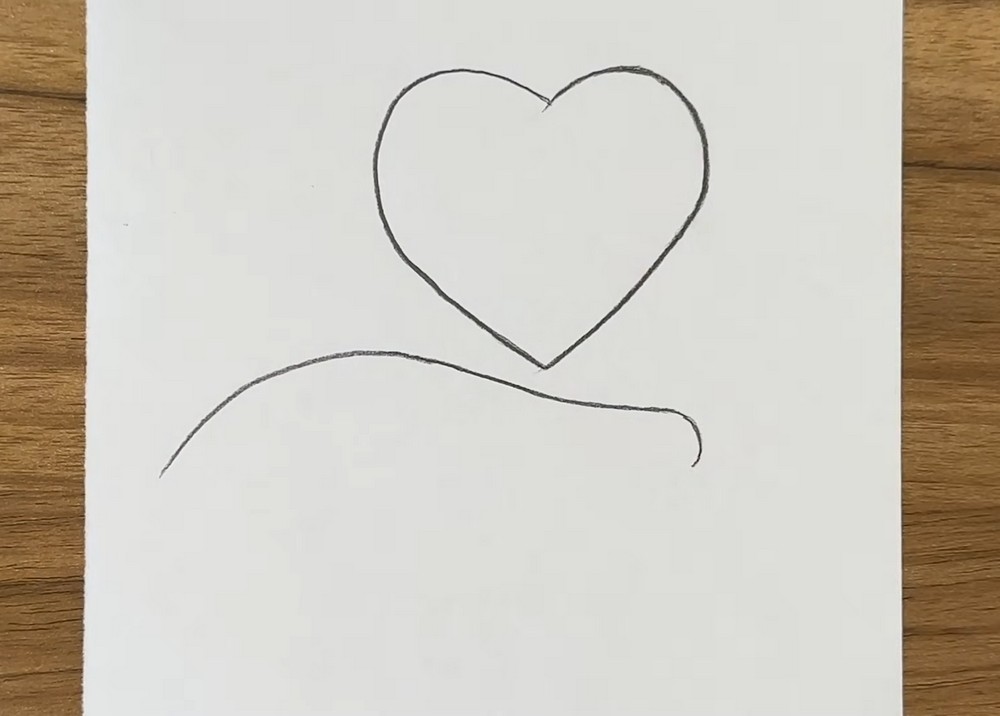
Under the heart, draw a long, graceful curve from left to right to suggest the back of the hand. Let it rise under the heart’s point and dip slightly near the wrist. End with a short hook to show the base of the thumb. Keep the stroke single and confident; this shape sets the gesture. Compare the spacing so the heart floats just above the curve, not touching. Adjust the arc until it feels relaxed and supportive. Refine edges lightly.
Add Finger Shelf
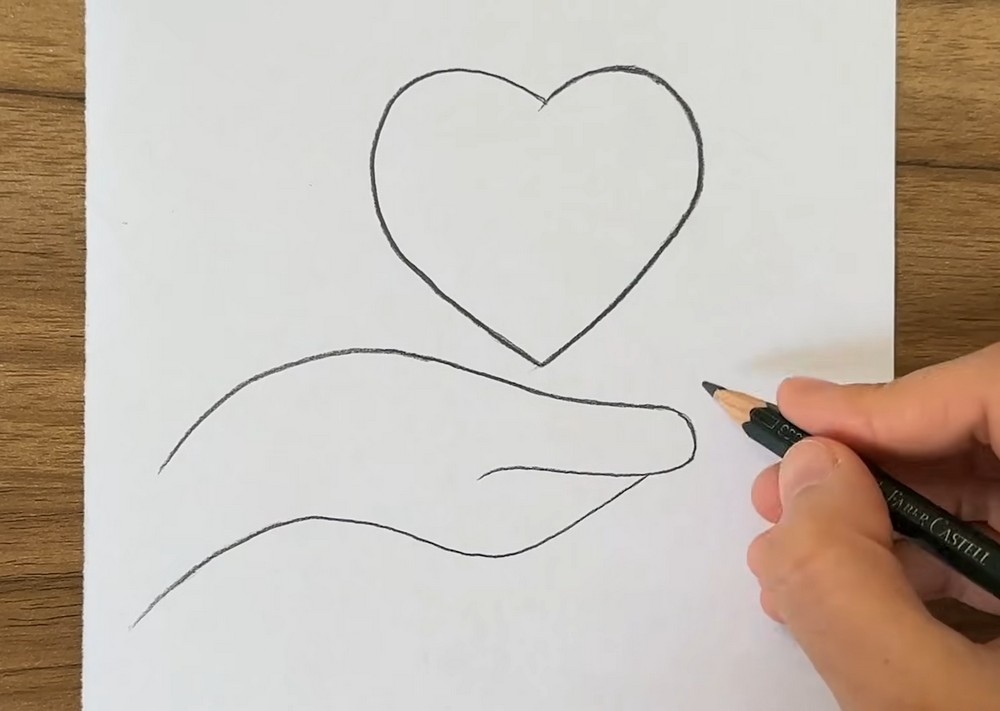
From the thumb base, extend a straightish line to the right to form the finger platform. Round the far end; this is the index fingertip. Draw a second line beneath it to create thickness for the palm and fingers, tapering toward the wrist. Keep proportions simple—about the same length as the heart’s width. Avoid sharp corners; hands look soft. If the platform tilts too steeply, rotate the paper and redraw. Leave room above for the floating heart’s shadow when blending.
Sketch Finger Divisions
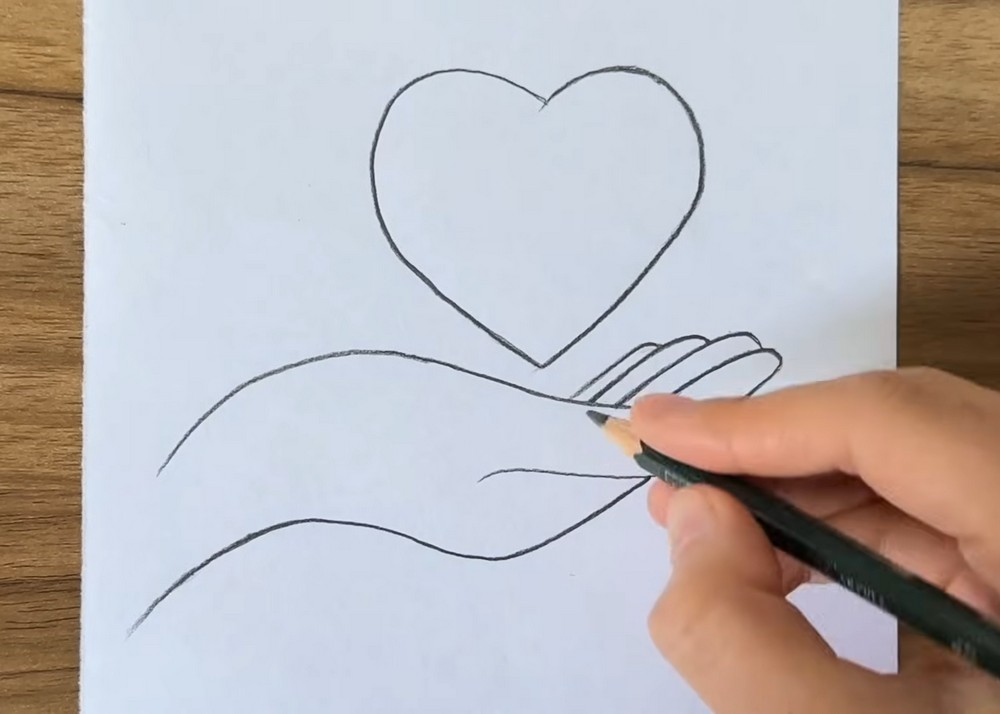
Lightly separate the finger platform into three curved segments for index, middle, and ring fingers. Use short, parallel arcs that follow the platform’s tilt, narrowing slightly toward the fingertip side. Add a small notch near the thumb base to suggest the webbing. Keep lines faint; they’re guides for later inking and shading. Check spacing: the three segments should feel even, with the pinky implied along the edge. Clean stray marks with a kneaded eraser so the structure stays clear now.
Refine Final Outline
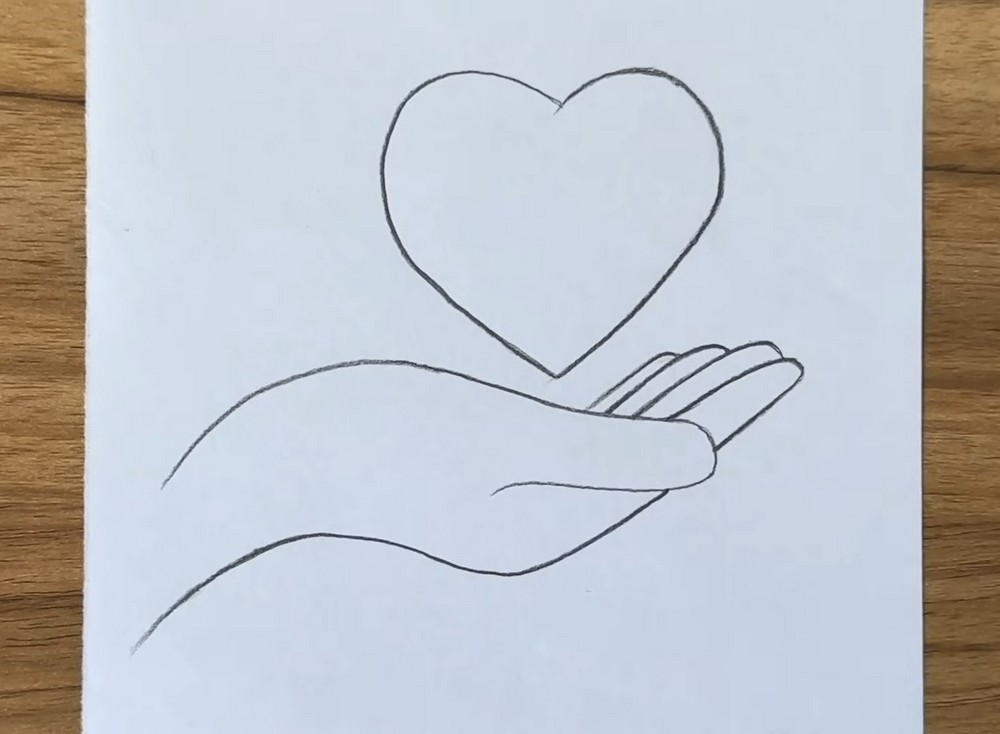
Trace over the best lines of the heart, hand, and finger shapes with a slightly darker pencil pass. Round the thumb pad and fingertip, and smooth the wrist curve so it flows into the forearm. Keep overlaps tidy where the fingers meet the palm. Erase extra construction lines, leaving an open gap between heart and hand. This clean outline is your foundation for shading. Before moving on, hold the page at arm’s length and confirm proportions look natural and balanced.
Map Core Shadows
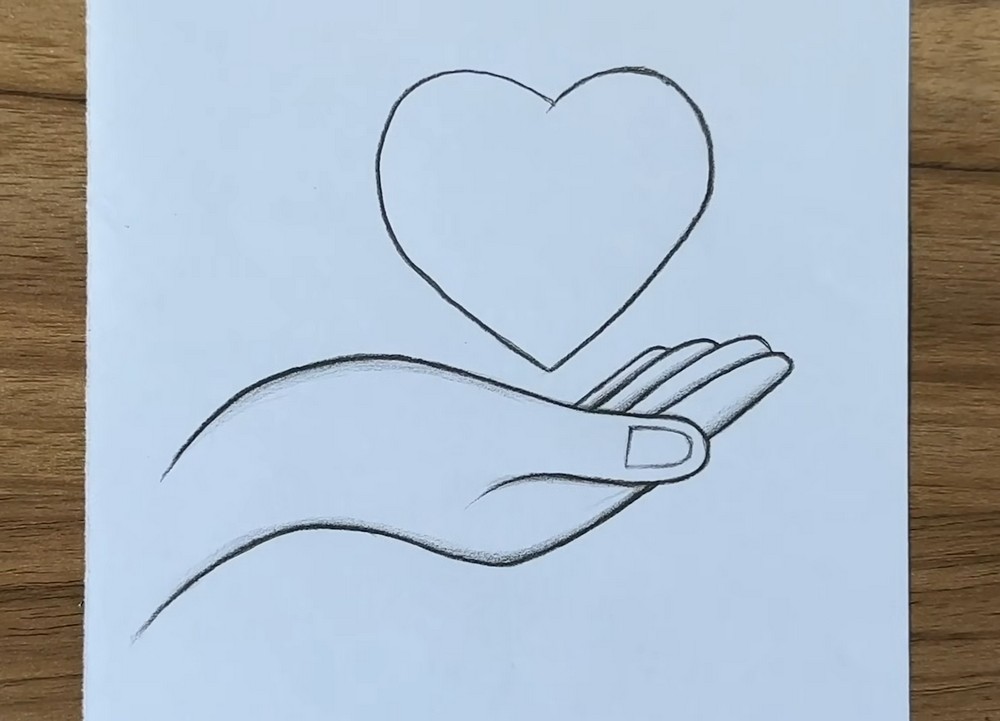
With a soft pencil, block the darkest edges: beneath the heart’s lower half, along the finger separations, and under the hand where it meets the wrist curve. Keep strokes light and even; think smoky borders, not harsh lines. Indicate a small nail shape on the index finger. Shade the thumb crease and the underside of the palm to suggest roundness. Leave the top planes mostly white for highlights. These mapped areas guide all later blending and prevent muddy tones forming.
Blend the Heart
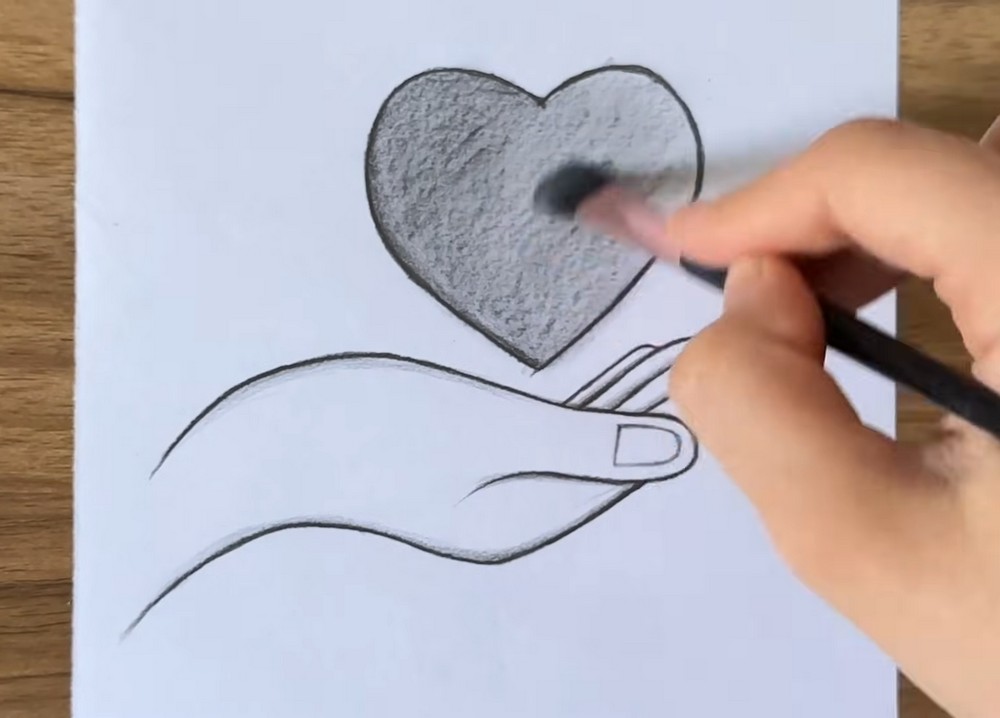
Using a tissue, soft brush, or cotton swab, blend the graphite inside the heart from dark near the top right rim to lighter toward the left. Keep the edge crisp; do not smear over the outline. Work in small circles to avoid streaks, and reload with clean paper as you lighten. Leave a pale highlight to suggest a soft glow. If needed, re-darken the rim lightly so the shape pops against the background without looking outlined. Keep pressure very gentle.
Shade the Hand
Smudge the shadowed areas of the wrist, palm, and between fingers, pulling tone inward while preserving bright top planes. Deepen the crease at the thumb base and under the finger pads so they appear cushioned. Keep gradients long and smooth to show volume. Erase a tiny highlight along the thumb ridge and fingertip. Reinforce the hand’s outline only where needed for contrast. The heart should still float above, so avoid cast shadows touching the fingers. Leave paper white for sparkle.
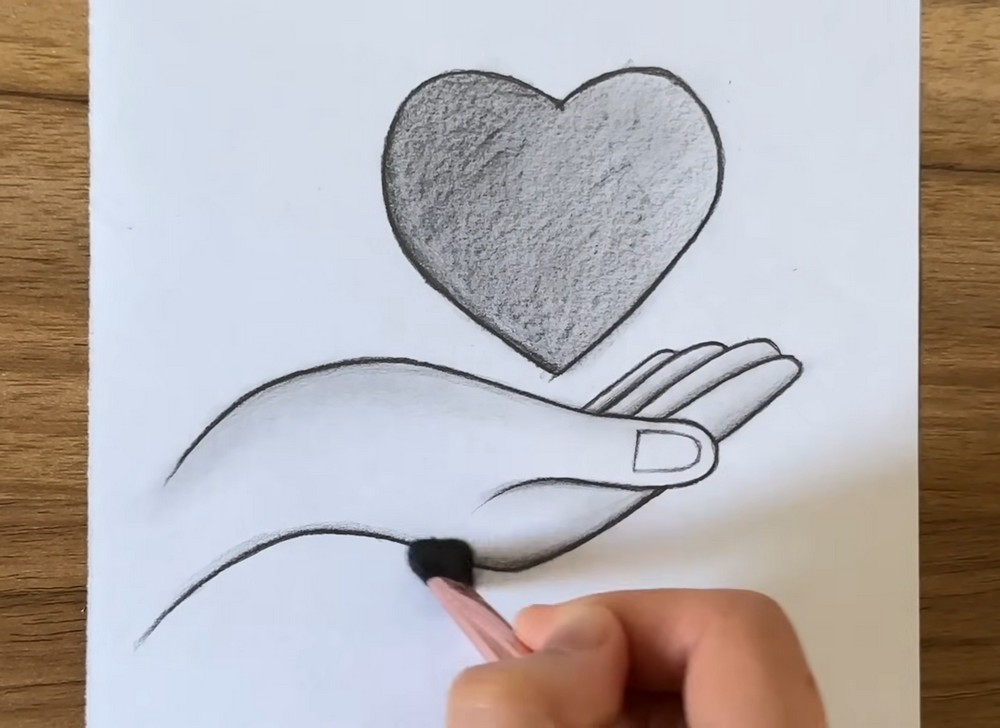
Finalize and Clean
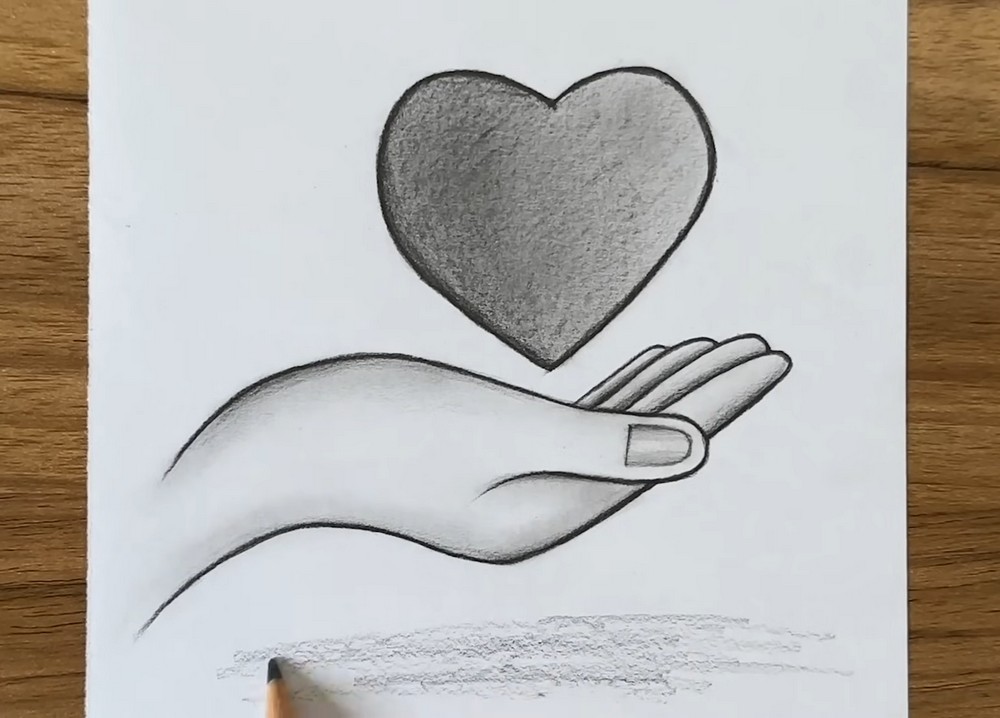
Deepen selective lines for clarity—under the palm, at finger separations, and the heart’s right rim—then soften elsewhere so edges breathe. Check values: the heart’s core should be your darkest area, the back of the hand mid-tone, and highlights clean. Gently lift graphite specks with a kneaded eraser dab. Add a light ground shadow beneath the wrist if you like, keeping it airy. Sign small in a corner. Step back; your generous hand and heart are complete. Share it with love.
Conclusion
Drawings like this are simple to start yet full of feeling. The gentle curves teach control, and the shading practice pays off in every future sketch. Keep your strokes light, then build depth slowly so the hand stays soft and welcoming. Revisit the steps whenever you want a thoughtful card or a calm warm-up. With a few pencils and patience, you can turn blank paper into an act of kindness, one line at a time.
A Bonus Tip
Before blending, lightly hatch in one direction; the uniform grain makes smoother gradients with fewer passes.
FAQs
Q: How long will this take?
A: Most people finish in 20–40 minutes, depending on shading time.
Q: What paper size works best?
A: A4 (8.3×11.7 in) is comfortable; larger paper gives more room for smooth curves.
Q: My heart looks uneven. Fixes?
A: Use a faint center line and mirror each side; nudge with the eraser until balanced.
Q: Should I shade the heart or hand first?
A: Shade the heart first so you can match hand values to it.
Q: Can I use markers instead of graphite?
A: Yes—ink the outline, then use light-to-dark alcohol markers, keeping highlights white.