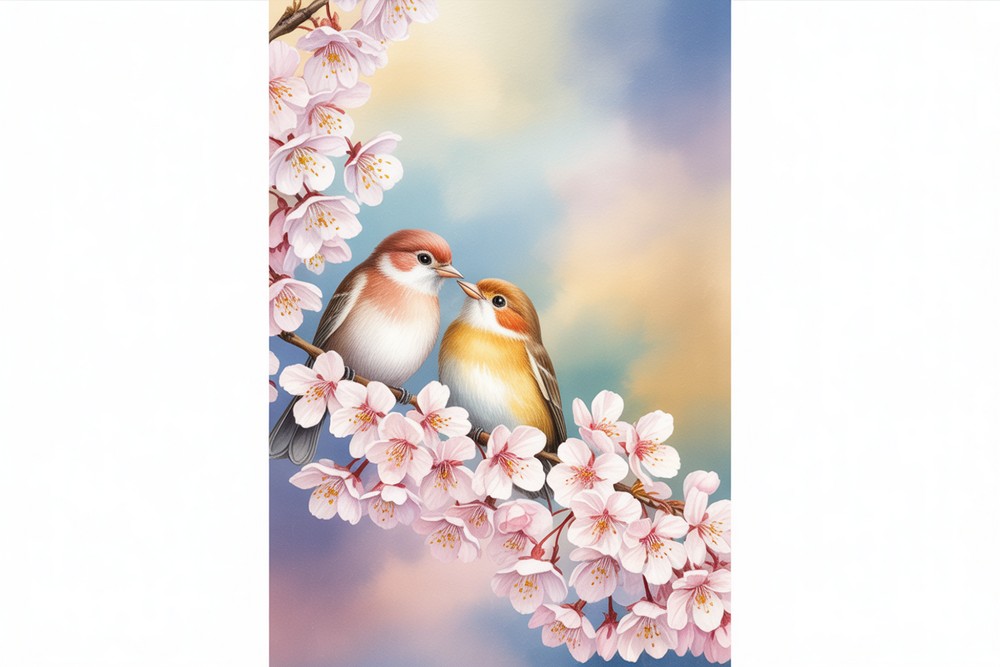
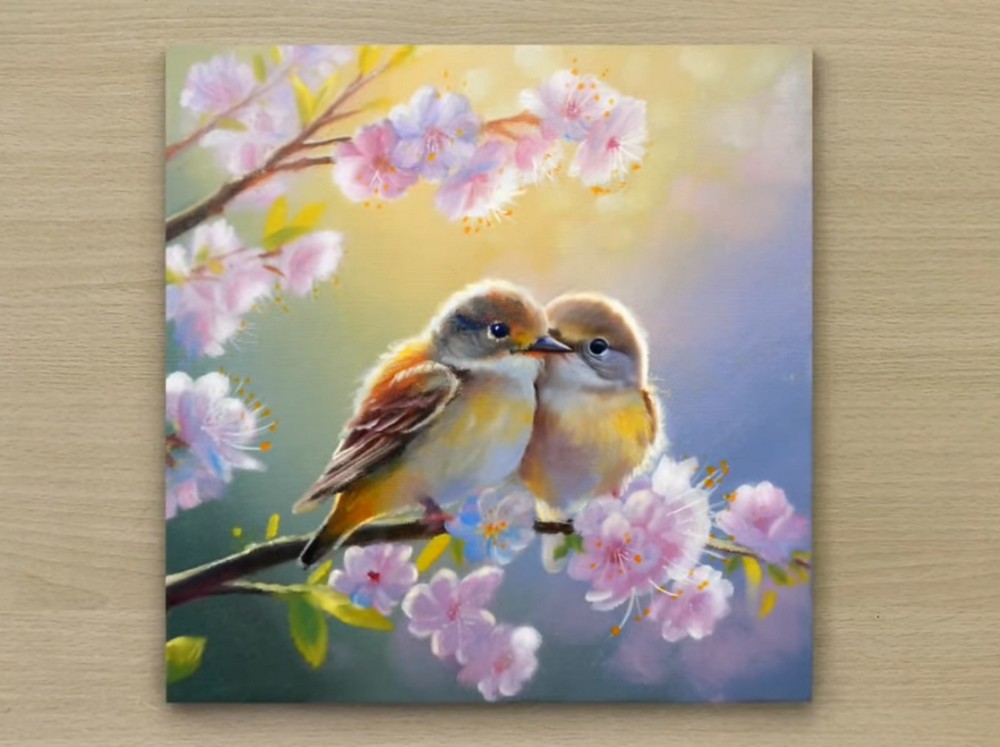
Lovely Morning Acrylic Painting
Paint a soft, romantic morning scene with acrylics—glowing sky, cherry blossoms, and two cuddled birds on a branch. This tutorial uses easy layering so beginners can achieve dreamy light without fuss. We’ll blend a gentle gradient, suggest bokeh, shape branches, build blossoms, then place the birds and finish with delicate highlights. Work wet-into-wet where blends are needed, and let layers dry when edges should stay crisp. Use a limited palette to keep harmony and speed decisions. The steps match your images exactly, from background to final sparkle, so you can paint along at comfort pace. Keep your brushstrokes loose, edges soft near the light, and sharper on focal details. Ready to brighten your wall with fresh spring color? Let’s begin. Breathe, relax, and enjoy the process with patient, layered glazes.
Supplies for This Drawing
- Pre-primed canvas panel, 25×25 cm (10×10 in)
- Acrylic paints: titanium white, lemon yellow, yellow ochre, quinacridone rose, ultramarine, phthalo blue (green shade), phthalo green, burnt umber, Payne’s grey
- Brushes: 1–2 large flats, medium filbert, small round, liner
- Palette, water bucket, paper towels, spray bottle
- Masking tape, pencil for light sketch
- Gloss or satin acrylic varnish (optional)
Prepare the Materials
- Tape canvas edges; set up good front lighting.
- Arrange paints from light to dark on the palette.
- Pre-wet flats slightly; keep a separate clean brush for blending.
- Keep towels ready for blotting.
- Place reference images within view.
- Test mixes for background, blossoms, and branch tones.
Special Features of This Drawing
- Atmospheric gradient with a central glow.
- Soft bokeh to suggest lens flare and morning humidity.
- Blossom clusters built from blocked shapes to crisp accents.
- Overlapping branches guiding eye movement diagonally.
- Two birds as a warm focal story.
- Selective glazing for luminosity without muddiness.
- Lost-and-found edges to enhance depth.
Tutor’s Suggestions
- Blend quickly, then stop—overworking kills the glow.
- Keep the brightest light free of brush chatter or texture.
- Reserve small, crisp strokes for stamens and eyes.
- Vary blossom sizes; avoid a bead-string pattern.
- Push branch shadows under clusters to ground them.
- Glaze warms over birds; cool glazes into background.
- Step back often; squint to check value balance.
Uses
- Weekend painting class or sip-and-paint project.
- Giftable wall art for spring celebrations.
- Greeting card print or calendar image.
- Technique study for gradients, bokeh, and glazing.
- Relaxing mindfulness practice with soft color transitions.
Level of Difficulty
Intermediate — simple shapes, but controlled blending, glazing, and edge handling.
Glowing Gradient Background

Prime your canvas and brush in a gentle gradient: pale lemon at the top center, melting into light peach, then turquoise green on the left and periwinkle blue on the right. Keep strokes diagonal and soft. Feather transitions with a clean, slightly damp brush. Aim for a glowing V of light in the middle. Let this underlayer dry completely before next step.
Mist, Petals, and Bokeh
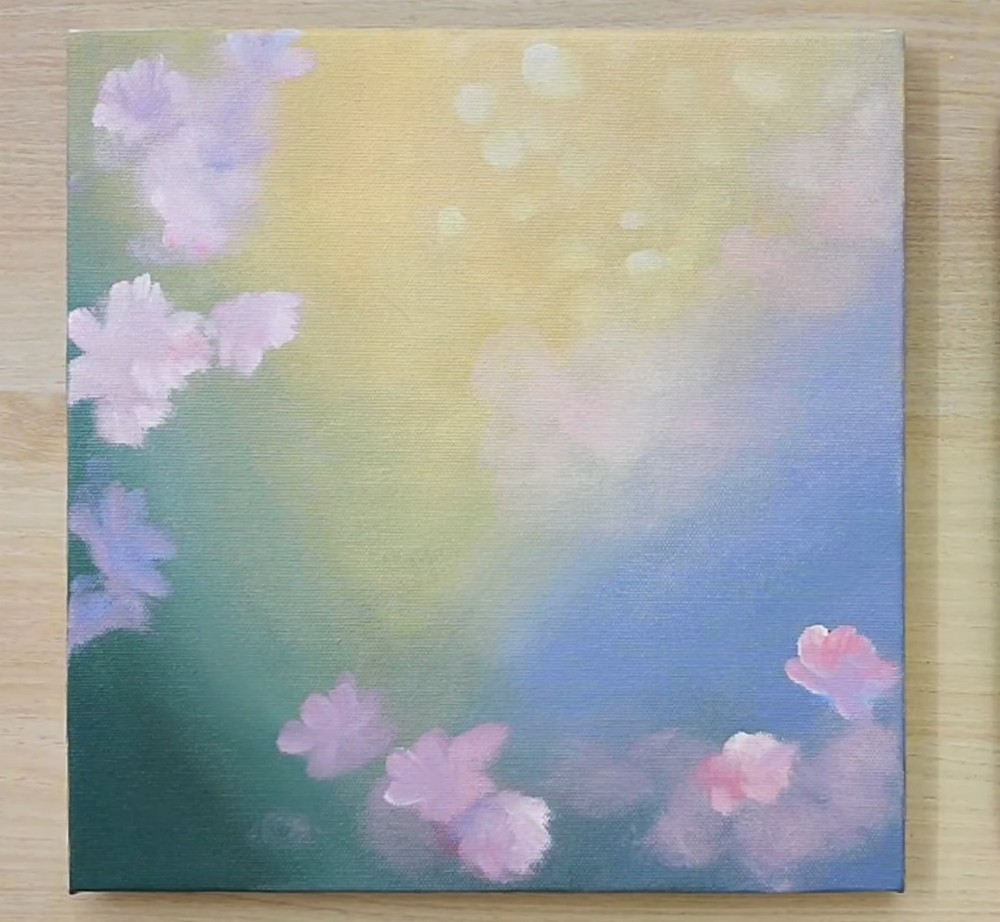
With a soft round brush, scumble misty floral clouds around the edges using white plus a touch of pink and lavender. Keep the center bright. Tap circular bokeh dots into the warm area with thinned white. Vary sizes, overlap a few, and blur edges. These hazy shapes establish depth and atmosphere for later blossoms. Dry again lightly to set layers firmly today.
Branches and Blossom Blocks
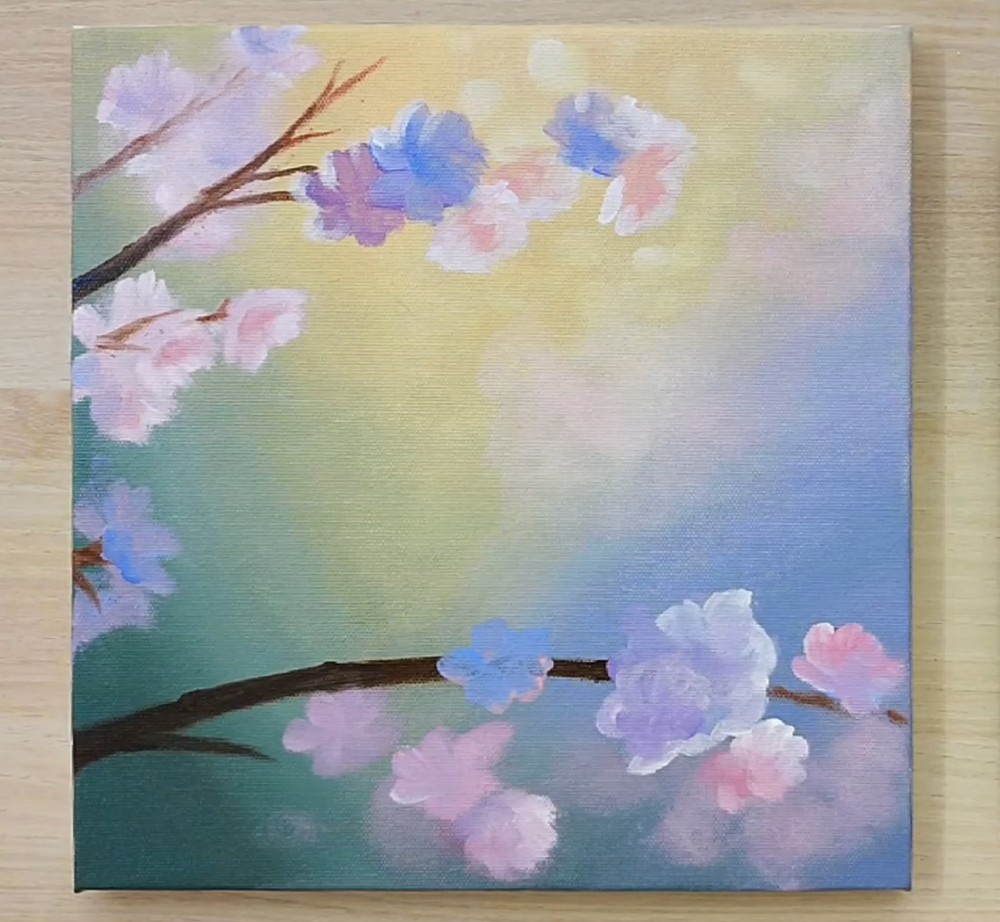
Sketch sweeping branches with thin burnt umber. Using a medium filbert, block clustered blossom shapes along the branches in loose strokes of pink, violet, and blue, leaving gaps of background glow between petals. Indicate a lower branch crossing right. Keep edges soft; think petals, not outlines. Strengthen branch shadows under clusters to anchor them, maintaining airy spacing overall for balance and realism.
Petals, Leaves, and Stamens
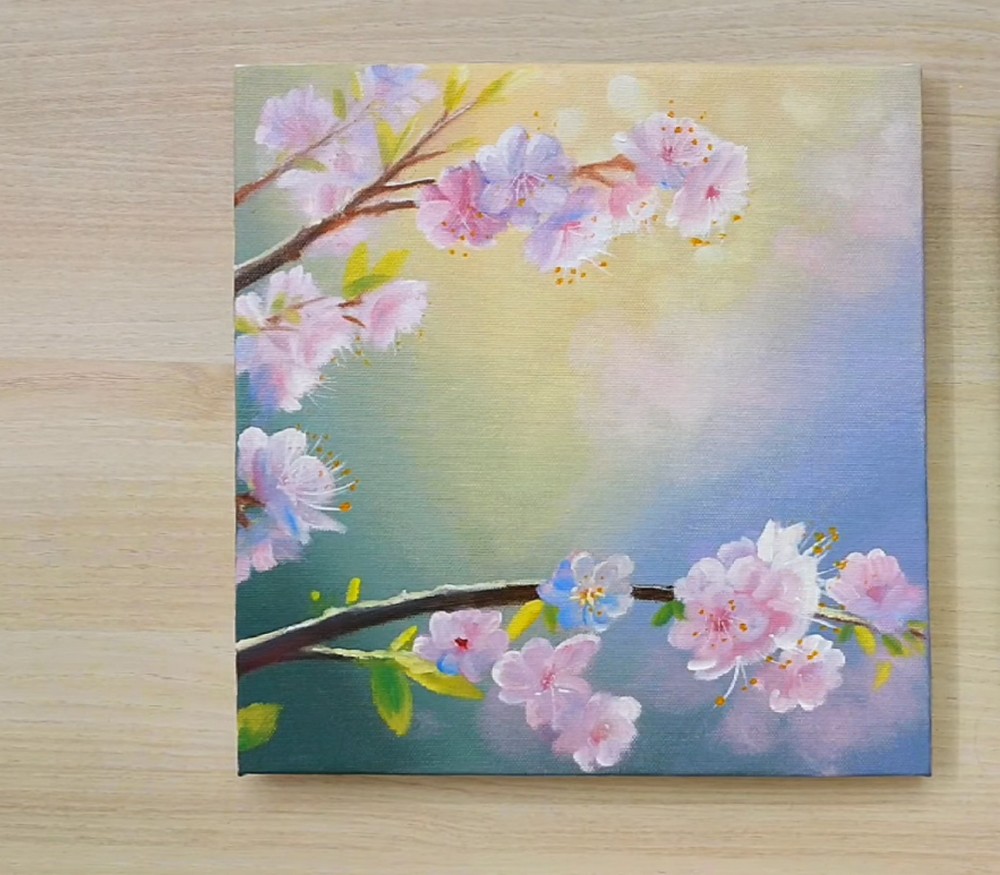
Refine flower forms. Using lighter pinks and whites, add distinct petals with quick, confident pulls, leaving soft lost edges toward the light. Dot warm yellow-orange stamens and tiny filaments from centers. Paint fresh spring leaves in yellow-green, tucking them behind blossoms to overlap branches. Add a pale highlight ridge on top of limbs to separate them from background glow, just a bit.
Birds: Simple Color Blocks
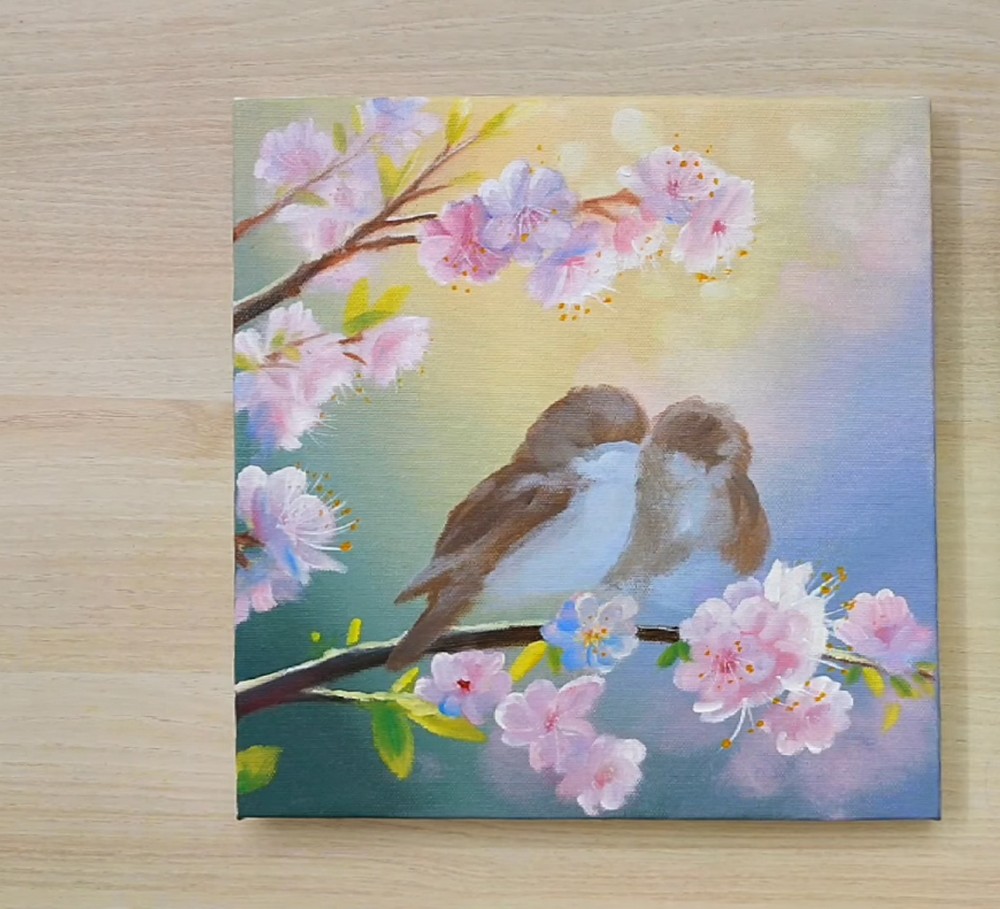
Block the pair of birds sitting close on the lower branch. Use muted browns for backs and wings, creamy whites for bellies, and soft grey for shadow. Keep shapes simple; think rounded eggs with beaks. Blend undersides into the glow to seat them. Reinforce cast shadow beneath feet. Leave space for later feather details and bright accents on eyes, beaks, and edges.
Final Details and Glazes
Finish with glazing and crisp details. Deepen branch darks, enrich petals with selective white highlights, and add translucent yellow glows near the birds. Define eyes, beaks, and tiny claws; flick short feather strokes on wings and crowns. Strengthen bokeh dots sparingly. Soften background transitions with a clean dry brush. Varnish after curing for a luminous, morning-fresh painting that feels peaceful and radiant.
Conclusion
Step back and admire the glow you built from gentle layers. The softened edges, scattered bokeh, and clustered blossoms guide the eye to the cozy birds. Keep experimenting: shift the palette warmer or cooler, change branch angles, or paint different species perched together. Repeat the sequence on a larger canvas for confident blends and extra luminous atmosphere in every season.
A Bonus Tip
For the brightest sparkle, place tiny, pure-white dots beside warm yellow glows—contrast makes those highlights sing.
FAQs
Q: How long will this take?
A: About 90–150 minutes, including drying pauses and final glazing.
Q: Can I use student-grade paints?
A: Yes. Add an extra layer or two for saturation and avoid heavy water; use glazing medium instead.
Q: My blends look streaky—help?
A: Work in sections, keep one clean damp brush for feathering, and blend edges while slightly wet.
Q: Do I sketch first?
A: Lightly mark branch paths and bird positions; leave the glowing center unmarked.
Q: When should I varnish?
A: After the painting cures fully—usually 24–72 hours—apply a thin, even varnish for protection and gloss.